Enswitch - Create a Holiday Mailbox
Learn how you can create a mailbox that collects voicemails that are received during the holidays.

Written by Val Campos
Updated at October 24th, 2025
Table of Contents
Set Up a Holiday Mailbox
If you would like to avoid sending calls during the holidays to a specific user's mailbox, you can create a holiday mailbox instead.
✔ Having a separate mailbox for holiday voicemails can help you avoid having to remember to switch out a user's mailbox greetings for the holidays.
Create a New Mailbox
To set up a separate mailbox that callers can leave voicemails in during the holidays…
- Navigate to Features → Mailboxes.
- Click New.
- In the Mailbox settings section of the New mailbox page, fill out the following fields (fields with a * are required):

-
* Mailbox number - The number the mailbox will be identified with. For individual users, type their 7-digit extension number.
Quick Tip: 500 is commonly used as the last 3 digits of the 7-digit extension number for holiday/general mailboxes. The first 4 digits should match what is used for other users.
- Description - Type a note that will be displayed alongside the feature code in the list of mailboxes.
- Owner - Use the Owner drop-down to select someone that will be able to edit this feature code.
- Show in control panel - If needed, select Yes to have this mailbox show in the control panel.
-
* Mailbox number - The number the mailbox will be identified with. For individual users, type their 7-digit extension number.
- In the Voicemail menu section, fill out the following fields (fields with a * are required):
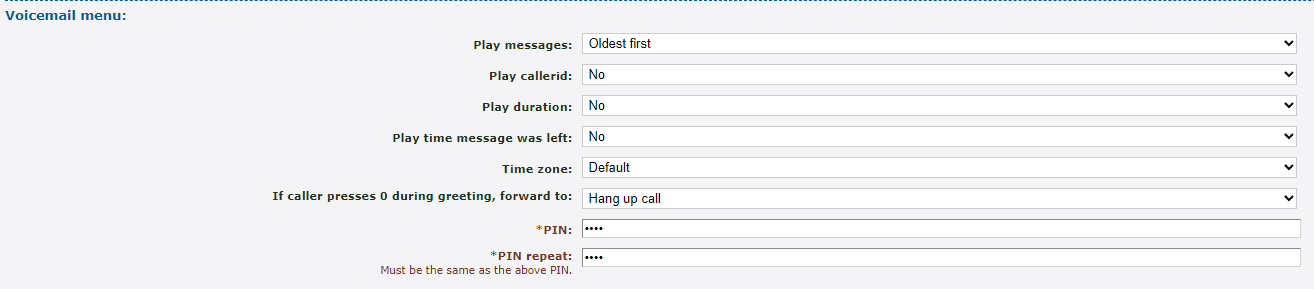
- Play messages - Choose the order that the mailbox should play messages.
- Play callerid - Select whether or not the mailbox should play the caller ID of the person that left a message.
- Play duration - Select whether or not the mailbox should play how long the voicemail is.
- Play time message was left - Select whether or not the mailbox should play the time that the message was left in the mailbox.
- Time zone - If this mailbox should not refer to the time zone set for the whole business, select the time zone here.
- If caller presses 0 during greeting, forward to - This acts as an operator forward. Select where a caller should be forwarded if they press 0 while in the mailbox.
- * PIN - Type in a PIN that will be used before users can check the mailbox's messages.
- * PIN repeat - Re-type the PIN from above.
- In the Notification of new messages section, fill out the following fields (fields with a * are required):

- Notify for - Choose if you should receive notifications in this mailbox for faxes, voicemails, or both.
- Notify by email - Select if the owner of the mailbox should receive a notification by email and whether or not the voicemail or fax file should be attached.
- Notify backup email addresses - If there should be extra email addresses for email notifications, use this box to type in those addresses. For multiple email addresses, use commas to separate them.
-
Delete messages after sending emails - Select whether or not to have the voicemail messages deleted from the mailbox when an email notification is sent.
✔ This can be helpful with managing the space available in the mailbox.
-
Notify by calling - If you would like to receive a phone call that allows you to check your mailbox for voicemails when a new message is received, type in a phone number that the system should file.
WARNING: Be sure to include the country code to avoid any dialing issues.
-
When call is answered, forward to - Choose how the system will handle the call that is sent to your phone number.

- Callerid for notification calls - Choose if a certain user's caller ID should be shown in notification calls. The caller ID can also be withheld.
- Notify by SMS - Select whether or not SMS notifications should be sent to the mailbox owner's phone number.
- Once all of the mailbox's settings have been configured, click the Save button.

Add a Holiday Greeting to the Mailbox
Now that a mailbox has been created, a greeting that mentions the holiday can be added to the holiday mailbox.
To add a new, festive greeting…
- Click the extension number of the holiday mailbox.

- In the Greetings and audio name section, do one of the following:
- Use the Sound file to use drop-down to select a saved Sound file.

- Click the Choose File button to select and upload a .wav audio file from your PC.

DANGER: The audio file needs to be in a .WAV file, mono channel, and 8000 Hz format to be properly read in the phone system.
To convert your audio file, use this handy website:
G711.org - Telephony File Converter
When using this website to convert the file, select the “Standard Definition” option for the Output Format.Example Text-to-Speech Greetings for US Holidays
If you are using these greetings for a holiday mailbox or as a greeting for a user's mailbox, you can download and use these holiday messages. These holiday greetings below ask callers to leave a message.
✔ These holiday greetings are useful for holiday mailboxes.
If you are wanting to replace a user's mailbox greeting with a holiday message, these greetings can also be used.
Generic Holiday Greeting
If you prefer the message used to not mention the name of the holiday, you can download and use this greeting:
Example Holiday Greeting
✔ Using this greeting can help you avoid having to remember to switch out the holiday greeting for each holiday.
New Years
Example New Year's Eve Greeting
Christmas
If you prefer your Christmas holiday message to say, “Merry Christmas”, you can download and use this greeting:
Example Merry Christmas Greeting
If you prefer your Christmas holiday message to say, “Happy Holidays”, you can download and use this greeting:
Thanksgiving
Labor Day
Memorial Day
Independence Day
If you would like your Independence Day message to say, “4th of July”, you can download and use this greeting:
If you would like your Independence Day message to say, “Independence Day”, you can download and use this greeting:
- Use the Sound file to use drop-down to select a saved Sound file.
- Click the Use or upload button.

Create a Feature Code for Dialing the Mailbox
In order to dial into this new holiday mailbox, a Feature Code will need to be created. To do this…
- Navigate to Features → Feature codes.
- Click New.
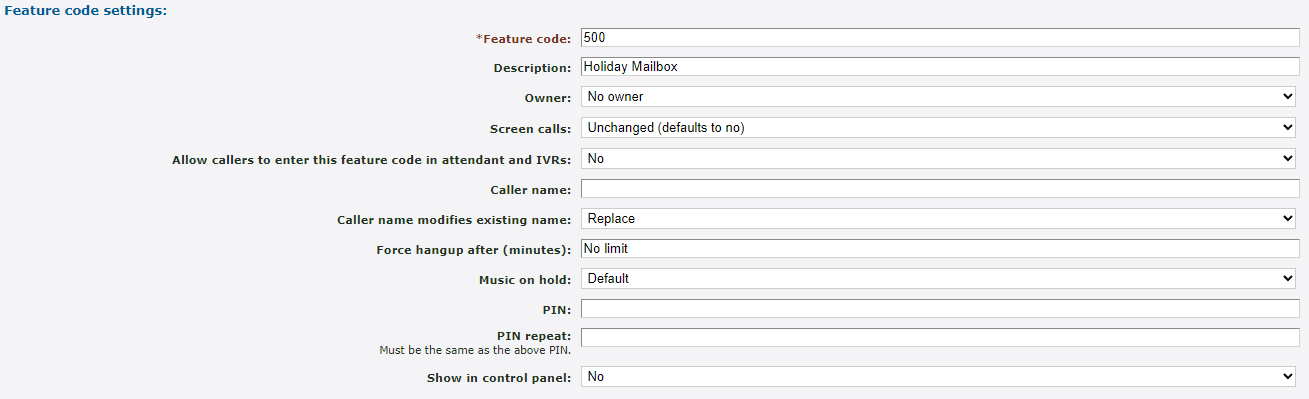
- On the New feature code page, fill out the following fields (fields with a * are required):
-
* Feature code - Type in a code that will be dialed on a SpectrumVoIP provided phone to reach the mailbox.
Quick Tip: SpectrumVoIP technicians usually use 500 as the 3-digit extension number for holiday/general mailboxes.
DANGER: Do NOT use a N11 number, like 911, 211, or 411.
- Description - Type a note that will be displayed alongside the feature code in the list of feature codes.
- Owner - Use the Owner drop-down to select someone that will be able to edit this feature code.
- Allow callers to enter this feature code in attendant and IVRs - If this mailbox should be accessed when the code is dialed in an IVR, select Yes.
-
* Feature code - Type in a code that will be dialed on a SpectrumVoIP provided phone to reach the mailbox.
- In the Route calls to section, skip setting a Default destination (this will be done later).
Note: This has to be done after saving since the My features section of the drop-down will not appear until then.
- In the Route calls to section, use the Default destination drop-down to select Mailbox under My features.
- Use the second Default destination drop-down to select the holiday mailbox.

- Click the Save button.

✔ Now you can dial this feature code to reach the holiday mailbox. Press star (*) to interrupt the greeting and enter the mailbox's PIN.
This feature code can also be used to transfer callers to that mailbox.
- Confirm that this mailbox can be dialed using the feature code.
Route Holiday Calls to the Mailbox
During the holidays, you can have calls route to your new holiday mailbox. Holiday call forwarding can be set up ahead of time to give you some peace of mind.
To do this, you can create a holiday time group that determines when the system should forward calls and a holiday time route that tells the system to route calls to the holiday mailbox when the holiday time group is active.
Create a Holiday Time Group
In order to tell the system when a holiday forward should start and end, a time group will need to be created.
To configure a time group…
- Navigate to Features → Times and dates.
- Click the New button.
- On the New time group page, fill in the following information:

- *Name - Give the time group a unique name to identify it by, such as Holidays.
- Description - If needed, add a description that will show by the time group's name.
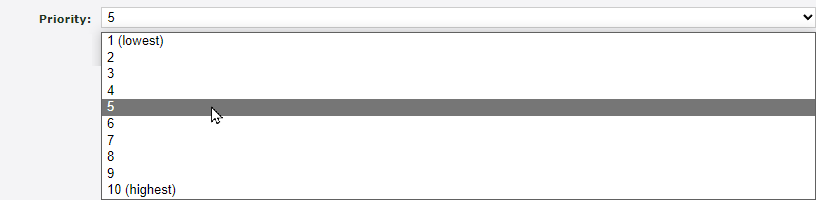
-
Priority - For Holiday routing, it is recommended to select 5 as the Priority.
-
Active when - Leave this set as Any time period below is active.

- Click the Save button.
- On the Time group saved message, click Add a new time period >>.

- On the New time period page, use the Time period settings section to give the time period a descriptive name and an optional description.

- In the When the time period starts and stops each day section, use the dropdowns to select your business hours.

Note: The times shown will be in the 24-hour format.
- In the Which days the time period is active section, select the day, month, and year that this specific period will be active for.
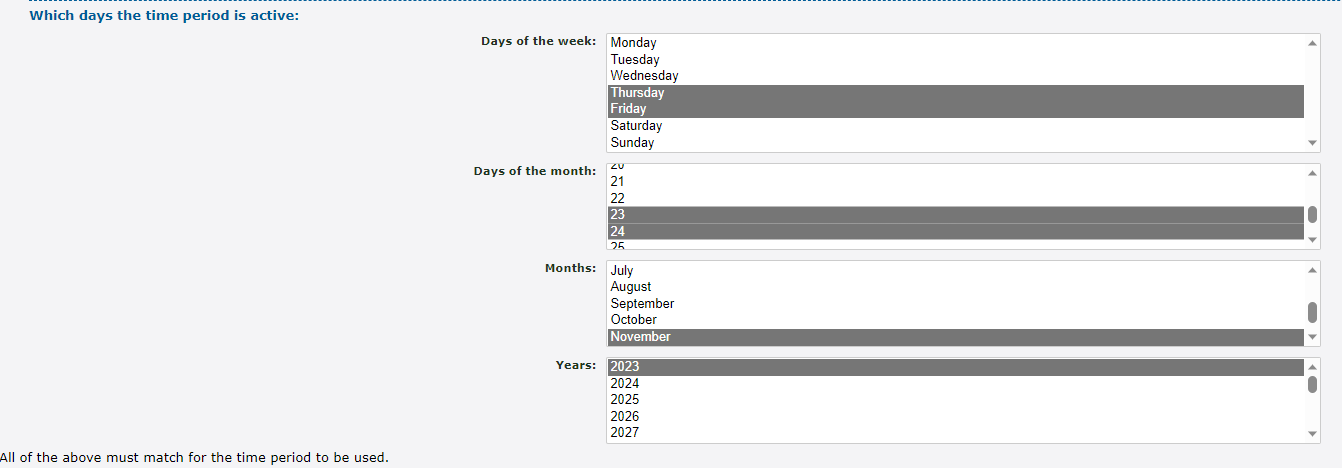
Quick Tip: If needed, multiple days can be selected as long as they both follow the same start and stop times.
To select multiple days, either click and drag to highlight multiple, or press Ctrl while clicking.
- Click the Save button.
- Click Continue editing the time group >> to view the time group and its time periods.

- To add more time periods, click the New >> button and repeat Steps 6-10.

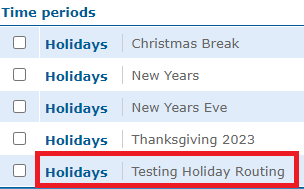
✔ You should now have a list of any time periods you have created for specific holidays.

More time periods can be added in the future that will determine when this time group should be active.
Configure a Holiday Time Route
Now that a holiday time group has been created, a time route can be set up for a number that will tell the system where calls should be routed when that time group is active.
To configure a time route for a phone number…
- Navigate to Features → Numbers.
- Select the phone number that needs to temporarily be forwarded.
- In the Time routes section, click the Add a time route >> button.

- In the New time route window, fill in the following information:

-
Time group - Use the drop-down to select the Holidays time group.

-
Forwards matching calls to - Select Mailbox and the newly created holiday mailbox.

-
Time group - Use the drop-down to select the Holidays time group.
- Click the Save button.
✔ You should now see the new Holidays time route routing calls to the holiday mailbox.

The destination of this time route can be edited at any time by clicking its name.
Clicking Edit time group will take you to where you can add more time periods for the time group to be active in.
Place a Test Call
To confirm your holiday routing is implemented correctly, it is recommended to give your phone number a test call.
WARNING: It is recommended to use this method if your organization is not busy receiving calls to ensure callers are not accidentally routed using the holiday routing.
If your organization is too busy for a test call directly to your phone number, consider testing this routing during lunch or the after hours.
To test out your holiday routing by placing a call to the phone number…
1. Navigate to Features → Numbers.
2. Click the phone number that has the holiday routing set.
3. In the Time routes section, click Edit time group next to the holiday time route.
4. In the Time periods section, click the New >> button.
5. In the Time period settings section, use the Description box to type a note about this time period.
6. In the When the time period starts and stops each day section, select a brief time period for when your test call will be placed.
7. In the Which days the time period is active section, select the day you are placing this test call.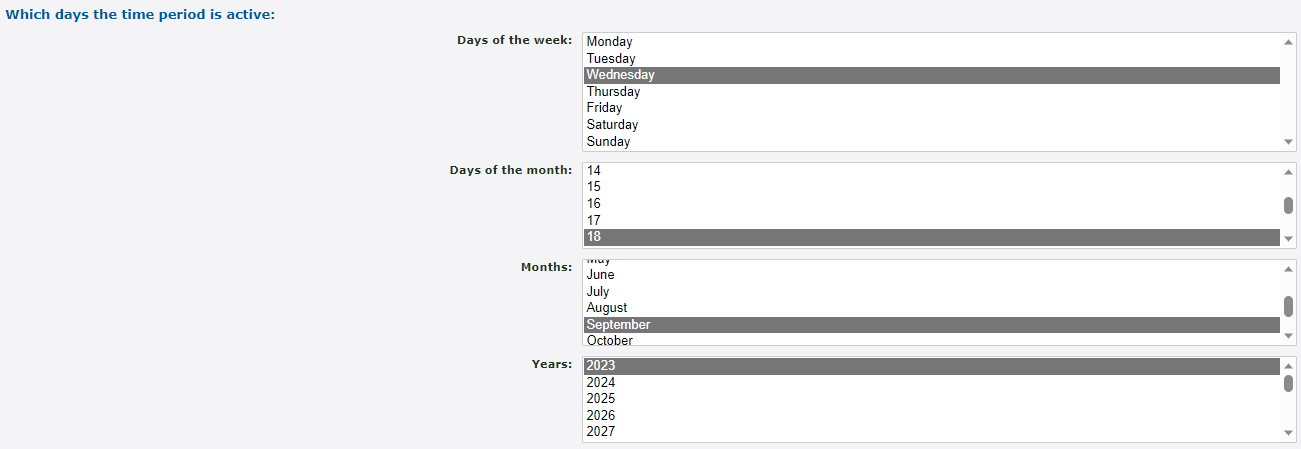
8. Click the Save button.
✔ Your new time period should now be seen in the list of time periods for the holiday time group.
9. Call your phone number and confirm that the call is routed to the correct destination.
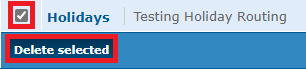
10. Once your test call is complete, you can select the test time period and click the Delete selected button.