Enswitch - Create and Configure a Mailbox
Learn more about how you can set up a new mailbox for general use or your users.

Written by Val Campos
Updated at June 5th, 2024
Table of Contents
Create a New Mailbox
When users receive a voicemail or fax, the message is saved into a mailbox. This makes it easy for users to view and manage their voicemails and faxes using the Enswitch web portal. A dialable Feature Code can also be created to allow for a mailbox to be easily dialed from a phone provided by SpectrumVoIP.
✔ Creating a new mailbox can be useful for users that need separate mailboxes. A new general mailbox can come in handy if several users need to share a single mailbox.
Configure a New Mailbox's Settings
- Navigate to Features → Mailboxes.
- Click New.
- In the Mailbox settings section of the New mailbox page, fill out the following fields (fields with a * are required):

| Option | Description |
|---|---|
| * Mailbox number | The extension number that the mailbox will be identified with. For individual users, type their 7-digit extension number. |
| Description | Type a note that will be displayed alongside the feature code in the list of mailboxes. |
| Owner | Use the Owner drop-down to select someone that will be able to edit this mailbox and its settings. |
| Show in control panel |
If needed, select Yes to have this mailbox show in the control panel. ✔ Enabling this option will allow calls to be dragged and transferred to this mailbox using the Control Panel page. |
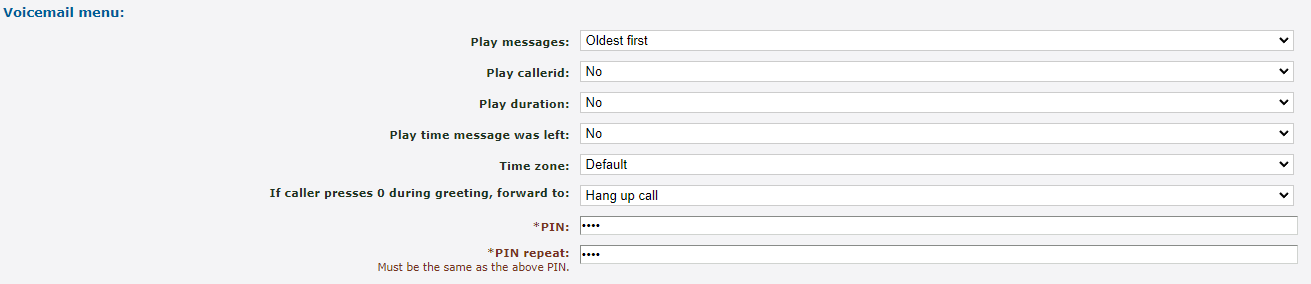
- In the Voicemail menu section, fill out the following fields (fields with a * are required):
| Option | Description |
|---|---|
| Play messages | Choose the order that the mailbox should play messages. |
| Play callerid | Select whether or not the mailbox should play the caller ID of the person that left a message. |
| Play duration | Select whether or not the mailbox should play how long the voicemail is. |
| Play time message was left | Select whether or not the mailbox should play the time that the message was left in the mailbox. |
| Time zone | If this mailbox should not refer to the time zone set for the whole business, select the time zone here. |
| If caller presses 0 during greeting, forward to | This acts as an operator forward. Select where a caller should be forwarded if they press 0 while in the mailbox. |
| * PIN & * PIN repeat | Type in a PIN that will be used before users can check the mailbox's messages. |
- In the Notification of new messages section, fill out the following fields (fields with a * are required):

| Option | Description |
|---|---|
| Notify for | Choose if you should receive notifications in this mailbox for faxes, voicemails, or both. |
| Notify by email | Select if the owner of the mailbox should receive a notification by email and whether or not the voicemail or fax file should be attached. |
| Notify backup email addresses | If there should be extra email addresses for email notifications, use this box to type in those addresses. For multiple email addresses, use commas to separate them. |
| Delete messages after sending emails |
Select whether or not to have the voicemail messages deleted from the mailbox when an email notification is sent. ✔ This can be helpful with managing the space available in the mailbox. |
| Notify by calling |
If you would like to receive a phone call that allows you to check your mailbox for voicemails when a new message is received, type in a phone number that the system should file. WARNING: Be sure to include the country code to avoid any dialing issues. |
| When call is answered, forward to | Choose how the system will handle the call that is sent to your phone number. |
| Callerid for notification calls | Choose if a certain user's caller ID should be shown in notification calls. The caller ID can also be withheld. |
| Notify by SMS | Select whether or not SMS notifications should be sent to the mailbox owner's phone number. |
- Once all of the mailbox's settings have been configured, click Save.

Set the Mailbox's Greeting
Now that a mailbox has been created, a greeting should be added to ensure the mailbox gives callers a correct greeting.
To add a new greeting…
- In the list of Mailboxes, click the mailbox number of the mailbox that needs a greeting.
- Scroll down to the Greetings and audio name section.

- Use the Greeting or name drop-down to select which kind of greeting you are uploading.

- If you have a greeting already uploaded to the Sounds page, use the Sound file to use drop-down to select that audio file.
- If you will be uploading a new greeting, click the Choose File button to select the .wav audio file from your device.
DANGER: To upload a .wav file, it is recommended to ensure the file has been converted to the proper format (.wav 8Khz, Mono, 16-Bit PCM).
If needed, please contact our technical support team to set up this message by calling (469) 429-2500 or emailing support@spectrumvoip.com.
Uploading an incorrectly formatted audio file can result in unexpected, potentially catastrophic issues for your phone system.
- Click Use or upload.
Create a Feature Code
In order to dial into this new mailbox, a Feature Code will need to be created. To do this…
- Navigate to Features → Feature codes.
- Click New.
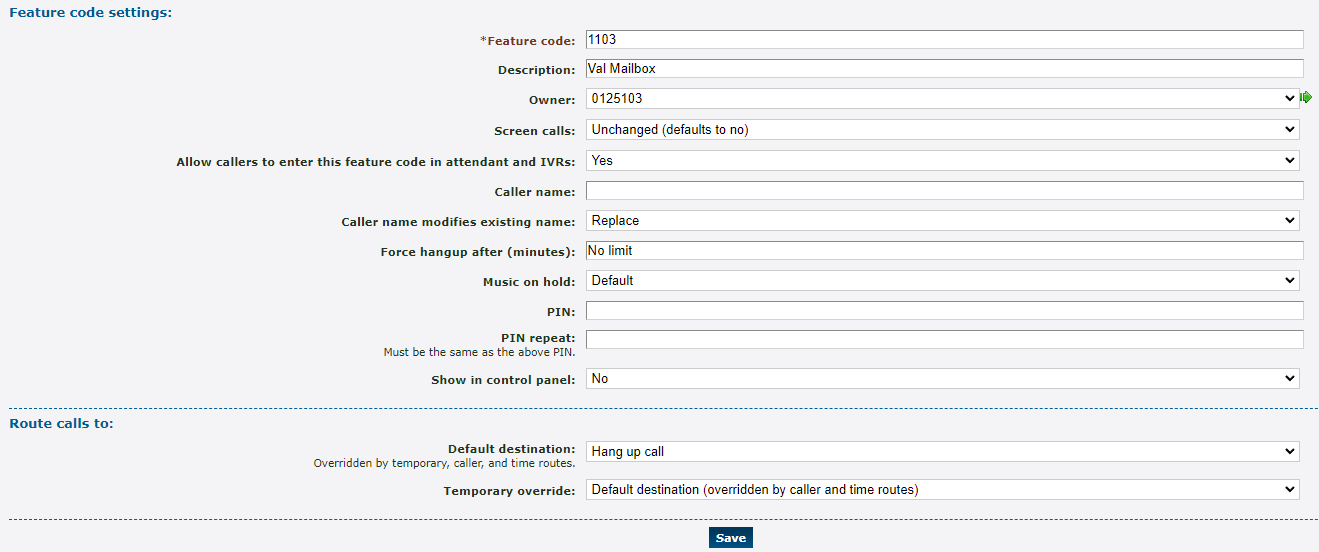
- On the New feature code page, fill out the following fields (fields with a * are required):
| Option | Description |
|---|---|
| * Feature code |
Type in a code that will be dialed on a SpectrumVoIP provided phone to reach the mailbox. Quick Tip: SpectrumVoIP technicians usually name this feature code as a 1 in front of the user's 3-digit extension number, such as 1101 for 101's mailbox. DANGER: Do NOT use a N11 number, like 911, 211, or 411. |
| Description | Type a note that will be displayed alongside the feature code in the list of feature codes. |
| Owner | Use the Owner drop-down to select someone that will be able to edit this feature code. |
| Allow callers to enter this feature code in attendant and IVRs | If this mailbox should be accessed when the code is dialed in an IVR, select Yes. |
| PIN & PIN repeat | A digital code that can keep the use of a feature code secure. If only certain users should be able to access this mailbox, setting up a PIN may be useful. |
- In the Route calls to section, skip setting a Default destination (this will be done later).
Note: This has to be done after saving since the My features section of the drop-down will not appear until then.
- Click Save.
- Click the Feature Code to edit it.
- In the Route calls to section, use the Default destination drop-down to select Mailbox under My features.
- Use the second Default destination drop-down to select the mailbox of the user this feature code will dial.

- Once done, click Save.