Rename an Extension in Enswitch
Learn how to quickly and easily change the name for a user in Enswitch.
Table of Contents
Update a User's Name
Over time, it may become necessary to update the name of one of your users to match a change in staffing.
To completely update the name shown for a user's features, you will need to be sure to change the name for that user's…
- Telephone Line
- Account
- Mailbox
- Speed Dial
Update the Name of the Extension
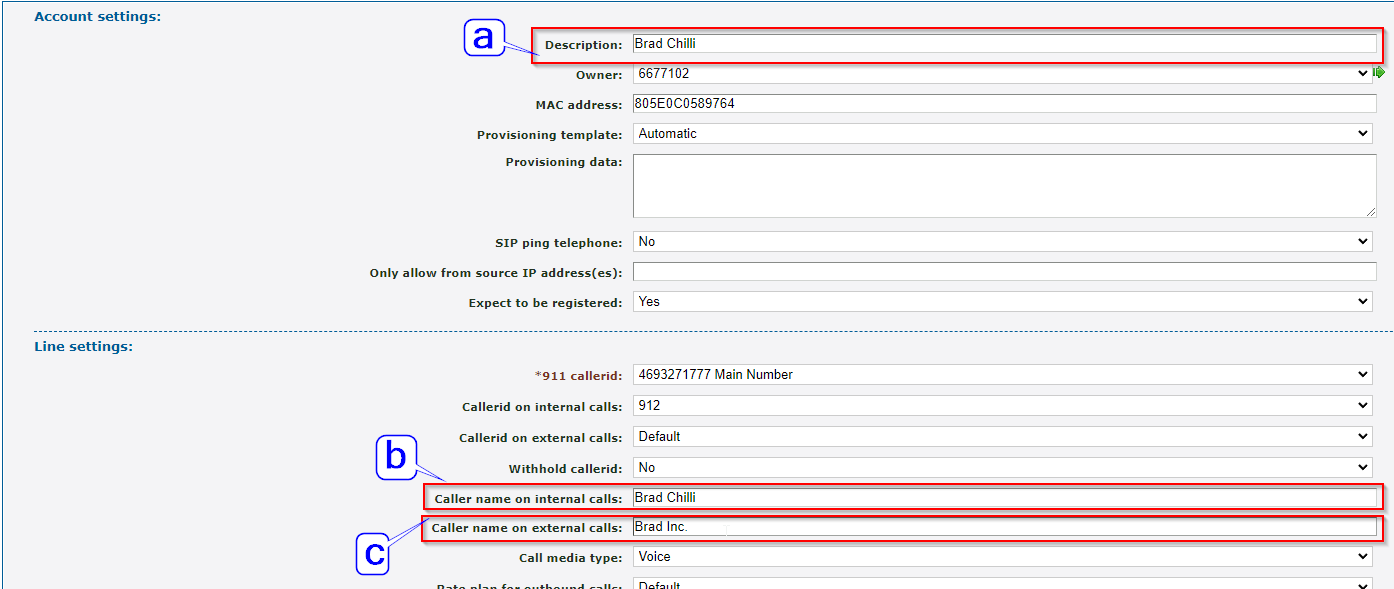
The user's extension, or telephone line, will have information that may need to be updated to match the new user's name. These include the description of the telephone line and the telephone line's caller name.
To update the user's telephone line settings…
- Navigate to Features → Telephone lines.
- Click the extension number of the user that needs adjustment.
- In that user's telephone line settings, adjust the following information:

- Description - Type the user's new name.
- Caller name on internal calls - Type what internal users should see when this user calls them.
- Caller name on external calls - Type the name that should be shown when the user places outbound calls.
- Click the Save button.
Rename the User's Account
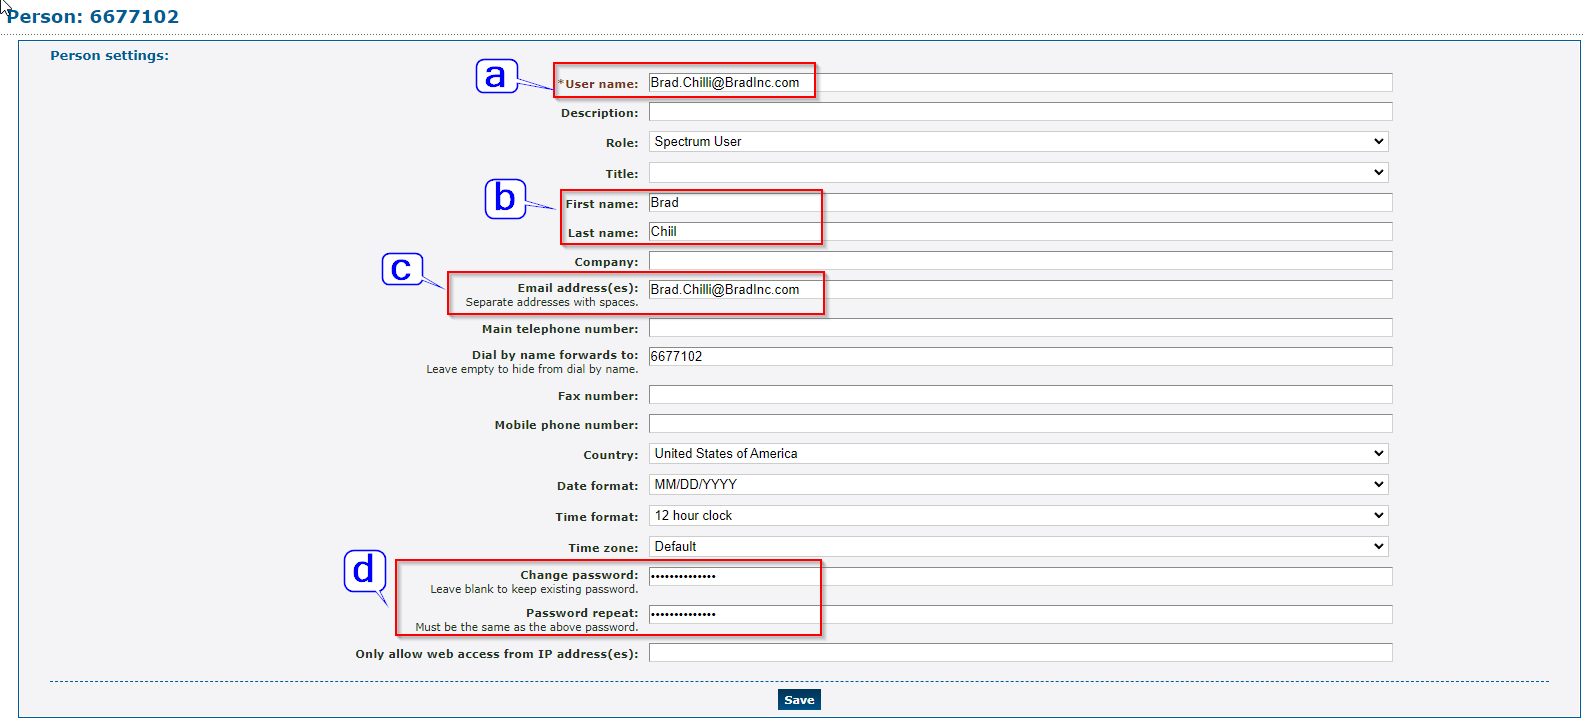
In the People page, each account's profile information can be adjusted, such as the account's user name (for the portal), first and last name, email address, and their password for the portal.
To adjust this user's account settings…
- To quickly go to that user's account settings, click the green arrow
 next to the Owner box in the Telephone Lines page.
Quick Tip: Alternatively, navigate to Feature → People and select that user.
- On that user's Person page, update the following fields:

- * User name - Type in the email address of the new user. Alternatively, you can have the user's 7-digit extension number used as the user name.
- First name and Last name - Update the first and last name to match the new user's name.
- Email address(es) - Add the new agent's email.
- Change password and Password repeat - Change the agent's password to secure their account.
- Click the Save button.
Adjust the Mailbox's Name
If that user's mailbox has a name showing for its description, you can update that name shown. It is also recommended to change that mailbox's greeting if it mentions the old user's name.
To update this user's mailbox's information…
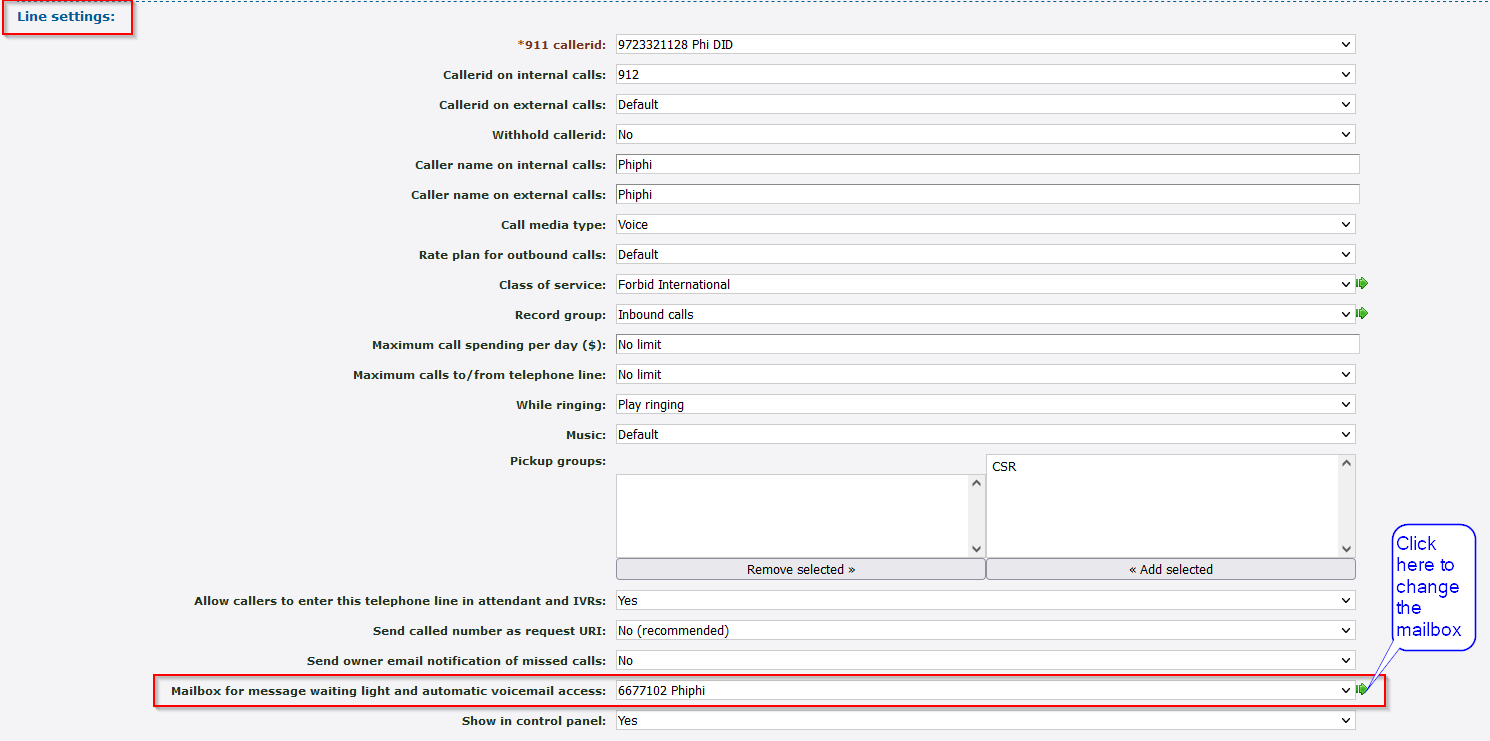
- To quickly navigate to the Mailbox of the user, click the green arrow
 next to the Mailbox for message waiting light and automatic voicemail access box.
Quick Tip: Alternatively, navigate to Feature → Mailboxes and select that user's mailbox.
- Update the name shown in the Description box.

- If needed, upload or select a greeting that mentions the new user's name.

- Click the Save button to save any changes.
Update a Speed Dial's Name
If the previous user had a speed dial set up, it is a good idea to update the speed dial's settings, such as its description and the name forced as the caller name for this user's calls.
To update the speed dial's settings…
- Navigate to Features→ Speed dials.
- Select the speed dial for that user.

- Update the name shown in the Description box.
- Change Force caller name on calls from this destination to match the new user's name.
- Click the Save button to update these changes.
WARNING: Any custom labels that have been made on users' phones for speed dials or BLF keys will need to be updated
Other features with descriptions that show the old user's name, such as Feature Codes, Call Queues, IVR Menus, Numbers, and more, may also need to be updated.
If there is an IVR menu that lists that old user's name as an option, it is recommended to update that IVR menu's greeting. 