Recommended Fortinet Firewall Settings
Learn how to optimize your Fortinet firewall settings to work alongside VoIP services.

Written by Adrian Angwenyi
Updated at December 20th, 2024
Table of Contents
From the Command Line Interface
WARNING: Please pay particular attention to spaces and dashes in the CLI based steps, or you may receive error warnings.
Step 1: Remove SIP Helper
- In the Command Line Interface (CLI) run the following commands:
- config system session-helper
- show
- For this example, edit 13 contains SIP
WARNING: Depending on your deployment sip may be a different number, please substitute the correct entry number for the delete command.
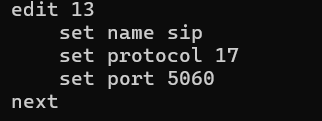
- Enter the following commands:
- delete 13
- end
Step 2: Disable SIP Helper and SIP NAT Trace
In the Command Line Interface (CLI) run the following commands: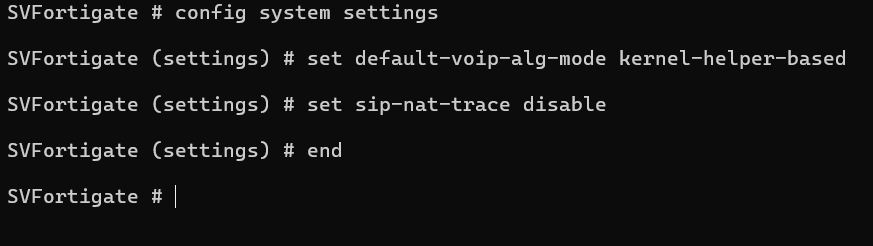
- config system settings
- set default-voip-alg-mode kernel-helper-based
- set sip-nat-trace disable
- end
✔ Reboot the Router while using the Web GUI under Status, or in the CLI with the following command:
execute reboot
Step 3: Disable Strict Register
Strict Register forces VoIP devices through a pinhole at port 65476 and will cause duplicate porting to occur.
To disable this setting, run the following commands in the Command Line Interface (CLI):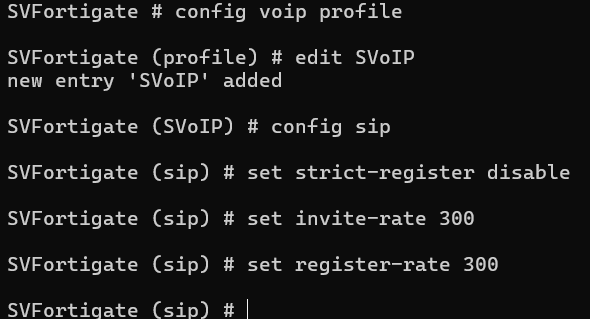
- config voip profile
- edit <Profile_name>
- config sip
- set strict-register disable
- set invite-rate 300
- set register-rate 300
- end
From the GUI / UX
Step 1: Enable Traffic Shaping
- Navigate to System → Feature Visibility.
- In the Additional Features column, enable Traffic Shaping and VoIP.
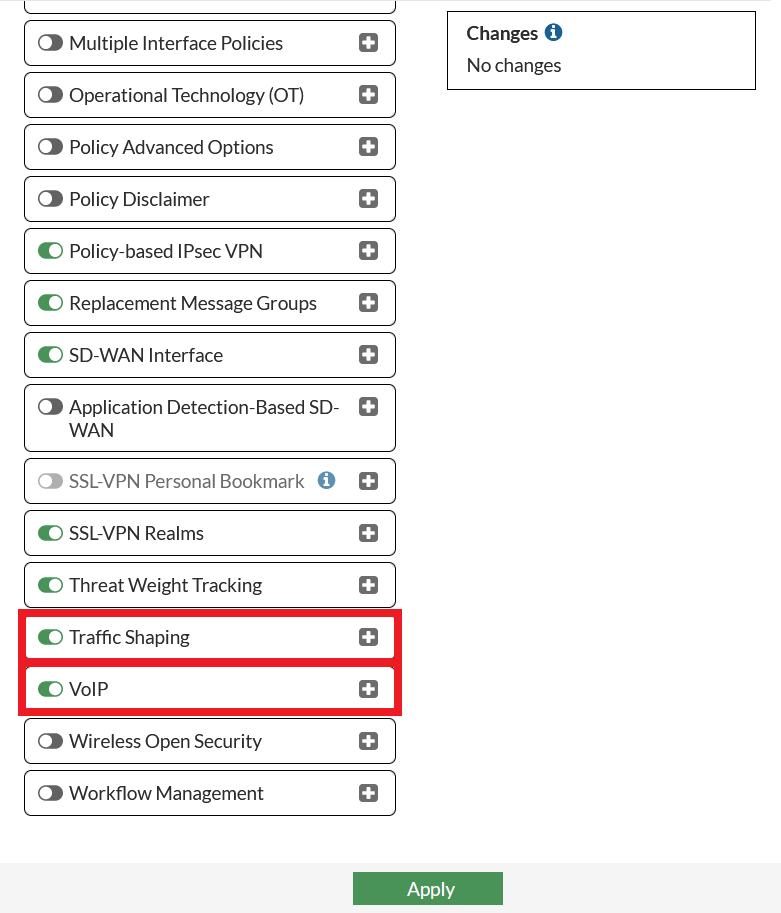
- Click the Apply button to save these changes.
Step 2: Create a VoIP Traffic Shaper
- Navigate to Policy & Objects → Traffic Shaping → Traffic Shapers.
- Click the + Create New button.
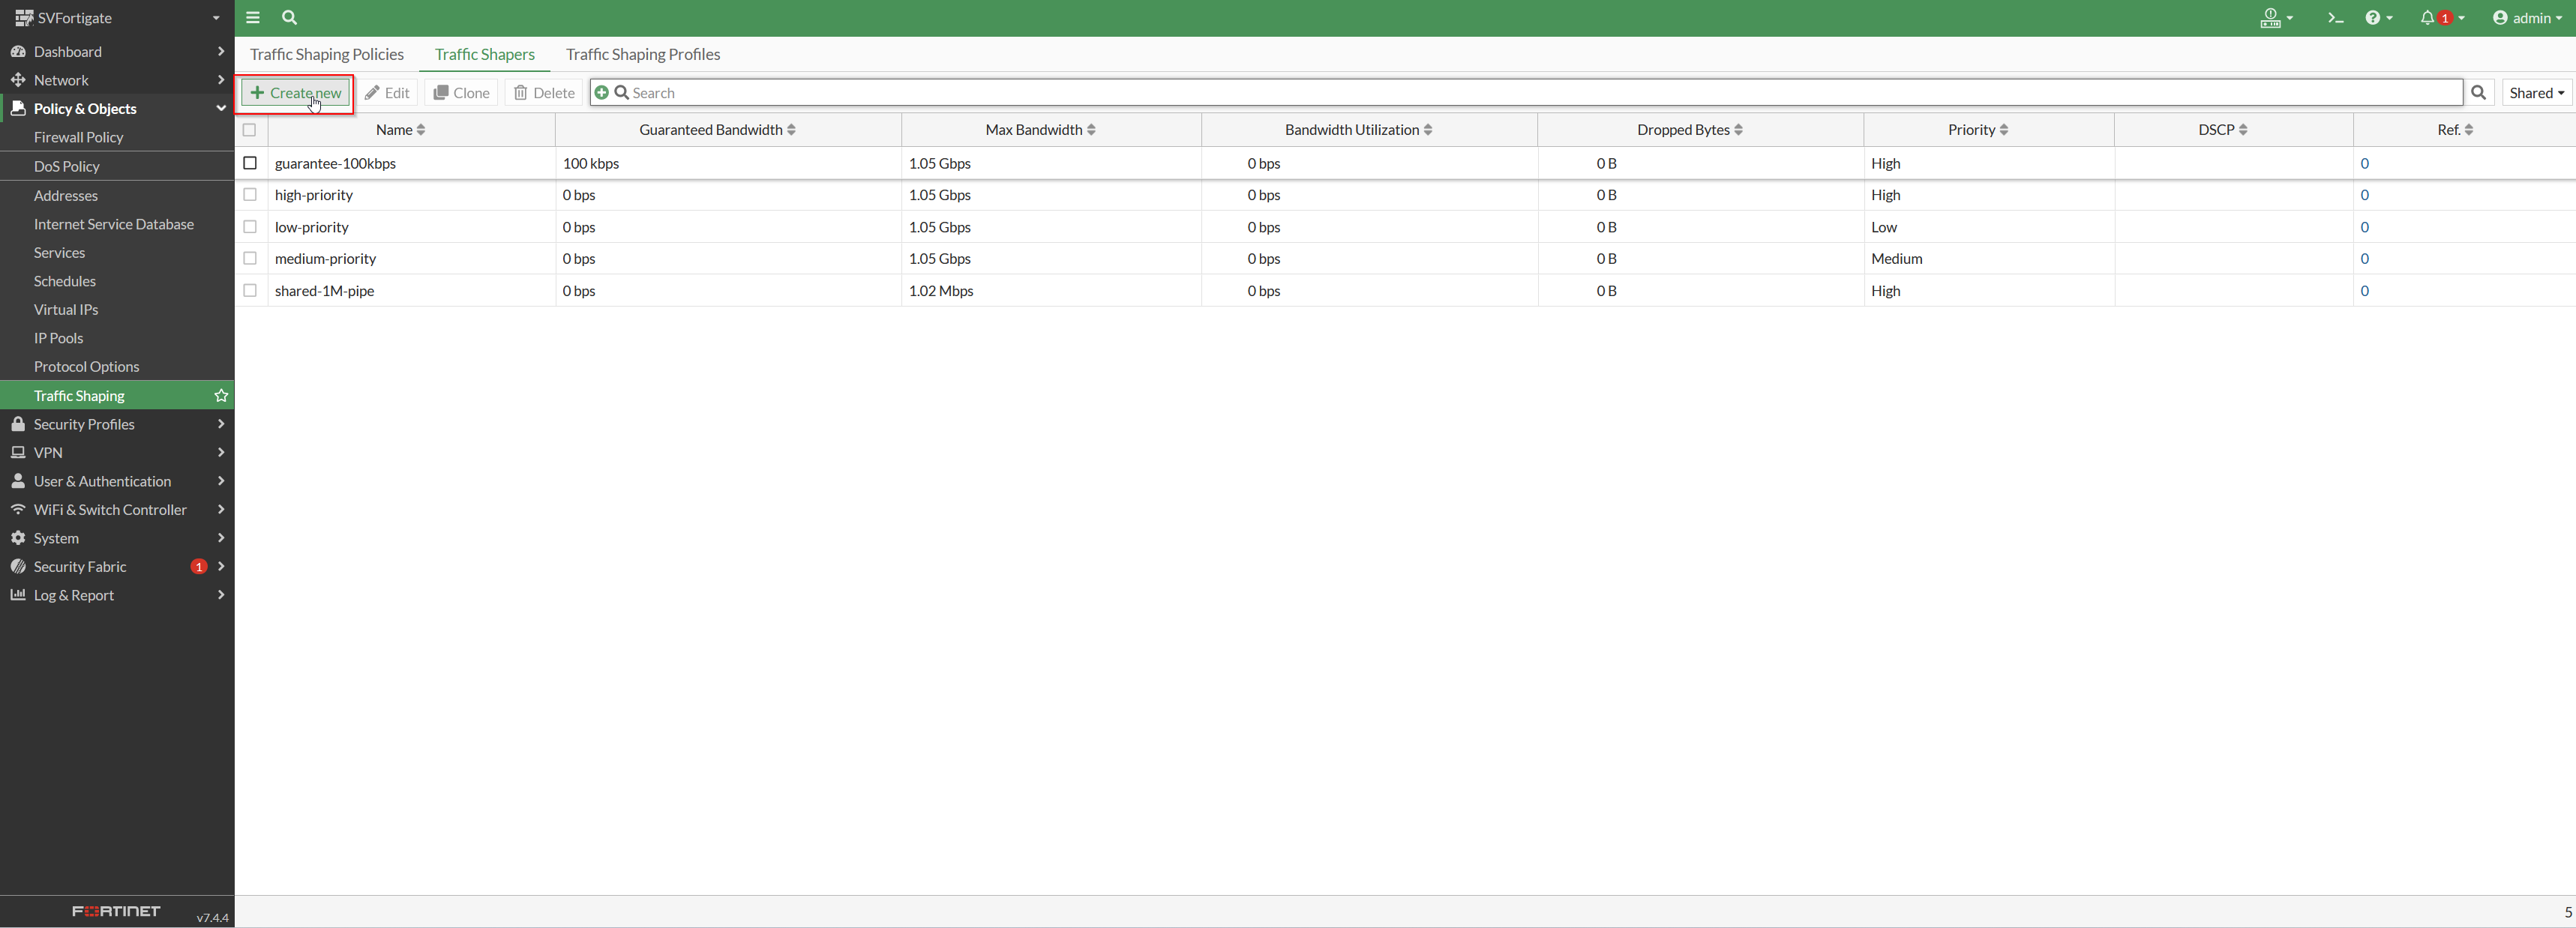
- Fill in the following information:
- Name - Type a name, such as SVoIP RTP Out.
- Traffic priority - High, this will decrease the chance the traffic gets dropped during times of heavy network load
- Maximum Bandwidth - In general this not needed in connections faster than 100 mbps
- Guaranteed Bandwidth - Allocate at least 1000 kbps.
- Click the OK button to create this traffic shaper.
Note:
A 10Mbps/1Mbps ISP connection that is solely dedicated to the phones would support 10 concurrent phone calls. Please adjust the Guaranteed Bandwidth depending on your ISP speeds and the needs for phone calls.
Step 3: Add Addresses, Services, and Address Groups
Addresses
- Navigate to Policy & Objects → Addresses.
- Reference this table to see the addresses that should be added.
Note: Here are the public subnets associated with our services:
199.71.209.0/24
24.227.249.0/25
72.249.136.32/28
206.123.122.32/27
212.69.157.32/27
40.143.31.64/27
45.41.5.0/24
12.150.91.0/24
- Click the + Create new button.
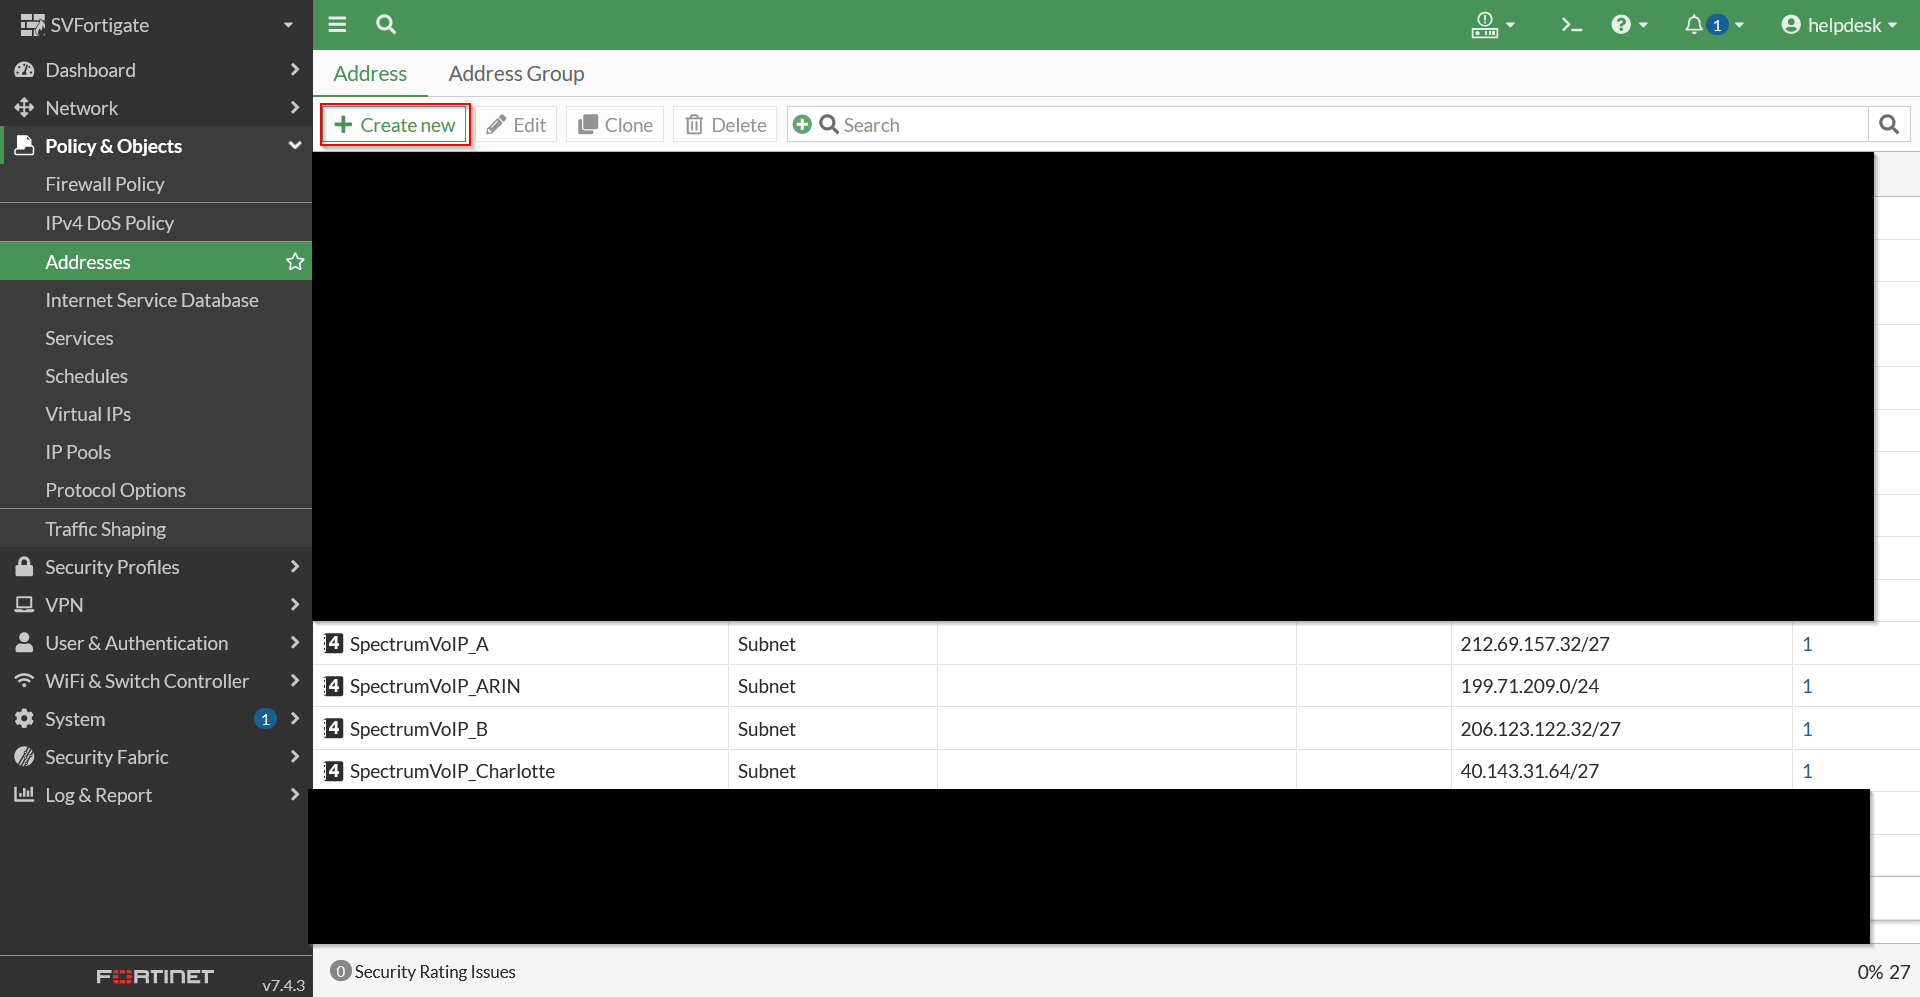
- Fill in the following information:
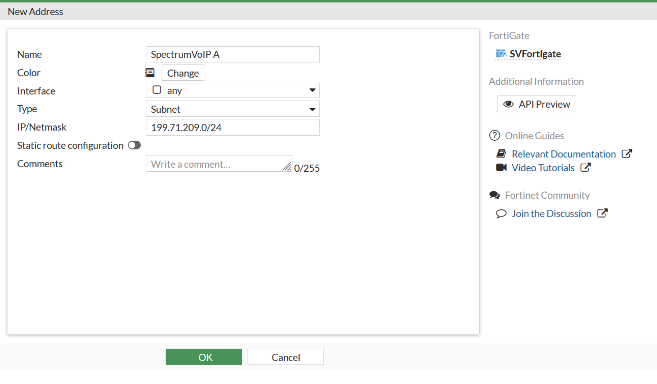
- Name - Type a descriptive name about this address.
- Type - Select Subnet.
- IP/Netmask - Type the address you need from step 2.
- Click the OK button.
- Repeat steps 2-5 for each address/port.
Address Group
- Navigate to Policy & Objects → Addresses and go to the Address Group tab.
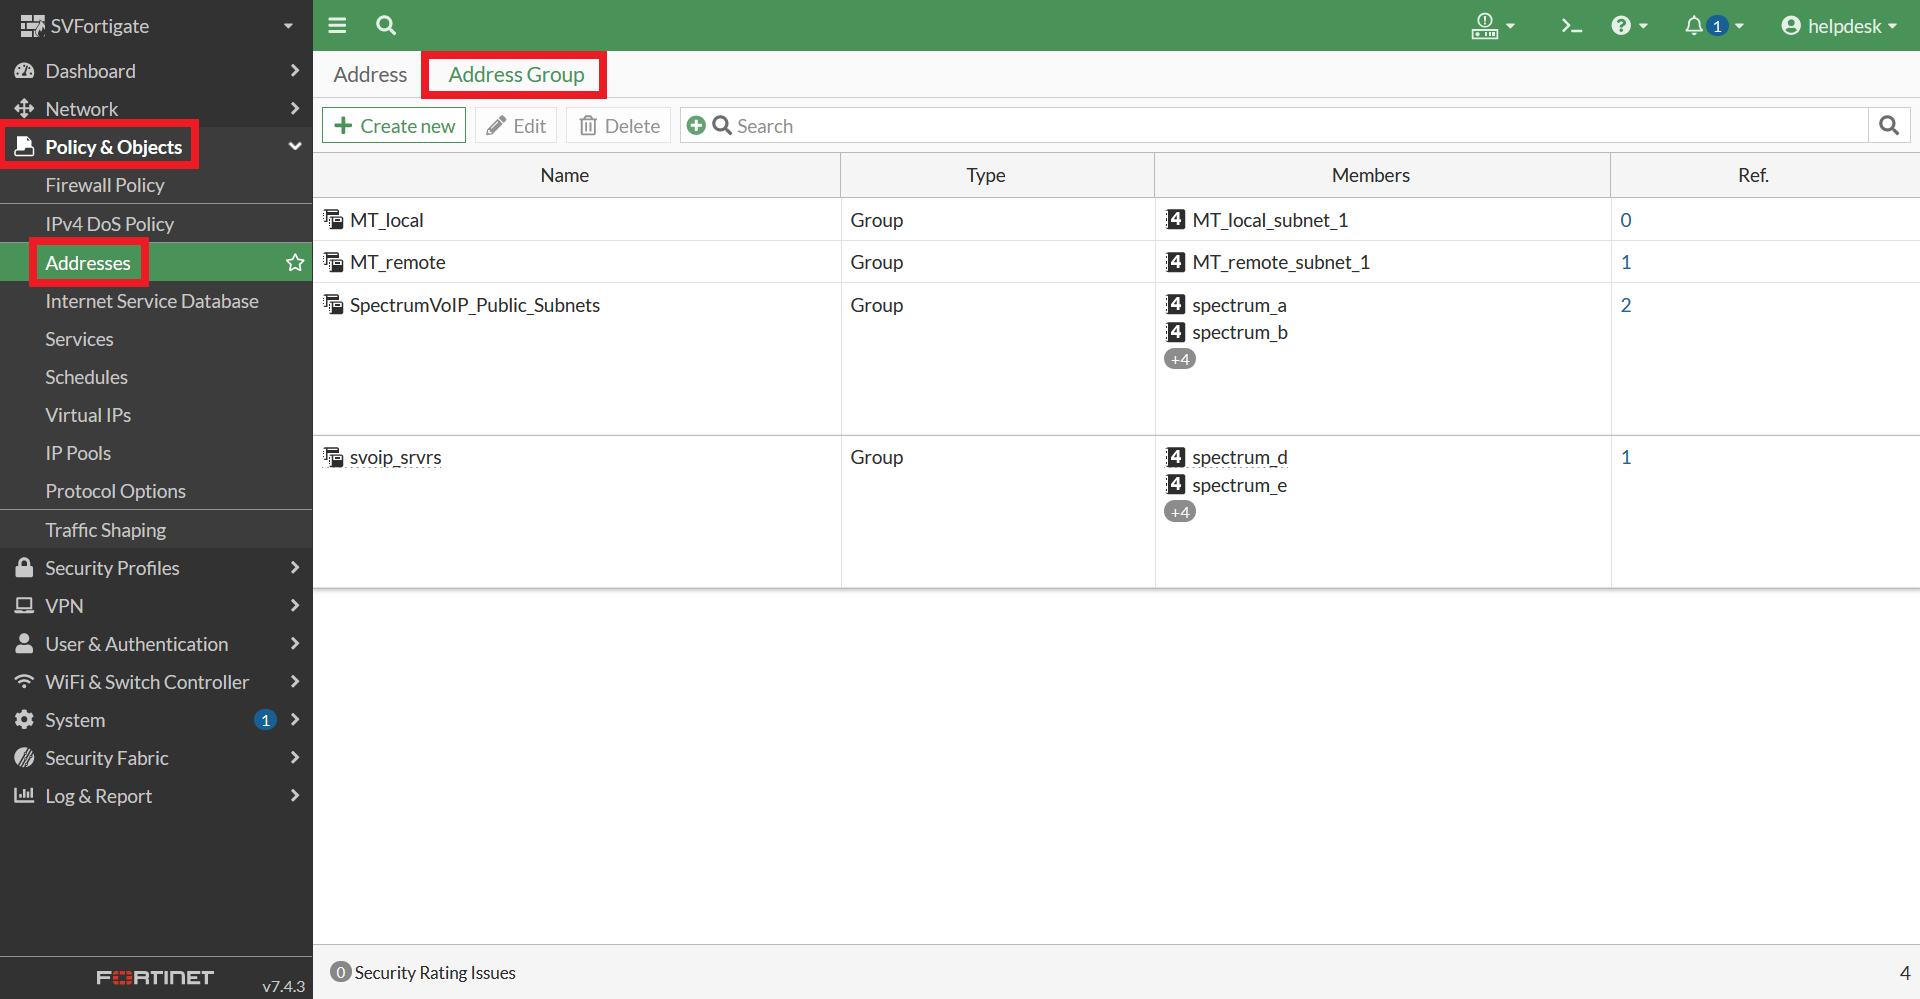
- Click the + Create New button.
- In the New Address Group menu, fill in the following information:
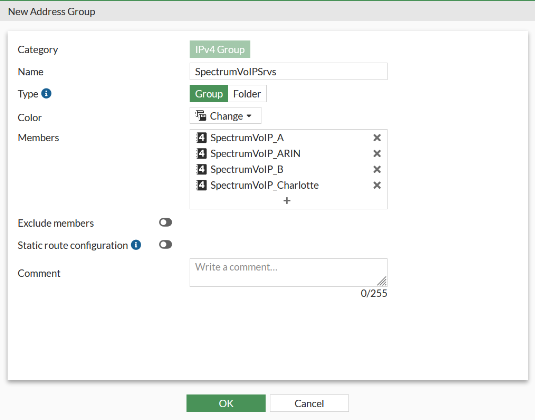
- Name - Type a descriptive name, such as “SpectrumVoIPServices”.
- Type - Click Group.
- Members - Click the + icon and select the SpectrumVoIP Address Objects that were created.
- Once you have selected all of the addresses look for the Close button at the bottom of the Select Entries.
- Click the OK button.
Services/Ports
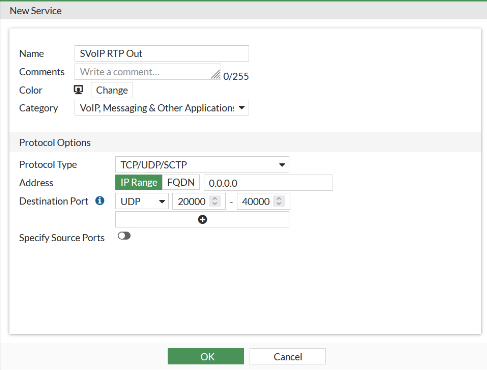
- Navigate to Policy & Objects → Services.
- Click the + Create new button.
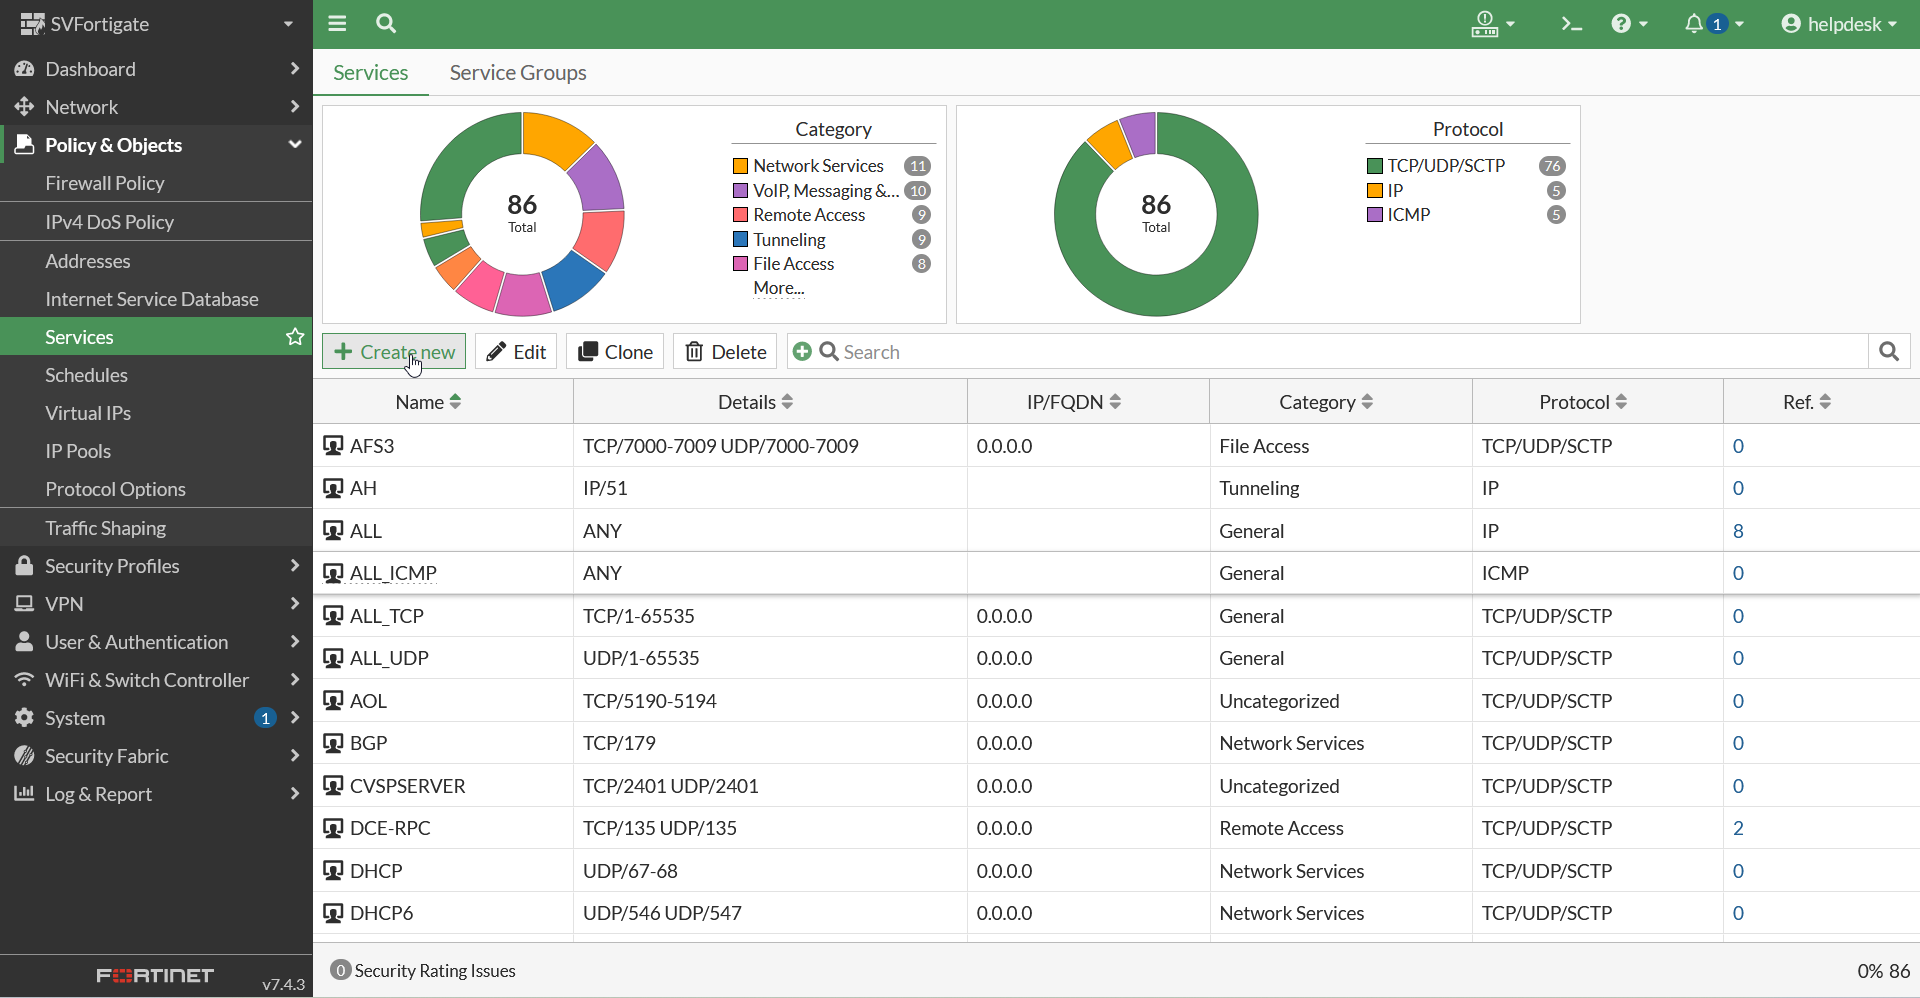
- In the New Service menu, fill in the following information:
- Name -
- Category - Select VoIP, Messaging & Other Applications.
- Protocol Type - Select TCP/UDP/SCTP.
- Address - Click IP Range and type in the subnet of one of the addresses from the Address section.
-
Destination Port - For this option, do the following:
- Select the appropriate port type, such as UDP.
- Set the port range to match what is used by your platform.
- Click the OK button when ready.
Step 4: Create an IPv4 Policy
- Navigate to Policy & Objects → IPv4 Policy.
- Click the + Create New button.
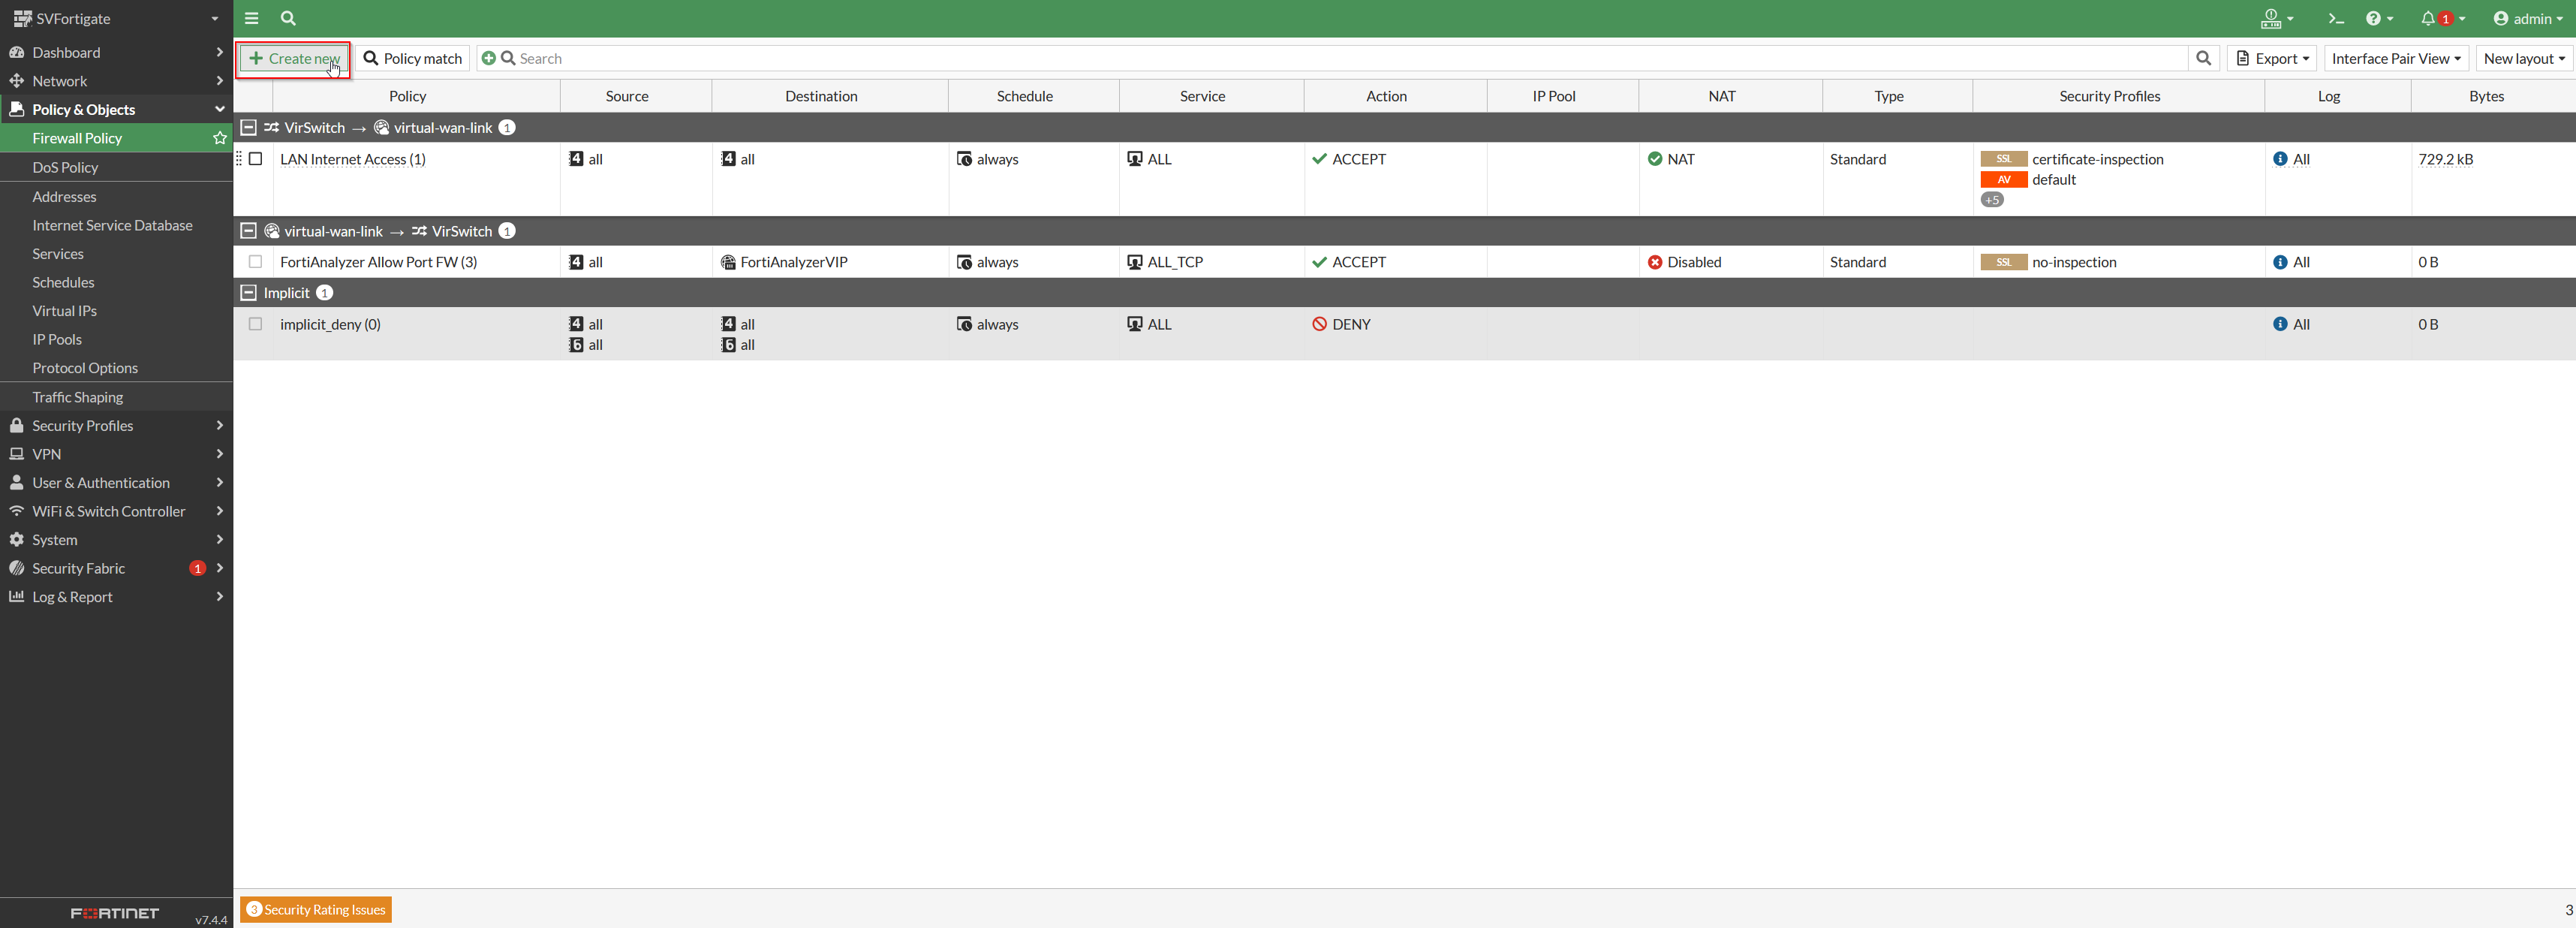
- Fill in the following information:

Important:
It is highly recommended for security purposes that you have a separate subnet for the phones and make this firewall policy as specific as possible.
- Name - Type a descriptive name, such as LAN to SVoIP.
- Incoming Interface - Select your LAN (Or Voice VLAN) interface.
- Outgoing Interface - Select your WAN interface.
- Action - Select ✔ ACCEPT.
- Source - LAN addresses (Or Voice VLAN addresses)
- Destination - The SpectrumVoIP Address Group Create previously
- Schedule - Always
- Service - SVoIP RTP Out, HTTP, & HTTPS
- Inspection mode - Flow Based
- NAT - ENABLE NAT
- IP Pool Configuration - Select Use Outgoing Interface Address.
- Preserve Source Port - DISABLE
- Passive health check - DISABLE
- AntiVirus - DISABLE
- Web Filter - DISABLE
- DNS Filter - DISABLE
- Application Control - DISABLE
- VoIP - ENABLE DEFAULT
- SSL inspection - SET TO NO INSPECTION
- Log Allowed Traffic - Select All Sessions.
- Click the OK button.
- Ensure the policy is active or turn it on once you apply the settings.
Warning:
To ensure the phones are able to provision, please ensure the Inspection mode is set to Flow-based and the SSL inspection is set to Certificate Inspection.
Step 5: Set REGISTER, INVITE, and SCCP Request Limits
- Navigate to Security Policies → VoIP.
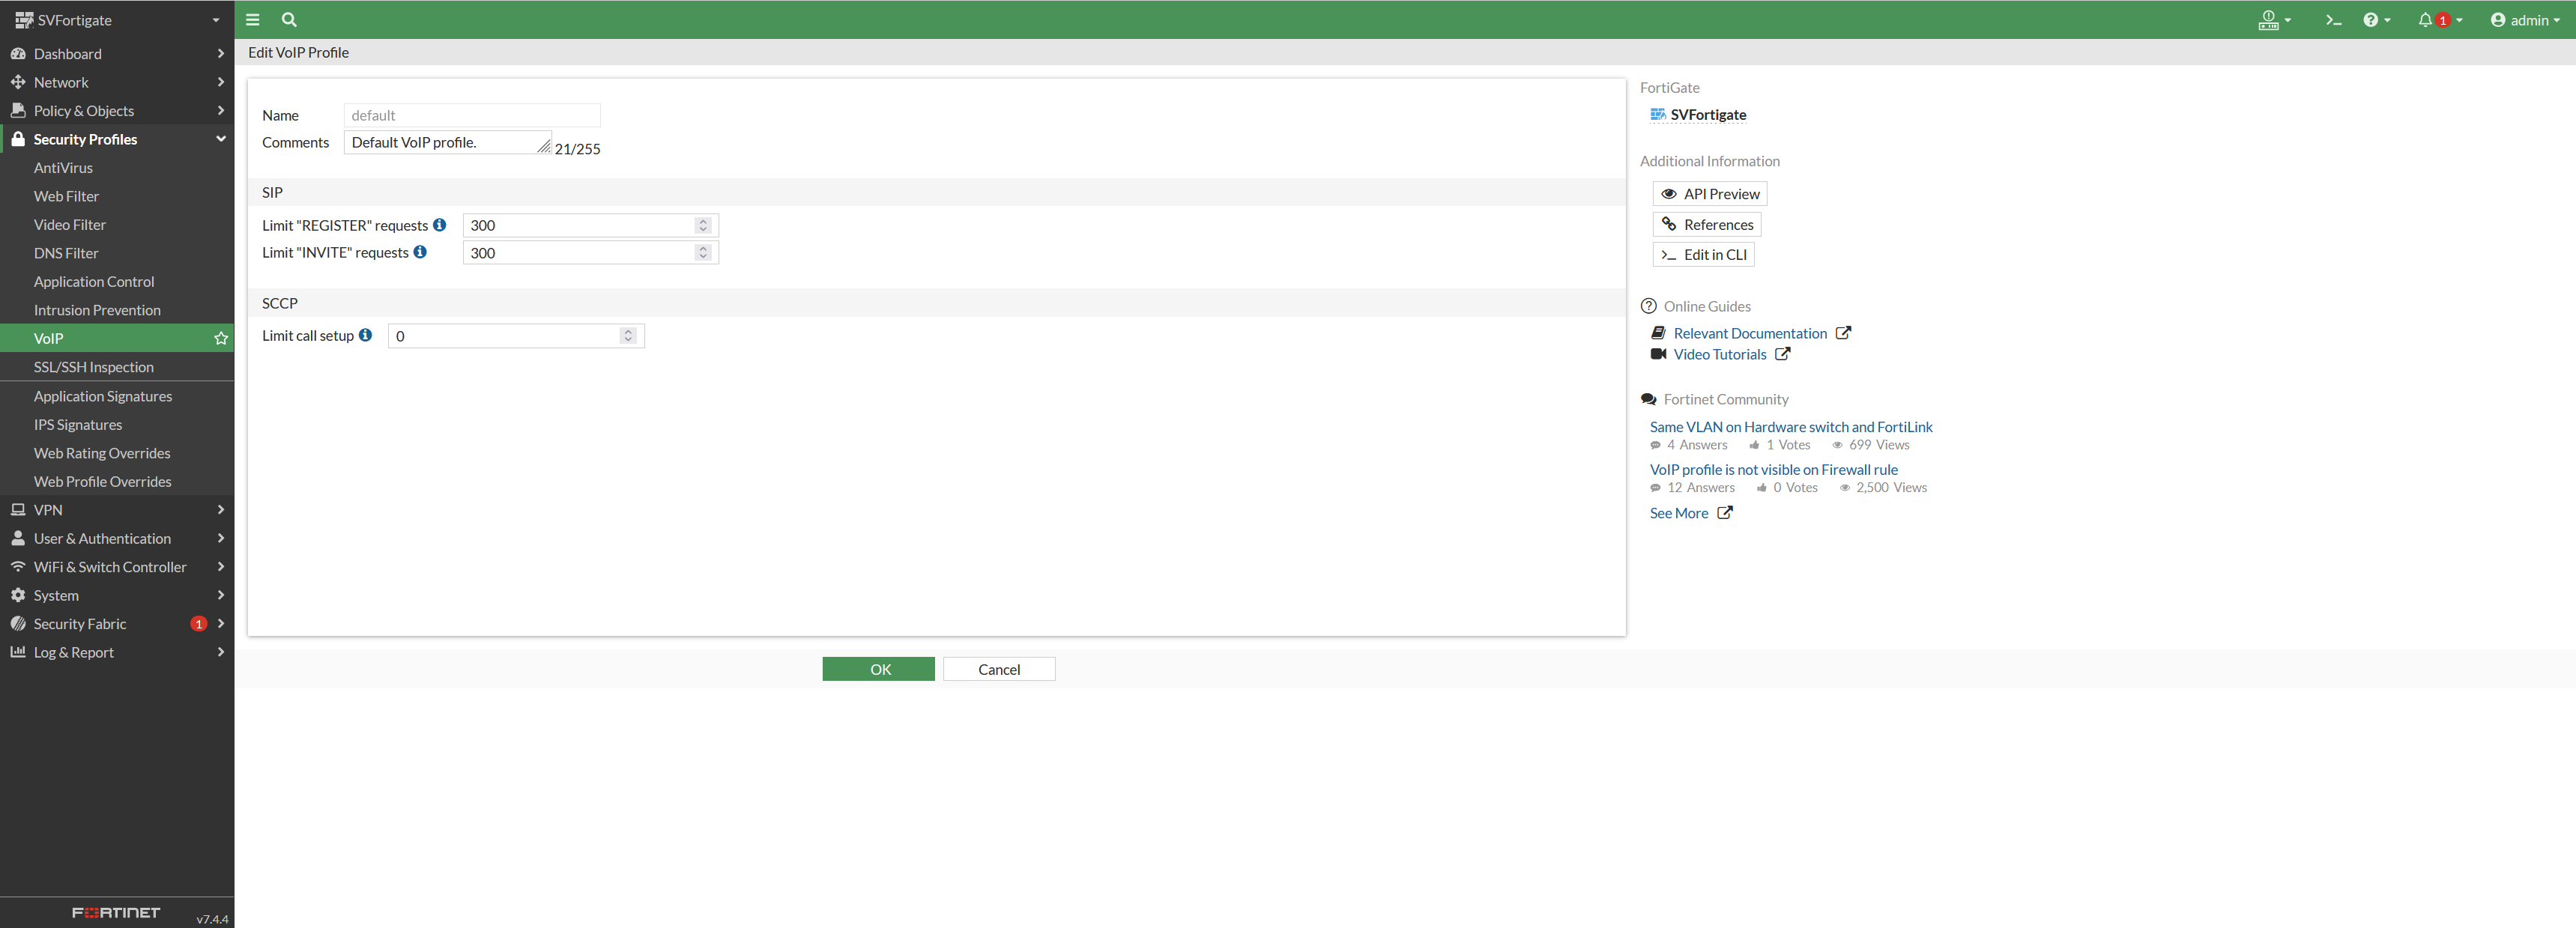
- Set the Limit “REGISTER” requests and Limit “INVITE” requests option to the value specified by your installation technician.
Quick Tip: 300 can be used if the exact value is not known.
- If necessary, set the SCCP limit as well.
Note:
In the vast majority of cases, SCCP can be left at 0. Please consult your network administrator for this particular setting.
Step 6: Create a Traffic Shaping Policy
- Navigate to Policy & Objects → Traffic Shaping Policy.
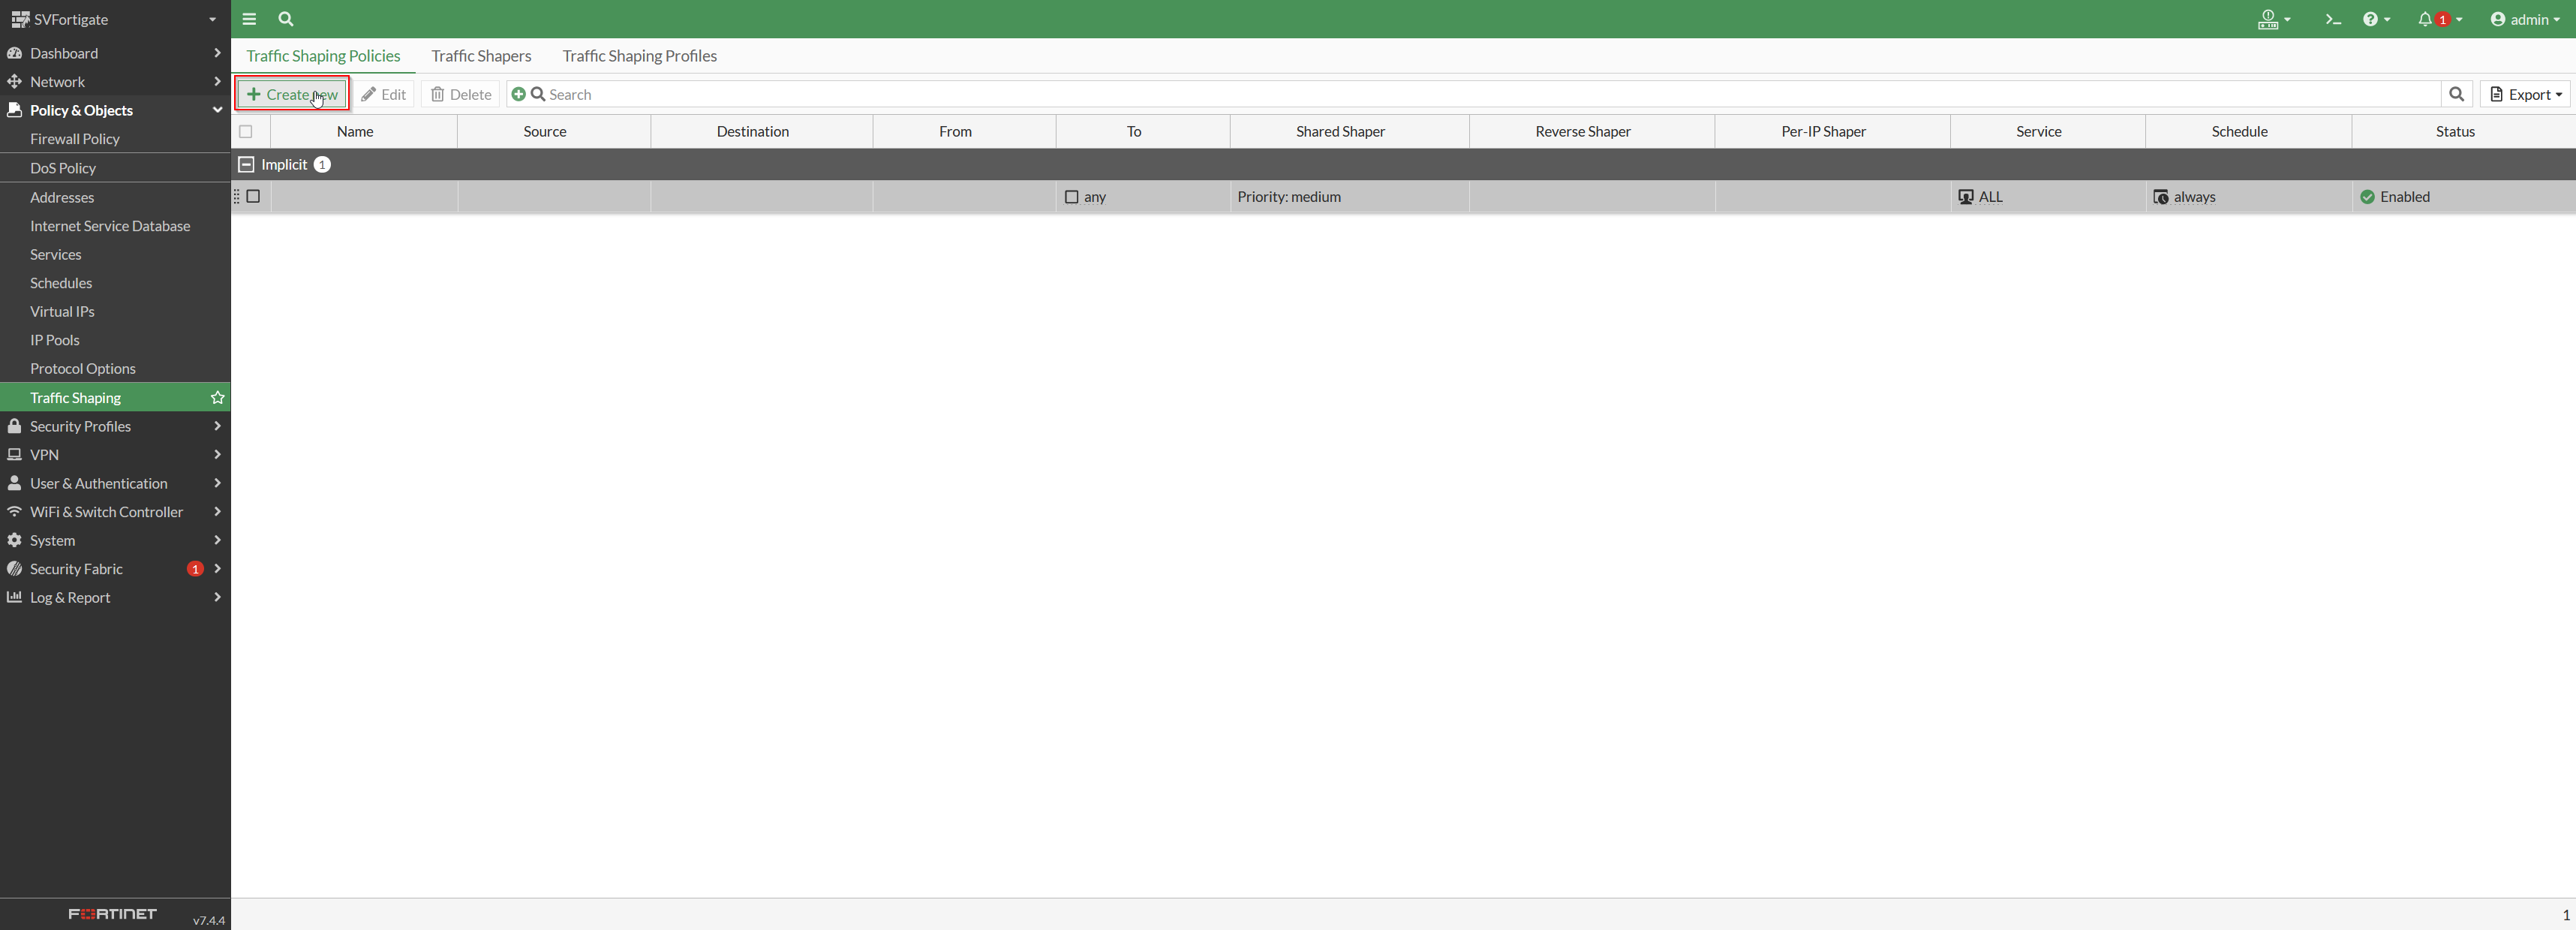
- Click the + Create New button.
- In the menu, fill in the following information:
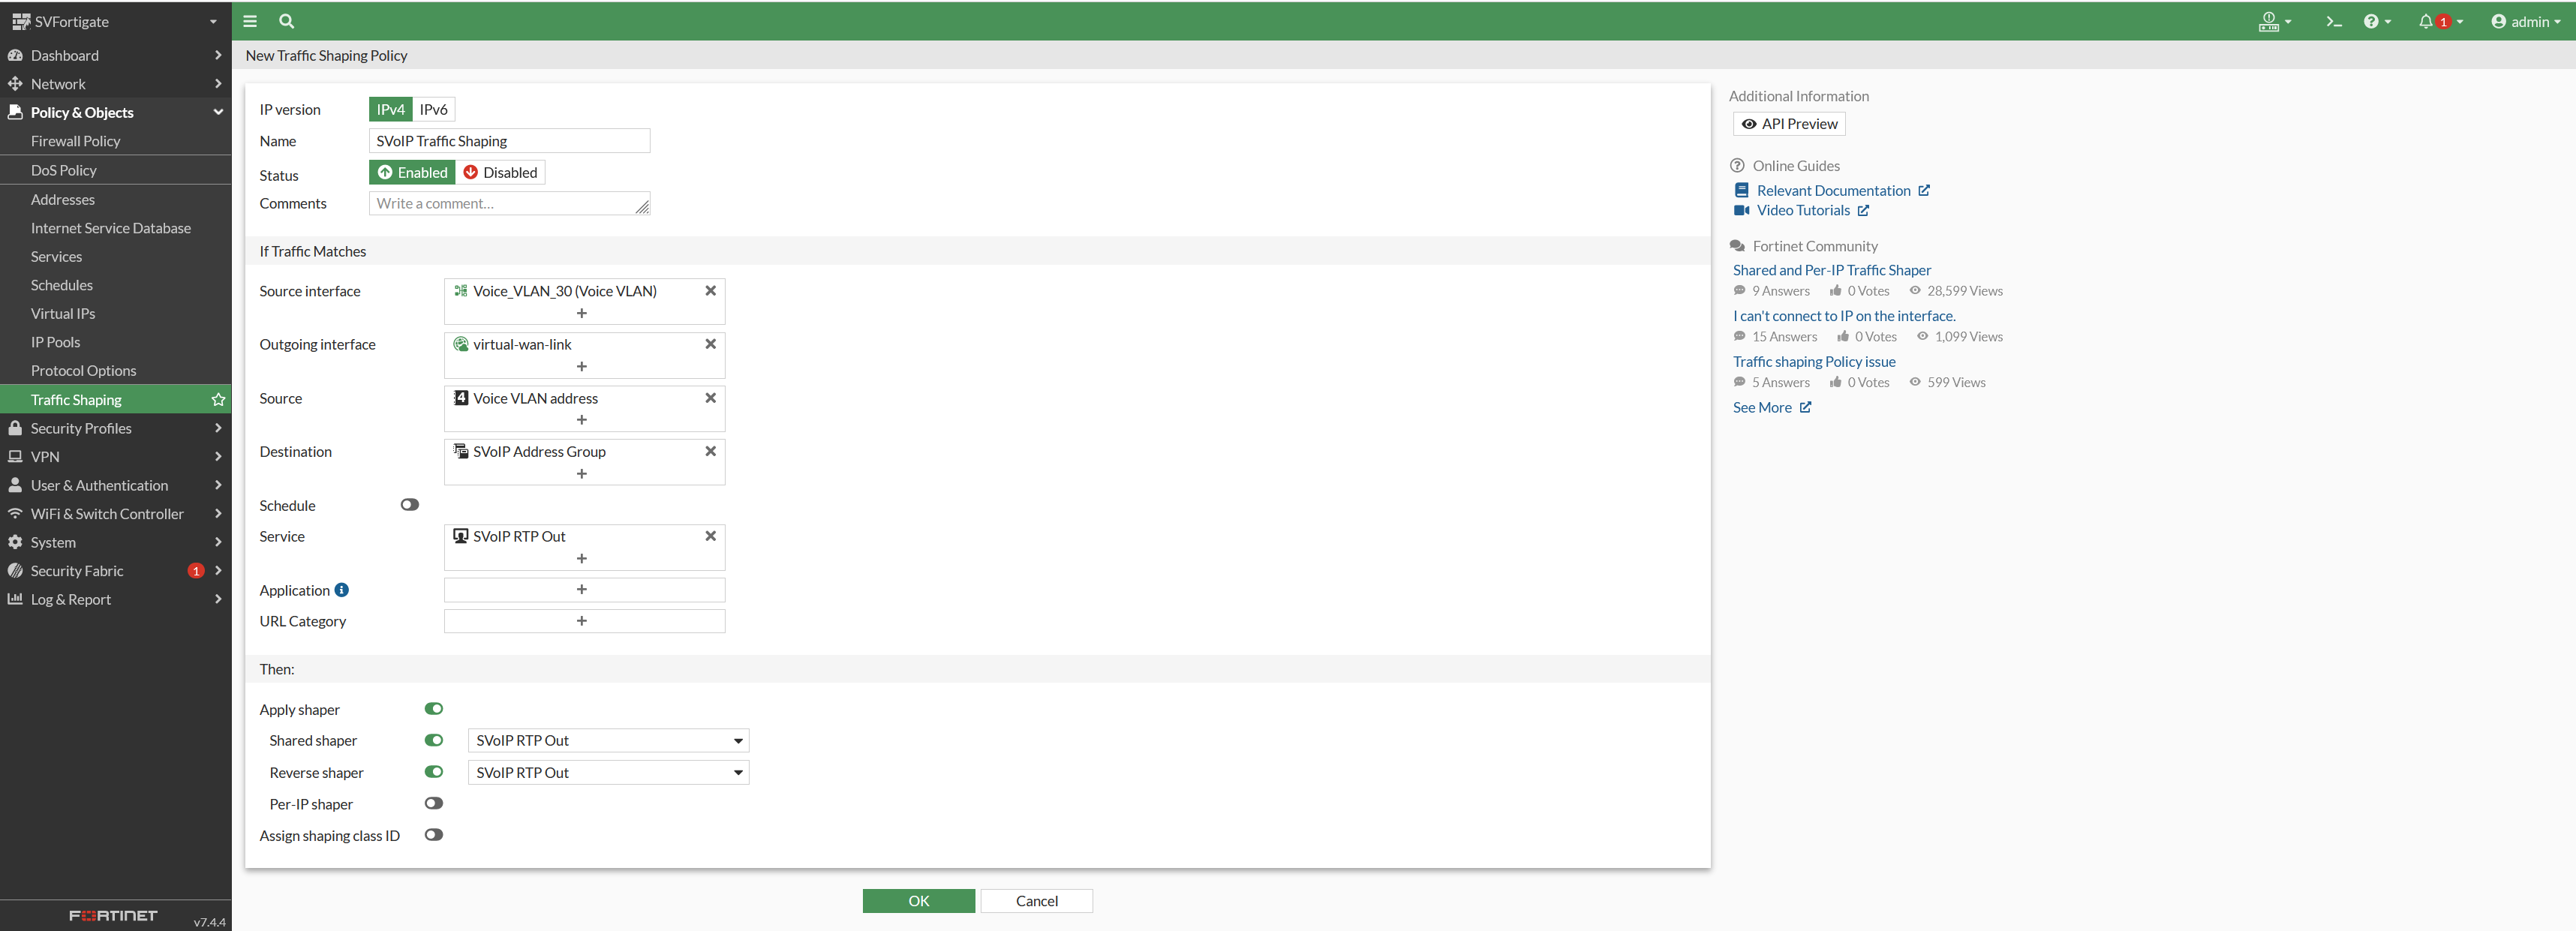
WARNING: Pay careful attention to the SIP and VOIP selections as they may be in different locations depending on the age, and firmware version of your Fortinet.
Ensure you select the name of the Policy / Traffic Shaper you created earlier.
- Service - Select select the Service we created earlier for the RTP.
- Application - Select SIP.
- Outgoing Interface - Select your internet interface.
- Shared Shaper - Select the new Traffic Shaper you created earlier.
- Reverse Shaper - Select the new Traffic Shaper you created earlier.
- Click the OK button.
Optional Step 7: SD-WAN Deployment
Note:
To prevent issues with provisioning, it is highly recommended to send SD-WAN traffic out one interface.
- Navigate to Network → SD-WAN → SD-WAN Rules
- Create a new rule with the following parameters:
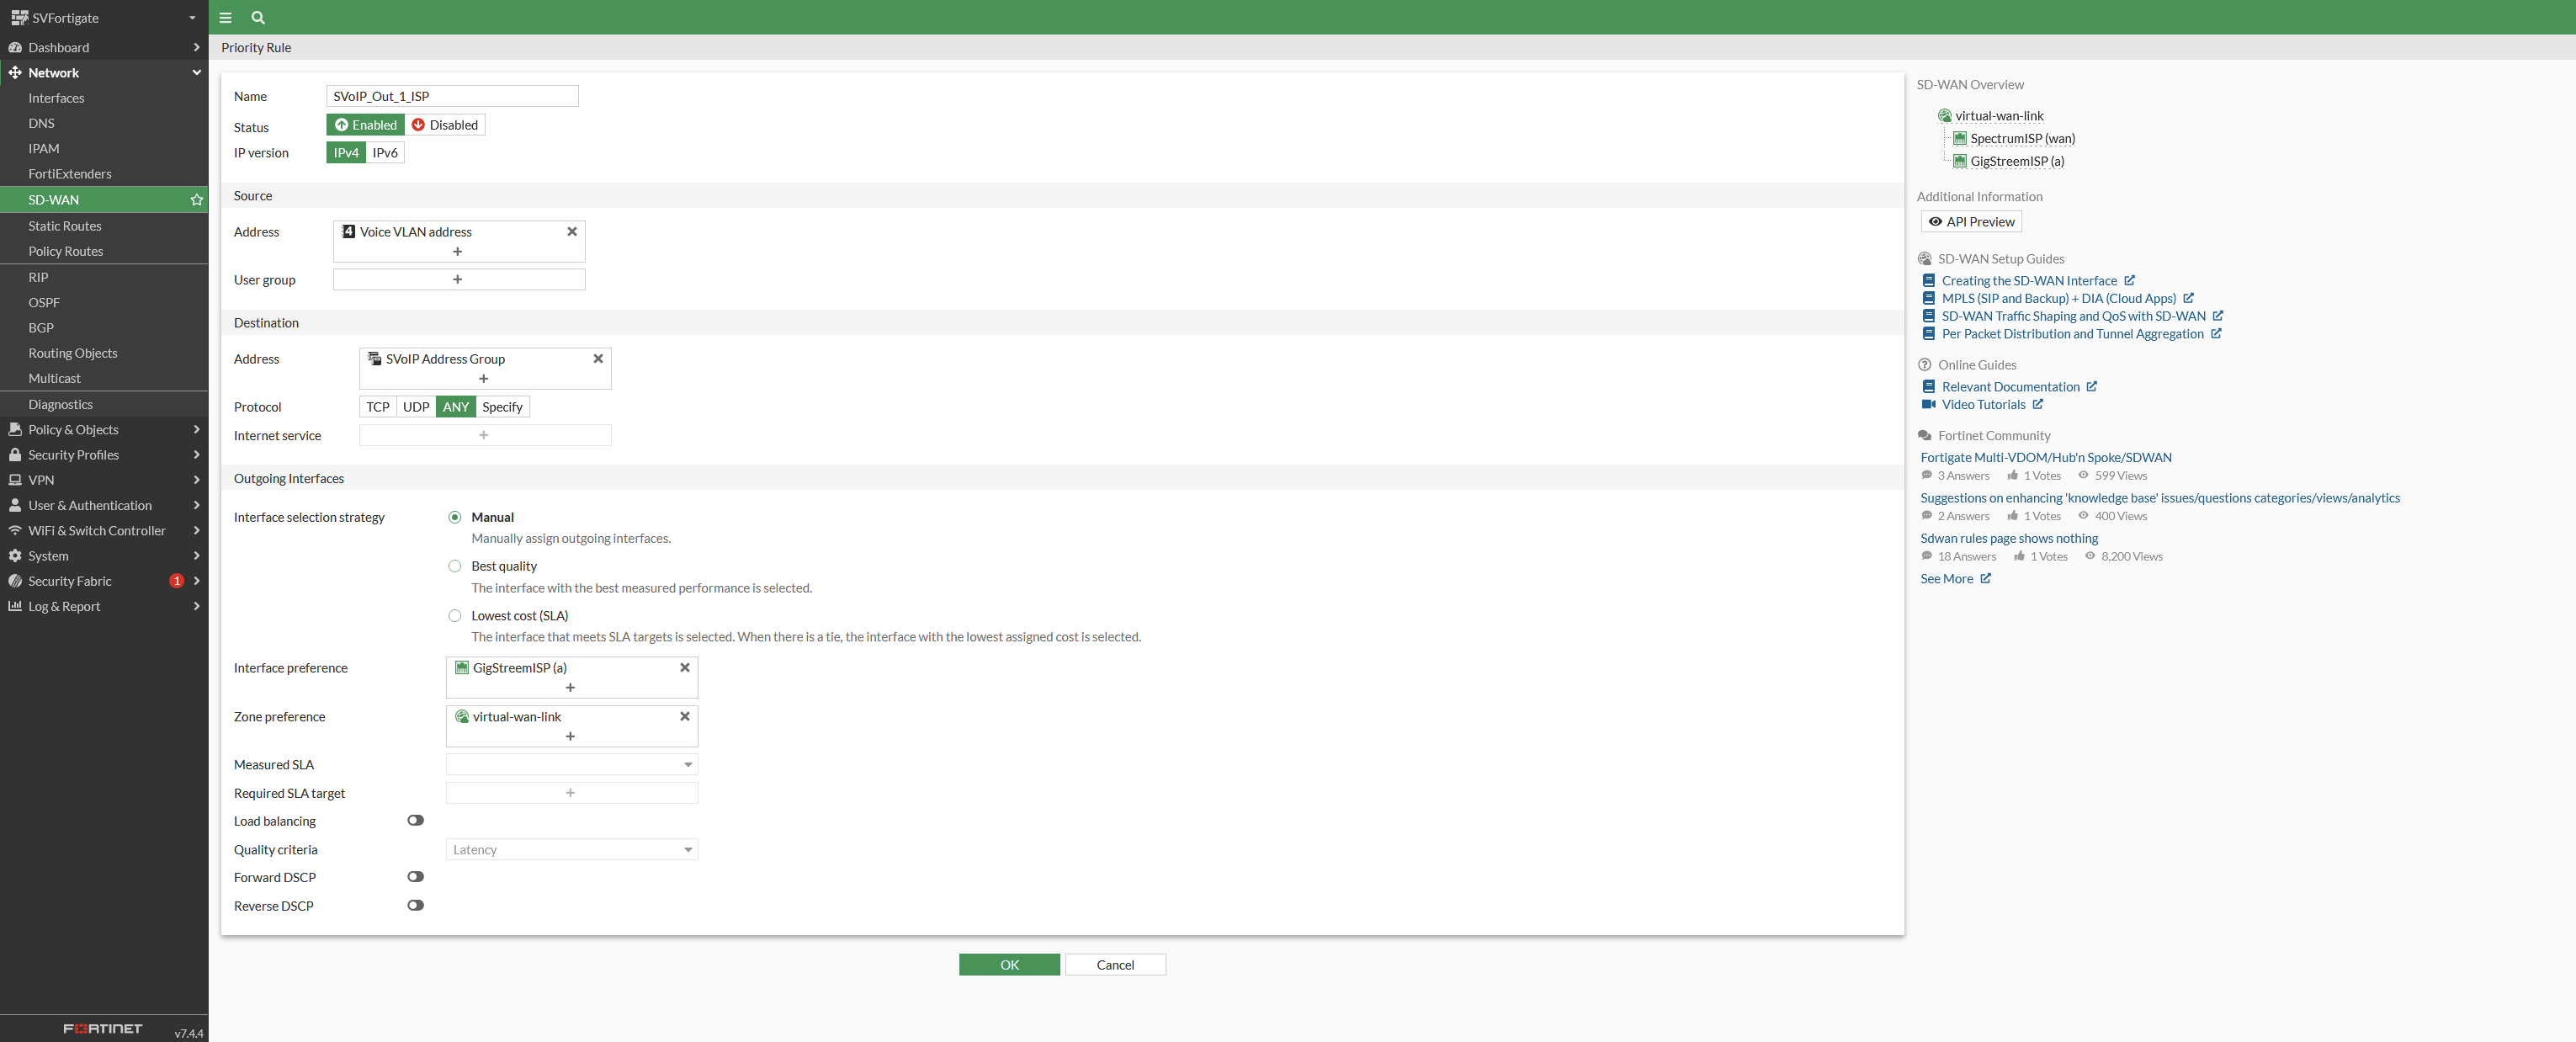
Warning:
There are many metrics that can be used to determine which ISP to send traffic out of, some common ones are jitter, latency, and packet loss. When manually setting the ISP for VoIP traffic, it will not load balance or fail-over to the secondary ISP. This will not affect other internet traffic.
✔ Congratulations! You have completed the pre-engagement setup.
If you have issues or questions with the configurations described above, a good first point of contact is to call our SpectrumVoIP technical support team at (469) 429-2500. Another excellent option is to call Fortinet at (844) 459-2514 or (866) 648-4638.
Please be aware that your device must have an active Maintenance and Support Agreement in effect for Fortinet's services.