Enswitch - Create a Holiday IVR Menu
Discover how you can create an IVR menu that will handle calls during the holidays.
Table of Contents
Configure a New Holiday IVR Menu
When the holidays arrive, you can ensure your calls are being routed properly using the Enswitch web portal. One of the most popular ways to route holiday calls is using a IVR menu.
✔ Using a holiday IVR menu is a great solution since you can have a set holiday greeting that plays before the menu allows the caller to choose where their call should be routed.
To create a new holiday IVR menu…
- Navigate to Features → IVR menus.
- Click the New >> button.

- In the IVR settings section, fill in the following information:

- * Name - Give the IVR menu a unique name, such as “Holiday IVR”.
- Description - If needed, add a note describing the IVR menu.
- Allow caller to enter feature code or telephone line - If callers should be able to dial feature codes or the 7-digit extension number of users, set this to yes.
- Time out after - Select how long (in seconds) the IVR menu should wait for a response before following its Time out option.
-
PIN for IVR setup menu - Type a set of numbers that will be used to access the IVR setup menu.
Note: A PIN must be set in order for the IVR setup menu to be used to manage the IVR menu's greetings.
- PIN repeat - Confirm the PIN from above.
-
Show in control panel - Select whether or not this IVR menu should be shown in the Control Panel.

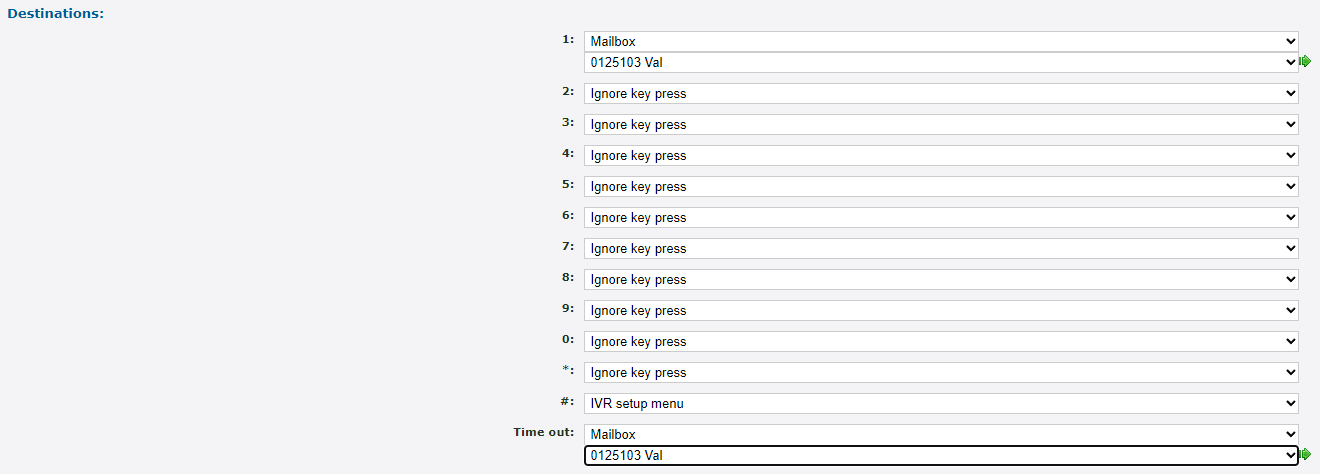
- In the Destinations section, use the drop-downs to select where calls should go when an option is pressed.

Quick Tip: It's recommended to leave option # set as IVR setup menu to allow you to use the setup menu to manage the greeting of your IVR menu.
- Click the Save button.

Add a Greeting to an IVR Menu
Now that an IVR menu has been created for holiday calls, a greeting will need to be added that informs callers about the holiday and their options they can select using their dial pad.
You can add a greeting to an IVR menu by either…
- Selecting a Sound as a greeting.
- Uploading a greeting from your PC.
- Calling the IVR menu and using the setup menu to record a greeting.
Select or Upload a Greeting
To set a greeting for the new IVR menu….
- In the IVR menu saved prompt, click upload one.

- In the Message file section, do one of the following:
- Use the Sound file to use drop-down to select a saved Sound file.

- Click the Choose File button to select and upload a .wav audio file from your PC.
DANGER: The audio file needs to be in a .WAV file, mono channel, and 8000 Hz format to be properly read in the phone system.
To convert your audio file, use this handy website:
G711.org - Telephony File Converter
When using this website to convert the file, select the “Standard Definition” option for the Output Format.Example Text-to-Speech Greetings for US Holidays
If you do not have the means to record a holiday greeting, you can use any of these example holiday messages instead.
Click the buttons below to download and listen to these example greetings that have been created using text-to-speech.
Do Not Mention Leaving a Message
If you are routing calls during the holidays to a mailbox to allow callers to leave a voicemail, it might be better to not have a holiday message ask callers to leave a message. Having both a holiday message and a mailbox's greeting mention leaving a message can cause confusion for some callers.
If your mailbox already tells callers to leave a message, feel free to use these greetings below.
✔ These holiday greetings are useful for functions, such as a Holiday Auto Attendant or IVR Menu, that route callers to an answering service's phone number or a mailbox that has its own greeting.
Generic Holiday Greeting
If you prefer the message used to not mention the name of the holiday, you can download and use this greeting:
Example Holiday Greeting
✔ Using this greeting can help you avoid having to remember to switch out the holiday greeting for each holiday.
New Years
Example New Year's Eve Greeting
Christmas
If you prefer your Christmas holiday message to say, “Merry Christmas”, you can download and use this greeting:
Example Merry Christmas Greeting
If you prefer your Christmas holiday message to say, “Happy Holidays”, you can download and use this greeting:
Thanksgiving
Labor Day
Memorial Day
Independence Day
If you would like your Independence Day message to say, “4th of July”, you can download and use this greeting:
If you would like your Independence Day message to say, “Independence Day”, you can download and use this greeting:
Example Independence Day Greeting
Mention Leaving a Message
If you are using these greetings for a holiday mailbox or as a greeting for a user's mailbox, you can download and use these holiday messages. These holiday greetings below ask callers to leave a message.
✔ These holiday greetings are useful for holiday mailboxes.
If you are wanting to replace a user's mailbox greeting with a holiday message, these greetings can also be used.
Generic Holiday Greeting
If you prefer the message used to not mention the name of the holiday, you can download and use this greeting:
Example Holiday Greeting
✔ Using this greeting can help you avoid having to remember to switch out the holiday greeting for each holiday.
New Years
Example New Year's Eve Greeting
Christmas
If you prefer your Christmas holiday message to say, “Merry Christmas”, you can download and use this greeting:
Example Merry Christmas Greeting
If you prefer your Christmas holiday message to say, “Happy Holidays”, you can download and use this greeting:
Thanksgiving
Labor Day
Memorial Day
Independence Day
If you would like your Independence Day message to say, “4th of July”, you can download and use this greeting:
If you would like your Independence Day message to say, “Independence Day”, you can download and use this greeting:
- Use the Sound file to use drop-down to select a saved Sound file.
- Click the Use or upload button.

Record a Greeting Using the IVR Setup Menu
To add a greeting to the Holiday IVR menu, the IVR's setup menu can be used when the IVR menu is called.
There are two ways an IVR menu can be contacted to do this:
- Route a phone number to the IVR menu.
- Use a feature code to call the IVR menu.
NOTE: In order to use the IVR setup menu, ensure that the IVR menu has a PIN configured.

Route a Phone Number to the IVR Menu
To be able to call the new IVR menu, a phone number can be set to route calls to the IVR menu.
To route a phone number to the IVR menu…
- Navigate to Features → Numbers.
- Select a phone number to route calls to the IVR menu.

-
In the Route calls to section, use the Default destination drop-down to select IVR menu and the name of the IVR menu.

-
Click the Save button.

- Call the phone number to contact the IVR menu.
- Press # (or any other option set as IVR setup menu).
- Enter the PIN for the IVR setup menu.
- Follow the prompts to manage the greeting of the IVR setup menu.
- If needed, remove the IVR menu from the phone's number's main routing.

Use a Feature Code to Call the IVR Menu
One way to call an IVR menu directly in order to use the IVR setup menu is to dial a feature code.
To create a feature code for reaching an IVR menu…
- Navigate to Features → Feature codes.
- Click the New >> button.
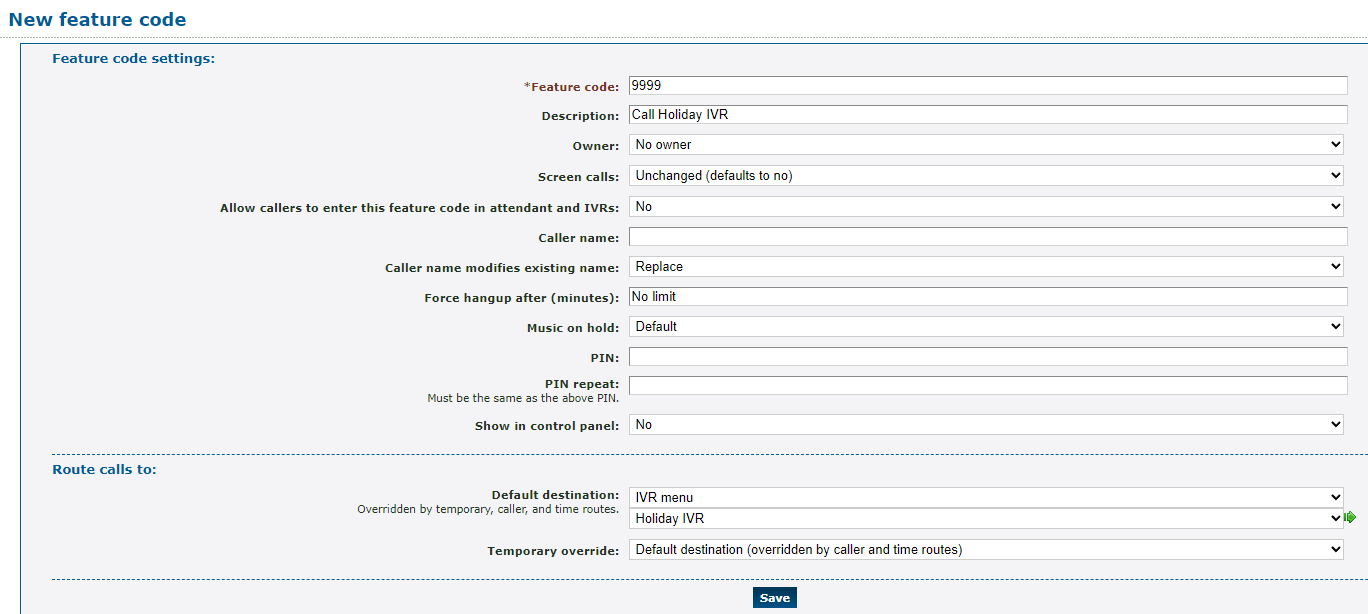
- On the New feature code page, fill in the following information:

-
* Feature code - Type a unique set of numbers that can be dialed on a SpectrumVoIP phone to contact the IVR menu directly.
DANGER: Do NOT use a N11 number, such as 911, 211, or 411.
- Description - If needed, add a note about the purpose of this feature code.
- Default destination - Select IVR menu and choose the name of the IVR menu using the second drop-down.
-
* Feature code - Type a unique set of numbers that can be dialed on a SpectrumVoIP phone to contact the IVR menu directly.
- Click the Save button.

Route Holidays Calls to the Holiday IVR Menu
Now that a holiday IVR menu has been created that will play a holiday greeting before routing calls, the new IVR menu will need to be added to a phone number's holiday time route.
To add this holiday IVR into a phone number's routing…
- Navigate to Features → Numbers.
- Select the phone number that needs to temporarily be forwarded.
- In the Time routes section, click the Add a time route >> button.

- In the New time route window, fill in the following information:

-
Time group - Use the drop-down to select the Holidays time group.

-
Forwards matching calls to - Select IVR menu and the newly created holiday IVR menu.

-
Time group - Use the drop-down to select the Holidays time group.
- Click the Save button.

✔ You should now see the new Holidays time route routing calls to the holiday IVR menu.

The destination of this time route can be edited at any time by clicking its name.
Clicking Edit time group will take you to where you can add more time periods for the time group to be active in.
Place a Test Call
To confirm your holiday routing is implemented correctly, it is recommended to give your phone number a test call.
WARNING: It is recommended to use this method if your organization is not busy receiving calls to ensure callers are not accidentally routed using the holiday routing.
If your organization is too busy for a test call directly to your phone number, consider testing this routing during lunch or the after hours.
To test out your holiday routing by placing a call to the phone number…
1. Navigate to Features → Numbers.
2. Click the phone number that has the holiday routing set.
3. In the Time routes section, click Edit time group next to the holiday time route.
4. In the Time periods section, click the New >> button.
5. In the Time period settings section, use the Description box to type a note about this time period.
6. In the When the time period starts and stops each day section, select a brief time period for when your test call will be placed.
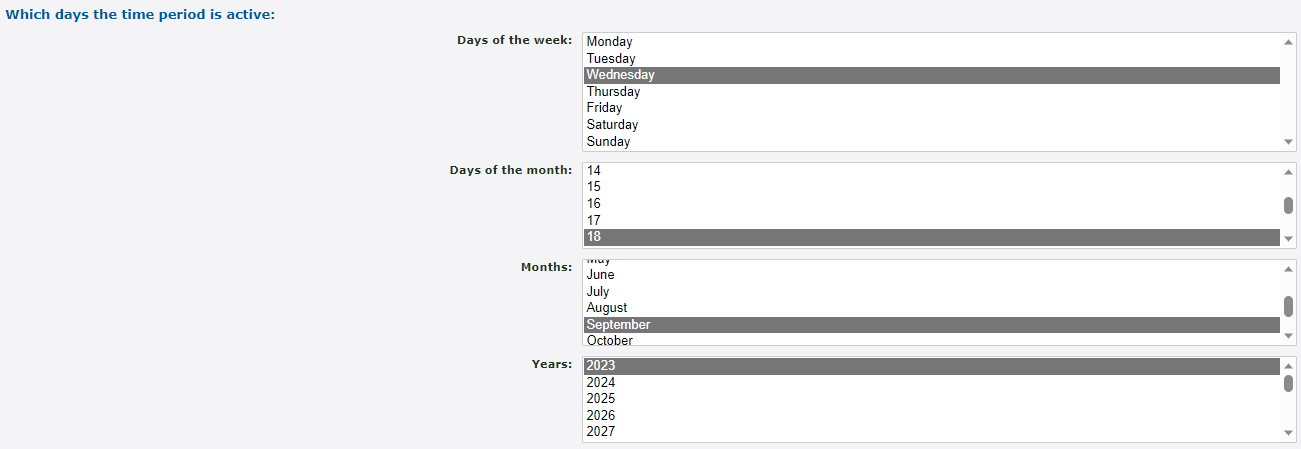
7. In the Which days the time period is active section, select the day you are placing this test call.
8. Click the Save button.
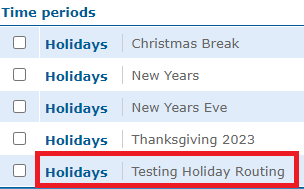
✔ Your new time period should now be seen in the list of time periods for the holiday time group.

9. Call your phone number and confirm that the call is routed to the correct destination.
10. Once your test call is complete, you can select the test time period and click the Delete selected button.
