Enswitch - Forward Calls for the Holidays
Discover how you can forward your business' calls during the holidays using the Enswitch web portal.
Table of Contents
Set Up Holiday Call Routing
During the holidays, you can have calls route wherever you need them to do with easy. Holiday call forwarding can be set up ahead of time to give you some peace of mind.
To do this, you can create time groups that determine when the system should forward calls and time routes that tell the system where calls should be routed when a time group is active.
Create a Time Group
In order to tell the system when a holiday forward should start and end, a time group will need to be created.
To configure a time group…
- Navigate to Features → Times and dates.
- Click the New >> button.
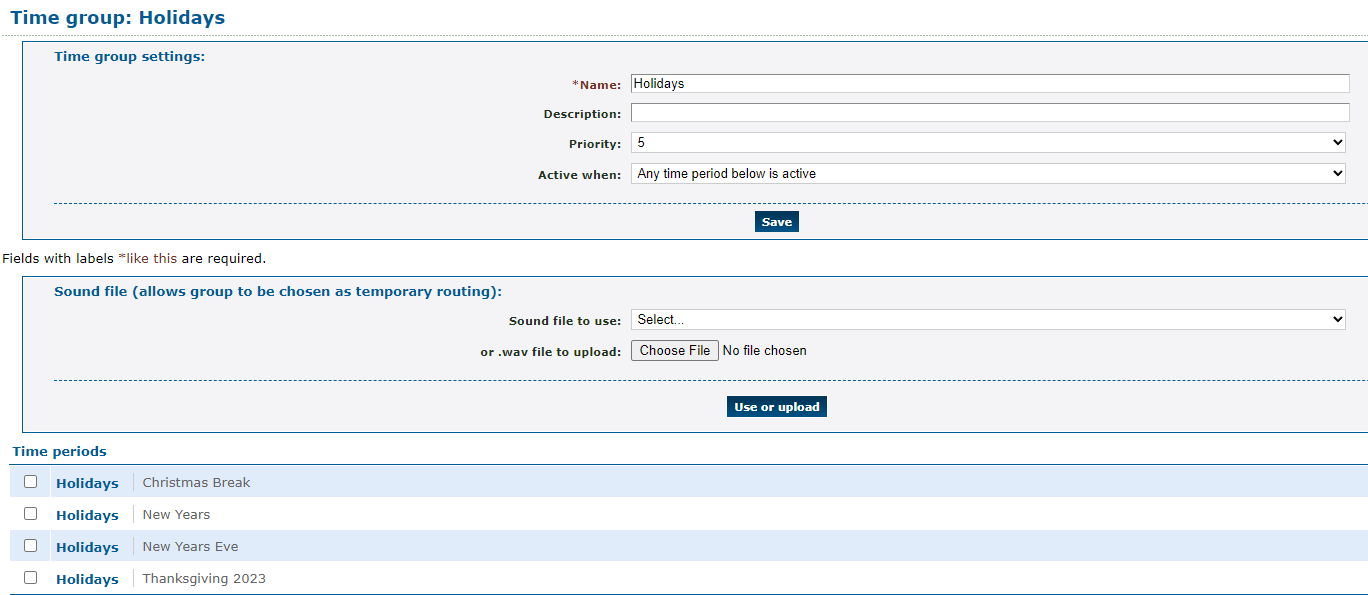
- On the New time group page, fill in the following information:

- *Name - Give the time group a unique name to identify it by, such as Holidays.
- Description - If needed, add a description that will show by the time group's name.
-
Priority - For Holiday routing, it is recommended to select 5 as the Priority.

-
Active when - Leave this set as Any time period below is active.

- Click the Save button.
- On the Time group saved message, click Add a new time period >>.

- On the New time period page, use the Time period settings section to give the time period a descriptive name and an optional description.

- In the When the time period starts and stops each day section, use the dropdowns to select your business hours.

Note: The times shown will be in the 24-hour format.
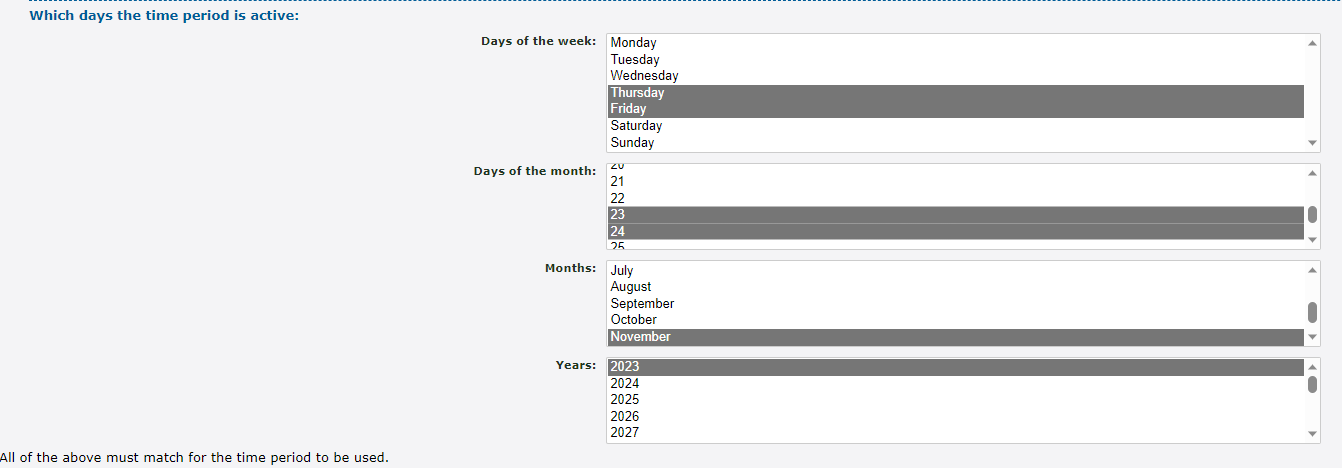
- In the Which days the time period is active section, select the day, month, and year that this specific period will be active for.

Quick Tip: If needed, multiple days can be selected as long as they both follow the same start and stop times.
To select multiple days, either click and drag to highlight multiple, or press Ctrl while clicking.
- Click the Save button.
- Click Continue editing the time group >> to view the time group and its time periods.

- To add more time periods, click the New >> button and repeat Steps 6-10.

✔ You should now have a list of any time periods you have created for specific holidays.

More time periods can be added in the future that will determine when this time group should be active.
Set Up a Time Route
Now that a holiday time group has been created, a time route can be set up for a number that will tell the system where calls should be routed when that time group is active.
To configure a time route for a phone number…
- Navigate to Features → Numbers.
- Select the phone number that needs to temporarily be forwarded.
- In the Time routes section, click the Add a time route >> button.

- In the New time route window, fill in the following information:

-
Time group - Use the drop-down to select the Holidays time group.

-
Forwards matching calls to - Select the destination for calls that are forwarded during the holidays. Commonly used destinations include…
- A Number
- An IVR menu
- A Holiday Mailbox
- A User's Mailbox
- A Dial by name menu
-
Time group - Use the drop-down to select the Holidays time group.
- Click the Save button.
✔ You should now see the new Holidays time route and where it will route calls.

The destination of this time route can be edited at any time by clicking its name.
Clicking Edit time group will take you to where you can add more time periods for the time group to be active in.
Place a Test Call
To confirm your holiday routing is implemented correctly, it is recommended to give your phone number a test call.
WARNING: It is recommended to use this method if your organization is not busy receiving calls to ensure callers are not accidentally routed using the holiday routing.
If your organization is too busy for a test call directly to your phone number, consider testing this routing during lunch or the after hours.
To test out your holiday routing by placing a call to the phone number…
1. Navigate to Features → Numbers.
2. Click the phone number that has the holiday routing set.
3. In the Time routes section, click Edit time group next to the holiday time route.
4. In the Time periods section, click the New >> button.
5. In the Time period settings section, use the Description box to type a note about this time period.
6. In the When the time period starts and stops each day section, select a brief time period for when your test call will be placed.
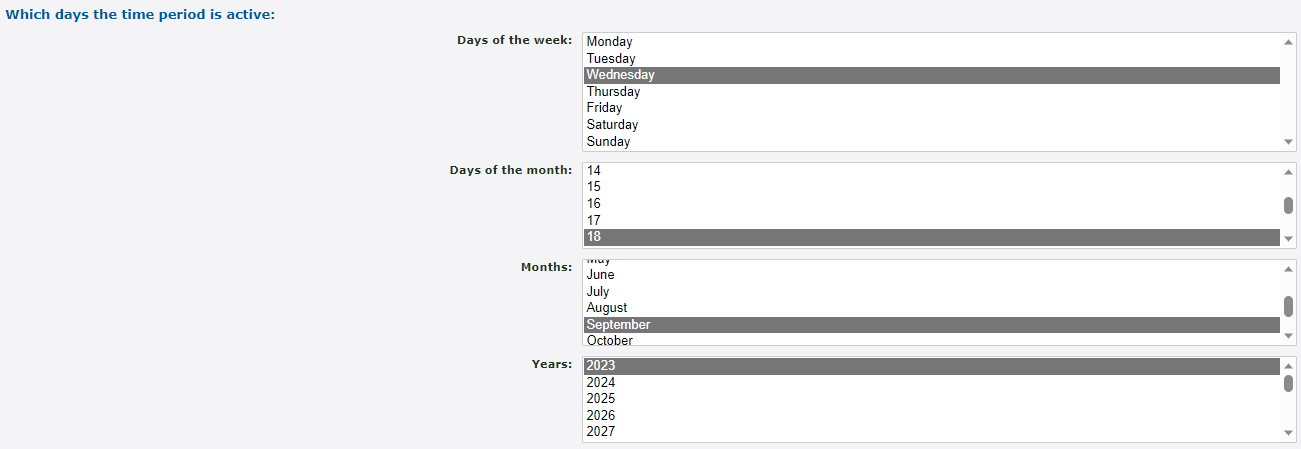
7. In the Which days the time period is active section, select the day you are placing this test call.
8. Click the Save button.
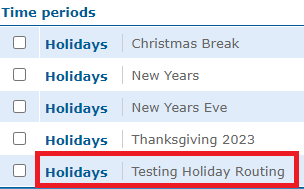
✔ Your new time period should now be seen in the list of time periods for the holiday time group.

9. Call your phone number and confirm that the call is routed to the correct destination.
10. Once your test call is complete, you can select the test time period and click the Delete selected button.