Enswitch - Manage Your Phone Numbers
Learn more about how you can edit the settings and routing of the phone numbers.

Written by Val Campos
Updated at August 7th, 2024
Table of Contents
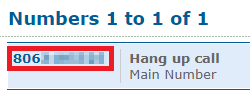
One the phone manager page, you can view the phone numbers that you have been set as the Owner for.
To view your phone numbers, navigate to Features → Numbers. 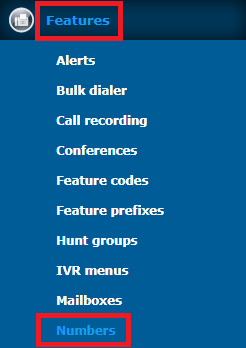
On the Numbers page, you can do the following:
-
View the phone number(s) that you are set as the owner for.

- Check where each number routes according to set Time Routes.

- Confirm the Default Destination for calls outside of a Time Route.

-
Click a phone number to edit its settings and routing.

-
Make bulk changes to multiple phone numbers.
Adjust a Phone Number's Settings
To configure the settings of a phone number…
- Click the phone number that needs adjustment.
- In the Number settings section, adjust the following settings as needed:
| Option | Description |
|---|---|
| Description | If needed, you can adjust the Description shown for the phone number
|
| Owner | If needed, select a user that should have the ability to view and edit the settings and routing of the selected phone numbers. |
| Screen calls |
If needed, call screening can be enabled or disabled for calls to your phone number. Quick Tip: Enabling call screening can help mitigate robo calls and some spam calls. • Yes, and play caller id - The user that receives the call will hear a message that plays the caller's caller ID before prompting the user to press 1 to accept the call or hang up to reject the call. |
| Allow callers to enter this number in attendant and IVRs |
Select whether or not this phone number can be dialed by callers in an auto attendant or IVR menu. Quick Tip: Enabling this may be useful for internal phone numbers that an employee or vendor may know to dial to reach a certain department or employee. |
| Force callerid | If needed, the Caller ID for inbound calls to this phone number can be changed to look like one of your owned phone numbers. By default, the system should show the Original caller ID of the caller. |
| Caller name |
The Caller Name shown for calls made to the selected phone numbers. Quick Tip: Adding a Caller Name can be useful for distinguishing when a caller is calling a phone number that has a specific purpose, such as vendors calling a phone number meant for a shipping department. |
| Caller name modifies existing name | Select how the Caller Name should appear for agents receiving calls made to the phone number. • Replace - Replace the Caller ID of the caller with the Caller Name selected above. • Prepend - Add the Caller Name selected above to the front of the caller's Caller ID. • Append - Add the Caller Name selected above to the end of the caller's Caller ID. |
| Music on hold | Select the genre of music that should play for callers waiting on hold after calling the selected phone numbers. |
| PIN | Enter a series of numbers that the caller should enter to have their call routed. Doing this can be useful for phone numbers that should only be used by internal users. |
| Force hangup after (minutes) | Type how long (in minutes) that the system should allow this phone number to ring before hanging up the call. By default, this will be set to No limit. |
| Show in control panel |
Choose whether or not this phone number should be shown in the Control Panel page. ✔ Enabling this option will allow calls to be dragged and transferred to the IVR Menu using the Control Panel page. |
| Inbound SMS Destination |
If SMS services are enabled for your account, type the destination for SMS messages. WARNING: This phone number must be set up with SMS services through an SMS campaign. An Owner must also be set for this phone number. |


- Once the phone number's settings have been adjusted, click the Save button or check out Time Routes section below to explore routing phone numbers.
Make Bulk Changes
If you have more than one phone number that needs the same settings updated, you can use the Bulk Change feature to avoid having to edit the settings of your phone numbers one-by-one.
To make bulk changes to multiple phone numbers…
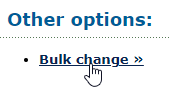
- On the Numbers page, click Bulk change >> under Other options.
- On the Bulk change numbers page, use the Numbers to change box to select phone numbers that need the same changes and click << Add selected.

- In the New settings section, adjust the following settings that should be updated for the phone numbers selected.
| Option | Description |
|---|---|
|
Change description & New description |
If needed, you can adjust the Description shown for the selected numbers. 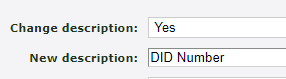
|
| Owner | If needed, select a user that should have the ability to view and edit the settings and routing of the selected phone numbers. |
|
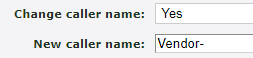
Change caller name & New caller name |
The Caller Name shown for calls made to the selected phone numbers. Quick Tip: Adding a Caller Name can be useful for distinguishing when a caller is calling a phone number that has a specific purpose, such as vendors calling a phone number meant for a shipping department. |
| Caller name modifies existing name | Select how the Caller Name should appear for agents receiving calls made to the selected phone numbers. • Replace - Replace the Caller ID of the caller with the Caller Name selected above. • Prepend - Add the Caller Name selected above to the front of the caller's Caller ID. • Append - Add the Caller Name selected above to the end of the caller's Caller ID. |
| Music | Select the genre of music that should play for callers waiting on hold after calling the selected phone numbers. |
|
Change default destination & Default destination |
If needed, adjust the Default Destination that calls should be sent to when these phone numbers' Time Routes are not active.
Quick Tip: The Default Destination is usually treated as the destination for afterhours calls. |
| Temporary routing |
Setting routing using this method will forward calls until the routing is returned to normal. This is great for temporarily forwarding calls when an end time for forwarding is unknown. Note: To learn how to set forwarding for a specific amount of time, check out this guide • Default destination (overridden by caller and time routes) - Allow the numbers' caller and time routes to route calls. This option is used by default. Quick Tip: If Default destination (ignore caller and time routes) or Specific number are selected, select Default destination (overridden by caller and time routes) to return the routing to normal. |
| Announcement message | Select a saved Sound to use as a message to be played to callers when they dial the selected phone numbers. |

- In the Caller and time routes section, you can add/replace Caller Routes and Time Routes:
Time Routes
To add or replace a Time Route, do the following:
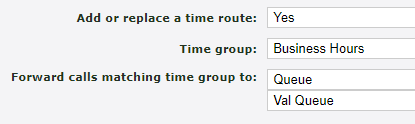
1. Use the Add or replace a time route dropdown to select Yes.
2. Use the Time Group dropdown to select an existing Time Group to be referenced.
3. Use the Forward calls matching time group to dropdown to specify how calls during this time group should be routed.Caller Routes
To add or replace a Caller Route, do the following:
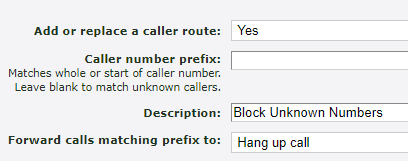
1. Use the Add or replace a caller route dropdown to select Yes.
2. In the Caller number prefix box, type a whole or part of a telephone number that this Caller Route should apply to.Quick Tip: If you are wanting to use this Caller Route for callers with Unknown Number as their caller ID, leave this field blank.
3. In the Description box, type a note about the purpose of this Caller Route.
4. Use the Forward calls matching prefix to dropdown to select how calls from this caller should be routed. - When you are ready to apply these changes to the number(s) selected, click the Change button.
Phone Number Routing Methods
While you are viewing a phone number, you have the ability to adjust how the number handles routing.
You will have the options to…
- Update the phone number's Default Destination for calls made outside of the phone number's Time Routes.
- Set up Time Routes for scheduling call forwarding for the phone number.
- Implement a Temporary Override to indefinitely forward the phone number's calls.
Use the following module to learn more about these methods:
The Default Destination
When a phone number receives a call outside of a phone number's set Time Routes, the call is routed according to what is set as the Default Destination.
• If the phone number does not have any Time Routes set, then the Default Destination will be where all calls are sent regardless of the time-of-day. 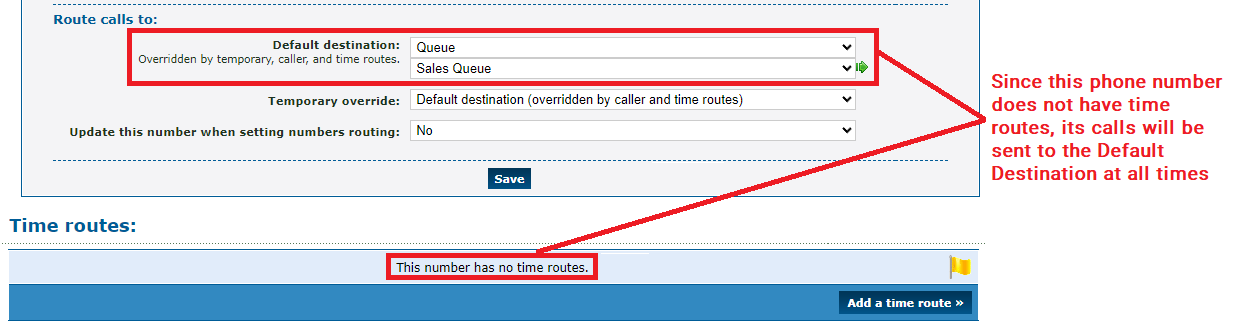
• If there is a Business Hours time route, then the Default Destination will usually act as the destination for calls received after hours. 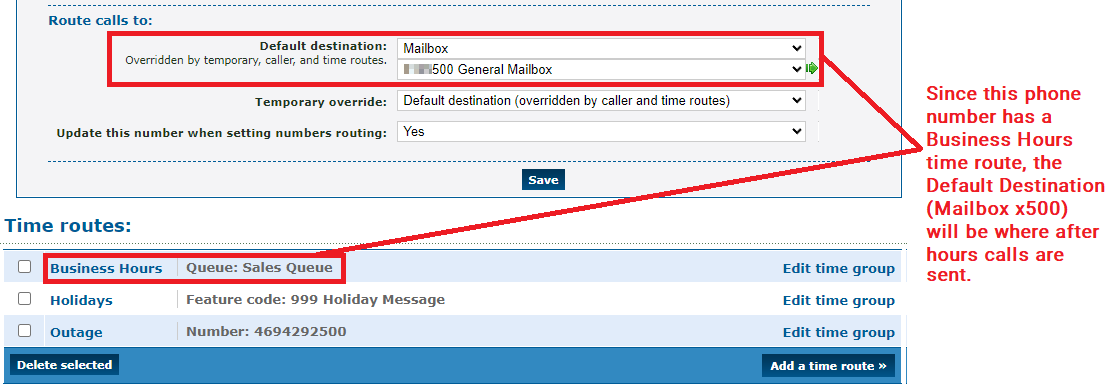
Update the Default Destination
If you need to update the Default Destination for a phone number, do the following:
1. Scroll down to the Route calls to section and use the Default Destination dropdown to select the feature to route the calls to.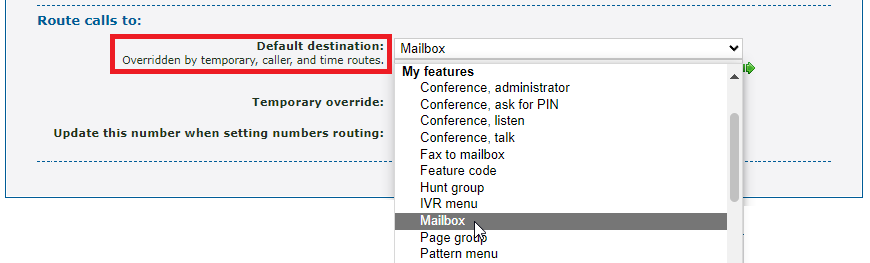
2. Use the second box that appears to specify where the calls should be sent.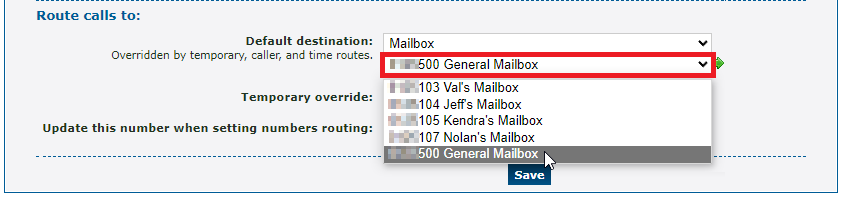
Time Routes
Sometimes having calls forwarding indefinitely can be inconvenient since that forwarding would need to be disabled.
If you know how long calls should be forwarded for, you can create a Time Route that tells the system where to route calls when a specific time group is active.
NOTE: Time Groups can only be created by an Enswitch admin user of your account or our technical support team.
To configure a time route for a phone number using an existing time group…
1. Navigate to Features → Numbers.
2. Select the phone number that needs to be temporarily forwarded.
3. In the Time routes section, click the Add a time route >> button.
4. In the New time route window, fill in the following information: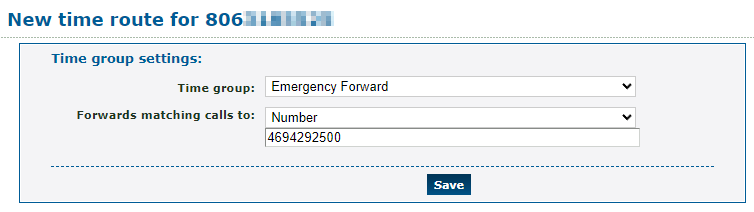
• Time group - Use the drop-down to select the time group that this route will use.
• Forwards matching calls to - Select the destination for calls that are forwarded during this time. Commonly used destinations include…
– Number
– IVR menu
– Mailbox
– Dial by name menu
5. Click the Save button.
✔ You should now see the new time route and where it will route calls.
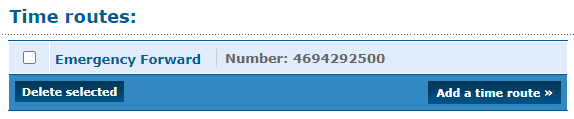
The destination of this time route can be edited at any time by clicking its name.
Temporary Overrides
One of the ways you can forward your calls is by setting up a temporary override on one of your phone numbers. Calls forwarding in this way will continue to do so until the temporary override is removed.
To indefinitely forward calls to a different phone number using a temporary override…
1. Navigate to Features → Numbers.
2. Select the phone number that needs to temporarily be forwarded.
3. In the Route call to section, use the Temporary override drop-down to select Specific number.
4. In the Number box, type the phone number that calls should be routed to.
5. Test this forwarding by giving your business' number a call to see where it routes
✔ This temporary forward will remain active until the temporary override option is returned to normal.
Remove a Temporary Override
Once you are ready for calls to stop forwarding, the temporary override can easily be removed.
To return the number's routing back to normal, use the Temporary override drop-down to select Default destination (overridden by caller and time routes).