Schedule Lunch Routing for Your Business
Discover how you can schedule lunch for your business and determine where calls go for that time.
Table of Contents
Scope: Office Managers and Site Managers will be able to adjust the Answering Rules and Time Frames for their organization and all users.
Basic Users can adjust their own Answering Rules and Time Frames.
Set Up Lunch Routing
Using Time Frames and Answering Rules, you can route calls your business receives during lunch ahead of time with ease.
Create a Lunch Time Frame
In order for the system to know when you should have calls routed for lunch, a time frame will need to be created.
To add a new Lunch time frame…
- Navigate to the Time Frames page.

- Click on the name of your business (Domain Name) to pull up a list of the time frames for the whole business.

Quick Tip: Alternatively, you can search for and click on the name of a User that needs this routing just for themself.
- Click the Add Time Frame button to create a new holiday time frame.

- In the Add a Timeframe menu, fill in the following information:
-
Name - Type in a unique name for this time frame, such as Lunch.

-
When - Select Days of the week and times

-
Name - Type in a unique name for this time frame, such as Lunch.
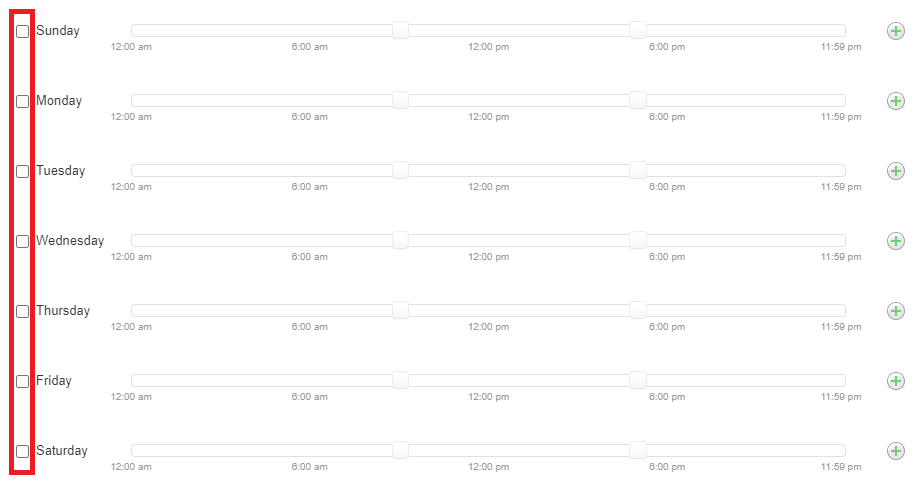
- Select the days that the business is open and has a lunch break.

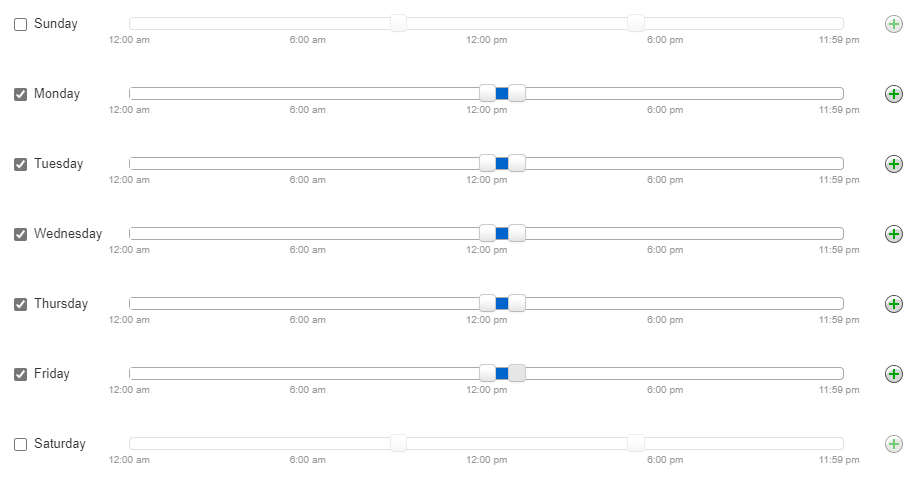
- Move the first slider to match the time lunch starts and the last slider to match the time lunch ends.

-
Repeat step 6 for each needed day.
✔ You should now see those days with the lunch times allotted.

- Click the Save button.

✔ Now your new, Lunch time frame should be included in your list of time frames, like so:

Review Your Phone Number's Routing
In order to know where we need to add the special lunch routing we will create; we need to confirm where your phone number is routing calls.
To check the Destination for calls to your phone number navigate to the Inventory page. On this page, you can check where your phone numbers are routing calls.

Take note of the Destination for that phone number for the next step.
Create a Lunch Answering Rule
Now that we have a Lunch time frame and know where calls for your phone number are being routed, we can add in an Answering Rule that will route calls somewhere when the lunch time frame is active.
To create a Lunch Answering Rule…
- Navigate to the Users page.

- Use the search bar to find the user (Inbound Routing User, Call Queue, Auto Attendant, User, etc.) that handles calls for your phone number

- Click the name of the user and visit the Answering Rules tab.
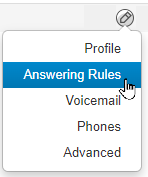
Quick Tip: Alternatively, click the Edit icon and select Answering Rules.

- Click the Add Rule button.

- In the Add Rule window, use the Time Frame drop-down to select the new Lunch time frame.

- If the rule should be active when the time frame is active, ensure the Enabled checkbox is selected.

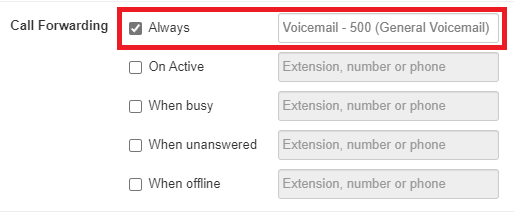
- In the Call Forwarding section, select the Always checkbox. In the box, type the destination for calls during your lunches.

Quick Tip: Possible destinations include:
– The Phone or Voicemailbox of a Specific User
– General Voicemailboxes
– Call Queues
– Auto Attendants
– Conference Bridges
– An Off-Net 10-Digit Phone Number (Answering Service, Cellphone, etc.) - Click the Save button.

✔ You will then see the new lunch rule in the list of the user's answering rules.

-
Make sure that the Lunch rule is above the Business Hours rule in priority.
- You can move Time Frames around by clicking and dragging the triangles on the left-hand side of the answering rules.

- The rules take priority from top-to-bottom.
- Top = Highest Priority (Usually a Temp Forward or Holiday answering rule)
- Bottom = Lowest Priority (Default/After Hours answering rule)
- You can move Time Frames around by clicking and dragging the triangles on the left-hand side of the answering rules.