Create a Lunch Auto Attendant
This article provides a step-by-step guide on how to set up a lunch auto attendant for your phone system, allowing you to give callers the power to determine where their call goes when they call when your office is closed for lunch.

Written by Val Campos
Updated at September 4th, 2025
Table of Contents
Why Use an Auto Attendant for Lunch?
If your office observes a period of time for lunch where calls are not handled, having an auto attendant handle those calls can help your callers avoid any confusion. This lunch auto attendant can tell your callers that the office is closed. This auto attendant can also allow callers to select how their call should be handled according to the dial pad menu options they can use.
✔ Using an auto attendant for calls received during lunch can help callers know that you are closed and what their options are for having their call handled, such as leaving a message or listening for when your office will re-open.
Configure the Auto Attendant
To implement this type of auto attendant, the following will need to be done:
- Add a new auto attendant.
- Set up a menu prompt for the auto attendant.
- Configure the dial pad menu's options.
- (Optional) Adjust any extra settings for the auto attendant.
Step 1: Add the Auto Attendant
- Navigate to the Auto Attendants page.

- Click the Add Attendant button.

- In the Add an Auto Attendant menu, fill in the following information:

- Name - Type in a descriptive name for the auto attendant.
-
Extension - Type an extension number that is not yet in use.
Quick Tip: Extension numbers in the 8100s are recommended for auto attendants.
\It is also good practice to keep your Auto Attendants in sequential order by organizing them in number ranges.
For example, if you have an Auto Attendant already created that is extension 8100, then the next New Auto Attendant would be created as 8101, then 8102, and so on.
- Time Frame - Select default (all the time).
- Click the Add button when finished.

✔ Clicking Add will pop up a new screen for configuring the new auto attendant's prompt and dial pad menu options.

Step 2: Create a Lunch Message
- Click the Manage Audio
 icon.
icon.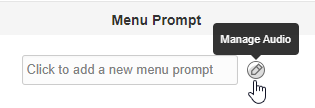
- In the Manage Audio modal, create a greeting using either of these methods:
- Use the Text-To-Speech tool.

-
Upload a greeting from your PC.

WARNING: The audio file should be a 16-bit WAV (8Khz, Mono, 16-Bit PCM) file.
Convert an Audio File Using G711.org
To convert the audio file, you can use a free site named g711.org. To do so…
1. Visit g711.org.
2. In the Source File section, click the Browse button.

3. Select the audio file to be converted.

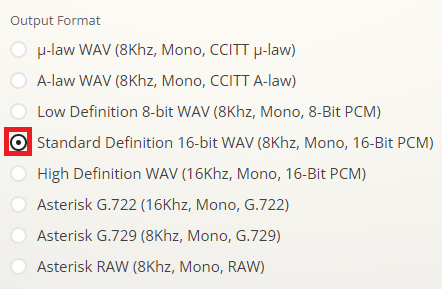
4. In the Output Format section, ensure that the Standard Definition option is selected.
5.Click the Submit button.

✔ Doing so will pull up a new page with a link.
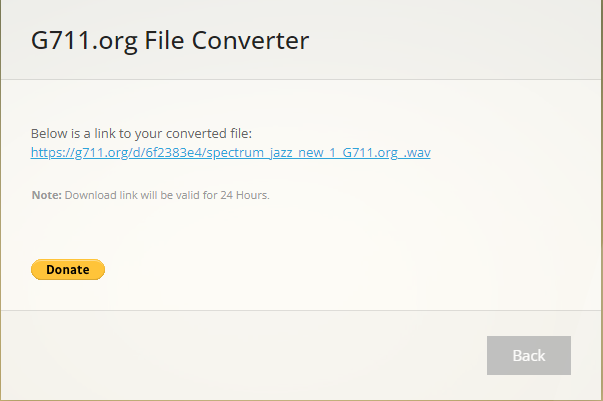
6. Right-click the link and select Save link as.

7. In the File name box, type a name for the converted audio file and then click the Save button.

DANGER: Not converting the music file can cause catastrophic issues for your phone system.
-
Record a greeting by sending a call to be recorded to a phone.

- Use the Text-To-Speech tool.
- Once completed, click the Save button.

Step 3: Set Up the Dial Pad Menu Options
- In the Dial Pad Menu section, click a Dial Pad Menu number.
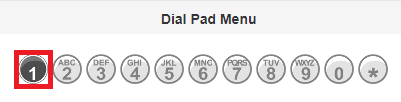
-
Select an application to use for that number.

Available Dial Pad Menu Options
User
This menu option will take the caller to the extension entered.
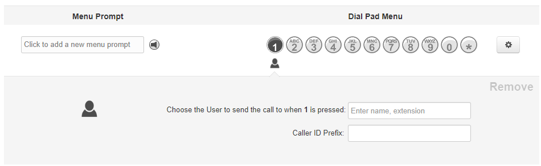
You can search the internal user by name or the extension number.
The Caller ID Prefix will add text to the front of the caller ID.
Conference
This option will take the caller to a specified Conference Bridge.
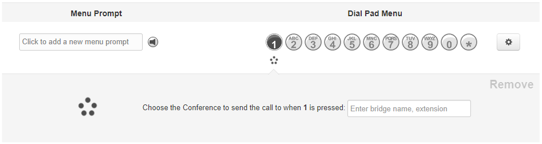
To add this option, type in the name or the extension number of the Conference Bridge. Click Save to completely add in this option.
Call Queue
This will menu option will take the caller to a Call Queue specified in the field below.
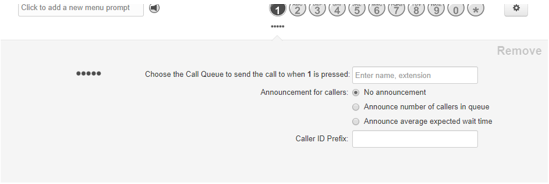
Select a call queue by typing in the name or the extension of the particular call queue.
Using the extra options, users can add in an announcement message of how many callers are in the queue, or how long the expected wait time is for callers.
The Caller ID Prefix will add text to the front of the caller ID.
– This option can be handy for labeling calls originating from certain phone numbers on the account.
– This option is also commonly used for labeling calls with the name of the department the call is going to.Directory
This menu option will take the caller to the Dial-by-Name Directory.
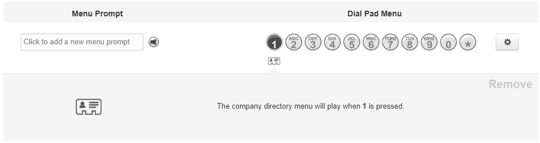
From the dial-by-name directory, callers will be able to look up a user using the first 3 letters of either their first or last name.
Note: By default, the dial-by-name directory searches users by last name.
To adjust the directory to search by first name, please contact our technical support team by calling (469) 429-2500 or emailing support@spectrumvoip.com.
Voicemail
This menu option will take the caller to the specified User's Voicemail to leave a message.
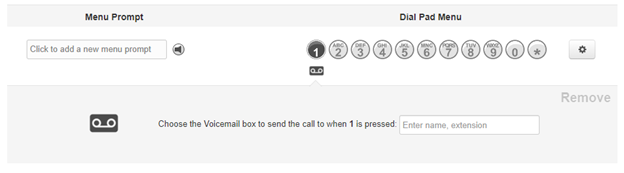
To select a specific user's voicemail, type in the name or the extension of a specific voicemail box.
Voicemail Management
This will take the caller to a directory-like menu where they can access a specific voicemailbox.
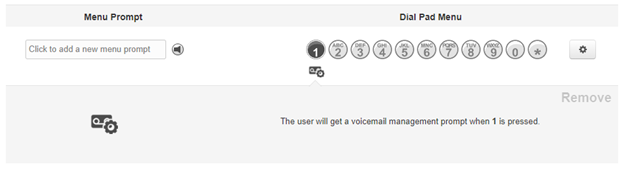
The Voicemail Management prompt will ask for the extension number of the mailbox and that extension's voicemail PIN.
External Number
This option will take the caller to an external 10-digit phone number.
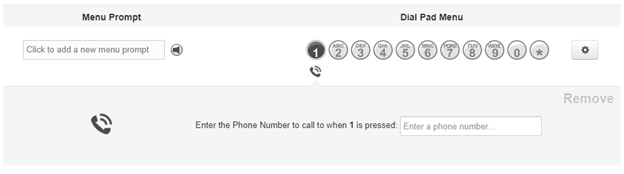
Type in the phone number you want the system to dial when pressing this option.
Play a Message
This will take the caller to recorded message.
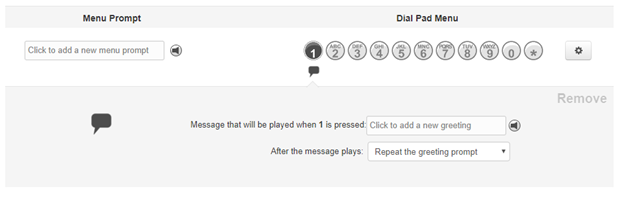
You will need to provide the message that the system will play the caller. In order to add in this audio…
1) Click the Manage Audio icon.
✔ Clicking this icon will pull up the Manage Audio menu.
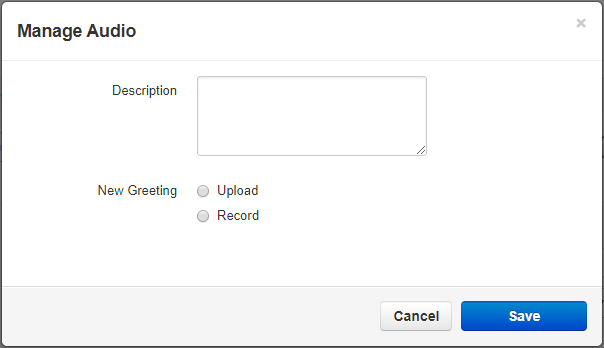
2) In the Description box, type a name for the greeting.
3) Add in the audio file by either uploading an audio file (in a WAV file, mono channel, and 8000 Hz format) or recording a greeting.
– Upload: Click the Browse button and select a formatted audio file from your PC. Click the Save button.DANGER: The audio file needs to be in a WAV file, mono channel, and 8000 Hz format to be properly read in the phone system.
To convert your audio file, use this handy website:
– Record: Type in an extension number or a phone number to send a call to. Follow the phone call's prompts to record the message.
4) Click Save to add the message.
5) Use the After the message plays drop-down to select the caller's next destination.
– Select Repeat the greeting prompt from the drop-down to route the call back to the main menu.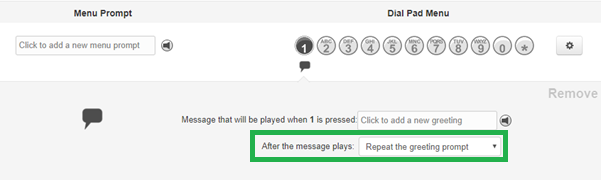
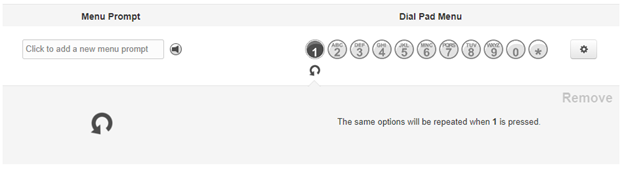
Repeat Prompt
Using this option will replay the main greeting.
Add Tier
This menu option will give callers another menu to route the calls without creating another auto attendant.
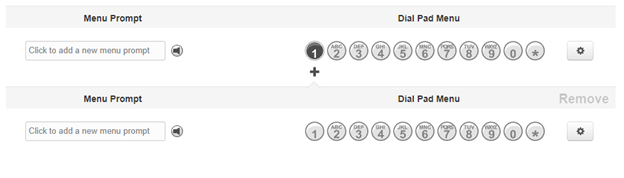
Note: The max number of tiers you can have is 1; however, each Dial Pad Menu option can have its own extra tier.
- Fill in and select any options shown for the application selected.

Note: Depending on the application selected on step 2, the options shown will differ.
- If needed, click Remove to remove the dial pad menu option being configured.

- Once completed, click the Save button.
(Optional) Adjust Extra Options
While setting up an Auto Attendant, there are extra settings that can be adjusted to fine-tune how the Auto Attendant acts.

Click the Options button on the right to pull up the Options menu where the basic and speech keyword settings can be adjusted.
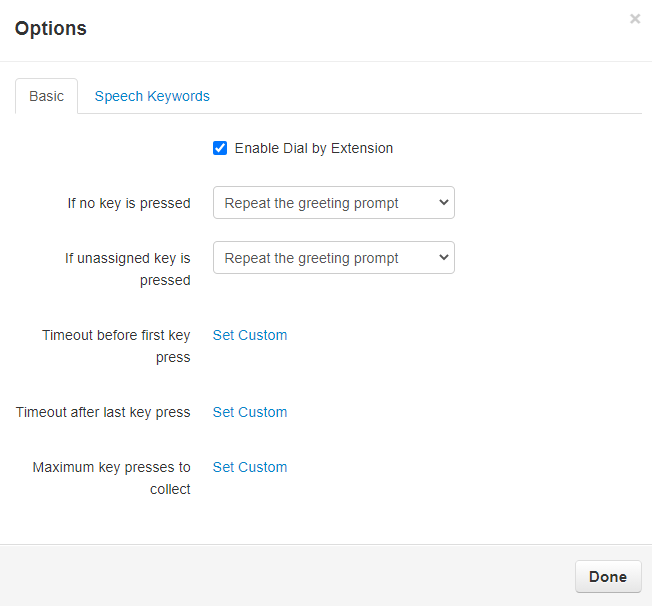
Basic Options
There are several, basic settings that can be adjusted to customize an auto attendant. Each of these settings affects how the auto attendant will handle a call under certain circumstances.
Basic Options to Adjust
Dial by Extension
The Dial by Extension feature allow callers in an auto attendant to dial the extension number of an employee to skip past using the options.
Quick Tip: Disabling Dial by Extension ensures that callers can only follow the auto attendant's options.
This setting is enabled by default and can be easily switched by clearing the checkbox.
If no key is pressed
If the caller does not select an option before the timeout expires, you can route the call to repeat the greeting, go to an option that is already set, or hang up the call.
If unassigned key is pressed
Using this option, you can route callers that press an unassigned key to either hear a repeated greeting, go to an option that is already set, or hang up the call.
Timeout before first key press
This option determines how long the auto attendant will wait before recognizing any key presses.
Note: By default, the system will wait 3 seconds before recognizing keys pressed.
Timeout after the last key press
Unlike the first key press, this option determines how long the auto attendant will wait after the last key press to register another key press.
Note: By default, the system will wait 3 seconds before registering another key press.
Maximum key presses to collect
You can use this option to set a limit for how many keys can be pressed.
Speech Keywords
Speech Keywords are used by the Auto Attendant to trigger routing whenever it hears a certain word or phrase spoken by the caller. Each dial pad option can have multiple keywords/phrases implemented.
Add Keywords and Phrases…
Whenever you add a dial pad menu option, an entry will populate in the Speech Keywords section of the Options modal:

These options can be clicked to show a field for entering in a word or phrase:
Using the Add a keyword or phrase box, type in what you would like the system to listen for to route calls to this selected option.
Click the Done button to save these changes. 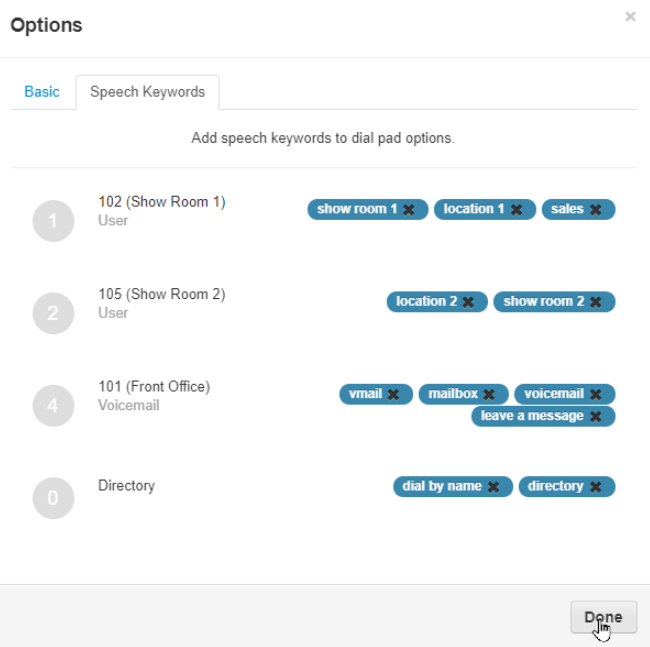
Set Up Lunch Routing
Now that a lunch auto attendant has been created, it can be used as a destination for calls coming in during lunch. Using Time Frames and Answering Rules, you can route calls your business receives to the lunch auto attendant during lunch with ease.
Step 1: Create a Lunch Time Frame
In order for the system to know when you should have calls routed for lunch, a time frame will need to be created.
To add a new Lunch time frame…
- Navigate to the Time Frames page.

- Do one of the following:
- Click the name of the user that needs a time frame.

- In the search bar, type and select the ion number of the user that needs a time frame.

Quick Tip: If you are not able to see the user you are trying to add a time frame for, deselect Hide Users Without Time Frames.

- If you are adding a time frame for your business' routing, click Domain instead:

- Click the name of the user that needs a time frame.
- Click the Add Time Frame button.

- In the Add a Timeframe menu, fill in the following information:

-
Name - Type in a unique name for this time frame, such as Lunch.

-
When - Select Days of the week and times

-
Name - Type in a unique name for this time frame, such as Lunch.
- Select the days that the business is open and has a lunch break.

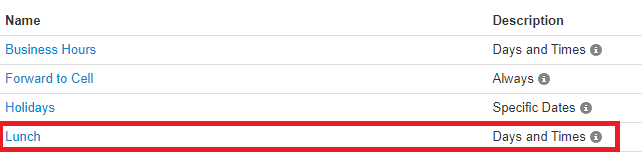
- When you are ready, click the Save button.
✔ Now your new, Lunch time frame should be included in your list of time frames, like so:
Step 2: Review Your Phone Number's Routing
In order to know where we need to add the special lunch routing we will create; we need to confirm where your phone number is routing calls.
To check the Destination for calls to your phone number navigate to the Inventory page. ![]()
On this page, you can check where your phone numbers are routing calls.
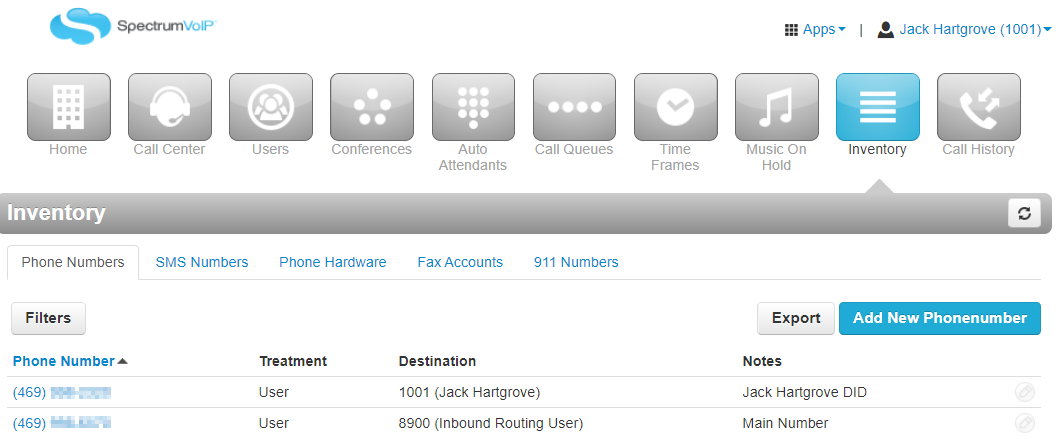
Take note of the Destination for that phone number for the next step.
Step 3: Create a Lunch Answering Rule
Now that we have a Lunch time frame and know where calls for your phone number are being routed, we can add in an Answering Rule that will route calls somewhere when the lunch time frame is active.
To create a Lunch Answering Rule…
Now that a time frame has been created, an answering rule can be added that will route calls to the busy auto attendant when the time frame is active.
To add an answering rule for routing…
- Navigate to the Users page.

- In the search bar, search for the user by name or extension number.

Note: If you are adjusting your business' call routing, find the Inbound Routing User for the location.

- Click the Edit
 icon and select Answering Rules.
- On the user's Answering Rules page, click the Add Rule button.

- In the Add an Answering Rule menu, do the following:

• Time Frame - Select the Lunch time frame.
• Call Forwarding - Select Always and in the box, type the name or extension number of the lunch auto attendant.
- Click the Save button.
✔ You will then see the new lunch rule in the list of the user's answering rules.
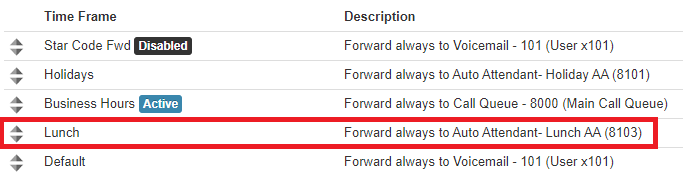
-
Make sure that the Lunch rule is above the Business Hours rule in priority.
- You can move Time Frames around by clicking and dragging the triangles on the left-hand side of the answering rules.

- The rules take priority from top-to-bottom.
- Top = Highest Priority (Usually a Temp Forward or Holiday answering rule)
- Bottom = Lowest Priority (Default/After Hours answering rule)
- You can move Time Frames around by clicking and dragging the triangles on the left-hand side of the answering rules.
- Make sure to click the Save button on the confirmation message that appears.

- To confirm your lunch routing works as intended, place a test call to the user or business during normal lunch hours.