Create a Time Frame in Stratus
Review how you can create time frames that can be used to route calls during specific times and dates.

Written by Val Campos
Updated at December 11th, 2025
Table of Contents
Many businesses and organizations have special scenarios where they need calls routed or forward to a destination that is different from their business hours routing. These special routing scenarios could be lunches, meetings, holidays, inclement weather closings, and more.
Call forwarding can be set up by doing the following:
- Schedule routing/forwarding by creating a Time Frame.
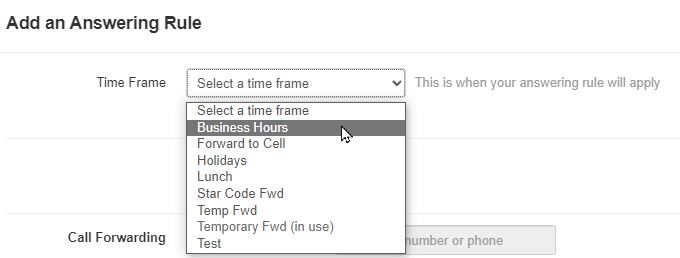
- Set where calls should be routed during a time frame by adding Answering Rules.
This guide will review how time frames can be created as the first step of setting up call routing.
For a comprehensive guides about adding both time frames and answering rules, read our Stratus Basic Inbound Call Routing guide.
Scope: Only Office Managers will be able to create and adjust Domain and owned time frames for the organization and all users.
Site Managers will be able to adjust the owned Time Frames for their Site's users.
Basic Users can only adjust their own Time Frames.
Domain Time Frames
Domain time frames are time frames that can be used by any user to create answering rules for call routing.

When a Domain time frame is created, it becomes selectable for all users when they are creating their answering rules for their own routing. These time frames can also be used by an Office Manager to create an answering rule that routes calls for the whole business.
Scope: Only Office Managers can create and edit Domain time frames.
To create a shared, Domain time frame for any user to use…
- Navigate to the Time Frames page.

- Click Domain or click the Edit
 icon to pull up a list of the time frames for the whole business.
Quick Tip: Alternatively, you can click the Add
 icon to quickly navigate to the Add a Domain Time Frame menu.
 - Click the Add Time Frame button.

- In the Add a Domain Time Frame menu, fill in the following information:

-
Name - Type in a unique name for this time frame.

-
When - Select the type of time frame to be created.

Use the Module below to explore the selectable options for When:Always
If the time frame should be active until it is disabled, select Always.
✔ This option is commonly used for call forwarding that will be enabled for an undetermined length of time, such a forwarding for emergencies or an outage.
Days of the Week
Select Days of the Week if the time frame will be active on a recurring basis (same time and day every week).

✔ This option is commonly used for scheduling Business Hours and Lunch.
To add a break in the time that the time frame is active on a certain day, click the Add range
 icon.
icon.
Click Copy to All to have this time range added to the other selected days.

By default, a Days of the Week time frame will be set to recur every week.

For some schedules, it may be important that this time frame have a break before it occurs again.
✔ This can be essential for companies that have teams that trade off schedules. This is commonly seen with on-call and after hours teams.
To set this time frame to recur at a different frequency…

Specific Dates
Select Specific Dates to schedule routing during special date(s) and times that may or may not recur, such as Meetings, Conferences, etc.
In the Specific dates section, select the date(s) and times the time frame will be active for and click the Add button.


If the date(s) will be recurring, use the Recurrence dropdown to select when this time frame should automatically be active in the future.

Quick Tip: If you have set this time frame to recur, you can use the Ends option to set a date that this time frame will stop following the Recurrence option.

Holidays
With the Holidays option, you can select commonly celebrated holidays from different regions that you would like to forward or reject calls for.

Use the search bar to find and select a holiday.
Use the dropdown filters to look for holidays observed in specific regions.

Select the range of time that this time frame will be active for, such as your business hours.

To remove a holiday, click the Delete
 icon.
icon.
If needed, use the Recurrence dropdown to select whether or not these holidays will be observed yearly.

Quick Tip: If you set these holidays to recur, you can use the Ends option to set a date that this time frame should stop following the Recurrence option.

Custom
Create custom time routing that combines days of the week, specific dates, and holidays all together to suit any time frame need.

✔ This type of time frame is commonly used for holidays, especially if a company's office is closed for specific dates that are not technically a government-recognized holiday.
For example… If a company is closed for Christmas Eve, Christmas, and the day after Christmas, they could create a Custom time frame named “Holidays” and add Christmas and Christmas eve as holidays and the day after Christmas as a specific date.
-
Name - Type in a unique name for this time frame.
- Click the Save button.

- To add more time frames, repeat steps 3-5.
✔ You should now have a list of time frames that can be used to create answering rules by you or other users.

Basic users will be able to view and use these time frames for answering rules, but they cannot edit these time frames.

Now the Domain time frames can be selected when you and other users are creating answering rules.
Note: To learn how you can use these time frames to create Answering Rules to route calls, check out this article.
Bulk Toggle Shared Time Frames
On the Time Frames page, you can use the Bulk Toggle feature to enable/disable time frames. These time frames are used by answering rules to tell the system when calls should be routed according to what is set in the answering rule. Once a time frame has been used in an answering rule for a user, the Bulk Toggle feature can be utilized.
To enable/disable the answering rules of multiple users…
- Click the Bulk Toggle
 icon next to the time frame that needs to be disabled/enabled for multiple users.
- In the Bulk Toggle Timeframe menu, select the users that need this time frame disabled/enabled.

- Click either the Enable or Disable button.

✔ Once one of these buttons has been clicked, you should see a confirmation message that the Answering Rules for these users were updated.

Now any call routing or forwarding set up through the answering rules using those time frames will be enabled/disabled, depending on the button that was clicked.
Owned Time Frames
Owned time frames are time frames that are created for a specific user. A user that owns a time frame can edit that time frame and create an answering rule for themself.
Scope: As an Office Manager you can create owned time frames for any user.
Site Managers can add owned time frames for their site's users.
Basic users can create and edit time frames that only they own using the basic version of the web portal.
To add in owned time frames for a specific user…
- Navigate to the Time Frames page.

- Use the search bar to find and select the user that should own the time frame.

- Click the Add Time Frame button.

- In the Add a Time Frame menu, fill in the following information:

-
Name - Type in a unique name for this time frame.

-
When - Select the type of time frame to be created.

Use the Module below to review the selectable options for When:Always
If the time frame should be active until it is disabled, select Always.
✔ This option is commonly used for call forwarding that will be enabled for an undetermined length of time, such a forwarding for work leave, emergencies, or an outage.
Days of the Week
Select Days and Times
Select Days of the Week if the time frame will be active on a recurring basis (same time and day every week).
✔ This option is commonly used for scheduling Business Hours and Lunch.
To add a break in the time that the time frame is active on a certain day, click the Add range
icon.Click Copy to All to have this time range added to the other selected days.
Set a Custom Recurrence
By default, a Days of the Week time frame will be set to recur every week.
For some schedules, it may be important that this time frame have a break before it occurs again.
✔ This can be essential for companies that have teams that trade off schedules. This is commonly seen with on-call and after hours teams.
To set this time frame to recur at a different frequency…
Specific Dates
Select Specific Dates to schedule routing during special date(s) and times that may or may not recur, such as Meetings, Conferences, etc.
In the Specific dates section, select the date(s) and times the time frame will be active for and click the Add button.
If the date(s) will be recurring, use the Recurrence dropdown to select when this time frame should automatically be active in the future.
Quick Tip: If you have set this time frame to recur, you can use the Ends option to set a date that this time frame will stop following the Recurrence option.
Holidays
With the Holidays option, you can select commonly celebrated holidays from different regions that you would like to forward or reject calls for.
Use the search bar to find and select a holiday.Use the dropdown filters to look for holidays observed in specific regions.
Select the range of time that this time frame will be active for, such as your business hours.
To remove a holiday, click the Delete
icon.If needed, use the Recurrence dropdown to select whether or not these holidays will be observed yearly.
Quick Tip: If you set these holidays to recur, you can use the Ends option to set a date that this time frame should stop following the Recurrence option.
Custom
Create custom time routing that combines days of the week, specific dates, and holidays all together to suit any time frame need.
✔ Custom time frames can be useful for events like Holidays or schedules for users that are not scheduled on a very regular basis.
For the holidays, a custom time frame may be used if a company has multi-day long breaks for holidays or early close days for some holidays or days before holidays.

-
Name - Type in a unique name for this time frame.
- Click the Save button.

- To add more time frames, repeat steps 3-5.
✔ You should now have a list of owned and Domain time frames.

You or that user can now select that owned time frame while creating an answering rule.

Note: To learn how you can use these time frames to create Answering Rules to route calls, check out this article.