Handle Calls Using the SpectrumVoIP ES Desktop App
Learn more about what the features the SpectrumVoIP ES Desktop app has to offer to help you handle calls.

Written by Val Campos
Updated at August 17th, 2023
Table of Contents
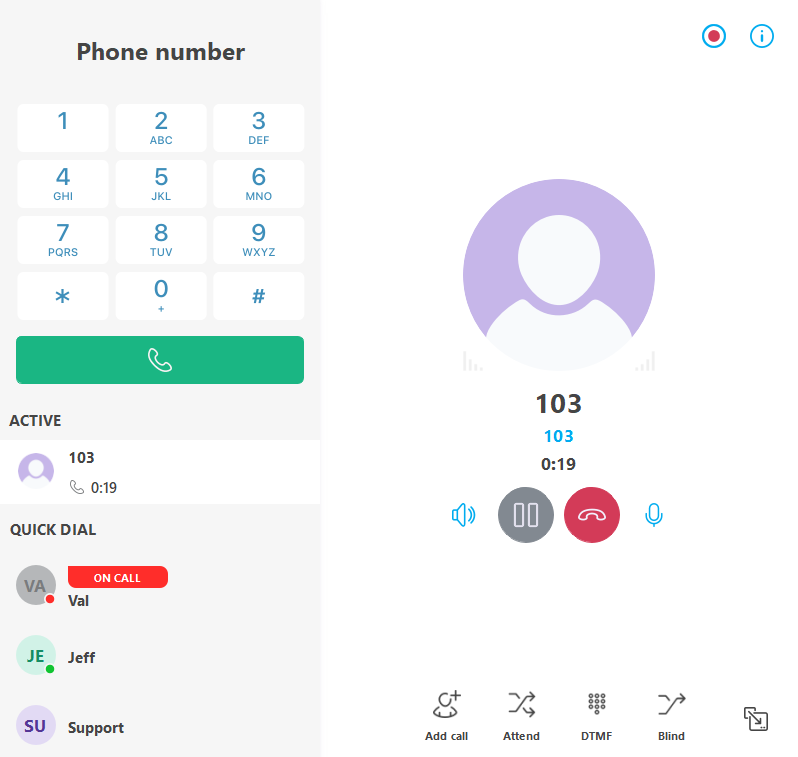
The Dialpad Tab
On the Dialpad tab, you will be able to use the dial pad to place a call, view and handle active calls, use a quick dial, and popout an active call into its own window.
Make a Call
Using this application, there are multiple ways calls can be placed. You can make a call by dialing an extension number or phone number, clicking Call for an entry in the Contacts or History tabs, and using a Quick Dial.
Use the Dialpad
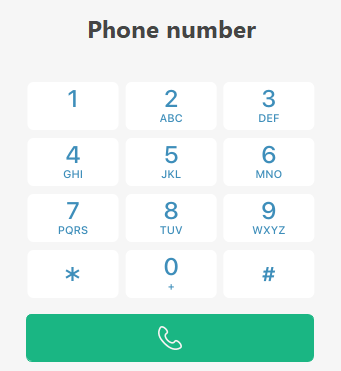
- Visit the Dialpad tab.
- Dial the extension or phone number.
Quick Tip: To avoid any issues dialing, it is recommended to include the country code of any telephone numbers dialed.
For example, add 1 to the front of the phone number of someone from North America.
- Click the Audio Call
 icon to initiate the call.
View More Calling Options
After dialing an extension or phone number, right-click the Call button to see more options for placing the call.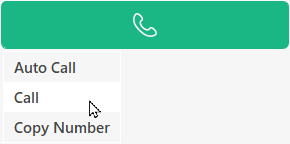
You now have the options to…
- Auto Call -
- Call - Place an audio call to the number dialed.
- Copy Number - Copy the number you have dialed to your PC's clipboard.
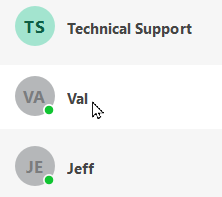
Call Using a Quick Dial
Once you have added quick dials, you can view your quick dials in the QUICK DIAL section of the Dialpad tab. To call a quick dial from the Dialpad tab, click the name of one of your quick dials. 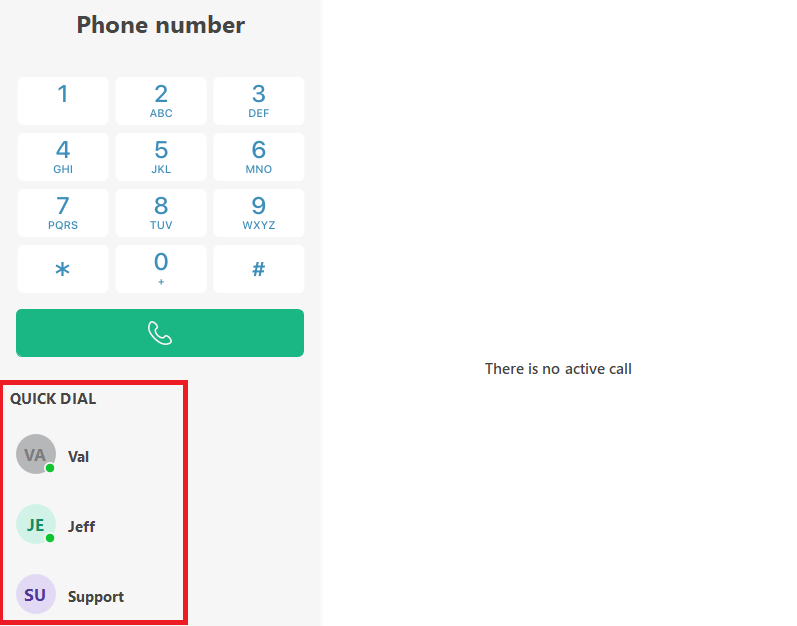
You can also access quick dials in the Quick Dials folder of the Contacts tab. To call a quick dial in the Contacts tab, click the name of the person you wish to contact and click the Audio Call icon.
Call a Contact
To place a call to someone you have saved as a Contact…
- Visit the Contacts tab.
- Use the dropdown to select which folder of your contacts to view.

- Click the name of the person you wish to contact.
- Tap the Audio Call icon.

Call Back a Recent Caller
If you recently spoke to someone that you would like to call again, you can easily do so using the Recents tab.
To call a recent caller…
- Visit the Recents tab.
- In the CALLS section, click an entry of the person you wish to call.
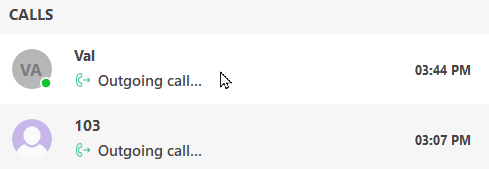
- In the person's call history, click the Audio Call icon to initiate a call.

- After the conversation is complete, click the End Call
 button to dismiss the call.
Receive Calls on the ES Desktop App
When you receive an incoming call, the app will display an Incoming call prompt with options to Accept Call, End Call, or Mute Call.
Use Do Not Disturb Mode
If you need to stop receiving calls for any reason, you can turn on Do Not Disturb (DND) mode.
| Icon | Indication |
|---|---|
 |
Do Not Disturb Mode is inactive. |
 |
Do Not Disturb Mode is active. |
To turn Do Not Disturb on, click the Busy  icon.
icon.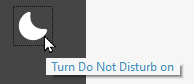
To turn Do Not Disturb off, click the Busy  icon again.
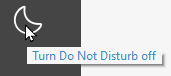
Active Call Features
While you are handling a call, you will have many options available for controlling the active call.
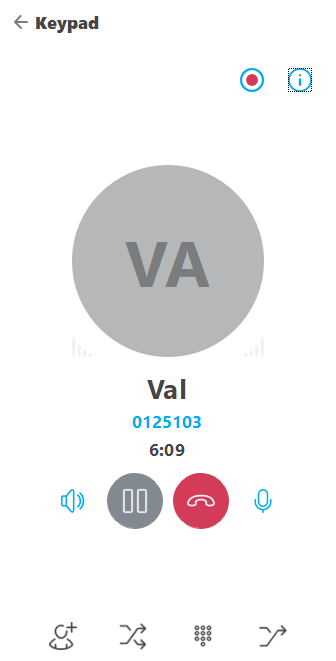
Popout an Active Call into Its Own Window
If needed, you can pop the call into a separate window. To do this, click the Switch to Dialog  icon.
icon.
Doing so will put the active call into its own window, which can make minimizing the call easier.
Record a Call
To start recording a portion of your current call, click the Record  icon.
icon.
To pause or stop the recording, click the Record  icon again.
Mute Your Microphone
If you need to, you can mute your microphone so that the caller you are speaking to cannot hear you.
- To mute yourself, click the Mute
 icon.
icon. - To unmute yourself, click the Unmute
 icon.
icon.
Place a Caller on Hold
To place your current caller on hold, click the Toggle Hold  button. While your caller is waiting on hold, they will be listening to your organization's music on hold.
The active call screen will also update to show your caller is on hold:
To resume your call, click the Toggle Hold  button again.
Transfer a Call
When you are handling a call, it may become necessary to transfer a caller to another user.
There are three different ways a call can be transferred:
- Transfer using an Attended/Warm Transfer.
- Transfer using a Blind/Cold Transfer.
- Transfer a caller to a Voicemailbox.
Perform an Attended Transfer
When you need to transfer a call to another person, it may be a good idea to talk with the person you are transferring to before completely transferring the call. This can be done using an Attended Transfer.
✔ Attended transfers can be useful since they allow you to tell the other person the caller's information and the reason for the caller's call.
To perform an attended transfer…
- Click the Attended Transfer icon.
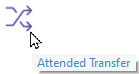
- Use the Transfer call dial pad to dial the extension number or phone number of the person taking the transfer.

Quick Tip: Alternatively, you can click a Quick Dial or a Contact to avoid having to dial.

- Click the Call button.
- When you are done speaking to the person you are transferring to, click the Complete Transfer icon.

Perform a Blind Transfer
If speaking to the person you are transferring to is not necessary, you can send a call straight to that person using a Blind Transfer.
To perform a blind transfer…
- Click the Blind Transfer icon.

- Use the Transfer call dial pad to dial the extension number or phone number of the person taking the transfer.
Quick Tip: Alternatively, you can click a Quick Dial or a Contact to avoid having to dial.
- Click the Call button.
Transfer a Caller to Voicemail
In some cases, it may be necessary to transfer a caller to another user's voicemailbox.
To transfer a call in this way…
- Click the Blind Transfer icon.
- Dial the Feature Code for the user's voicemailbox.

Quick Tip: Most accounts use 1+EXT (e.g., 1103 for dialing extension 103's mailbox) as the code for dialing into the mailboxes of other users.
Find Your Mailbox's Dialable Code
If you are not sure what your mailbox's feature code is, you can check this and the other feature codes you are set as the Owner for by logging into the ES web portal as a basic user.
To find your mailbox's feature code…
1. Log into the ES web portal.
2. Navigate to Features → Feature codes.
3. Take note of the Feature Code shown that is marked for your extension's Mailbox.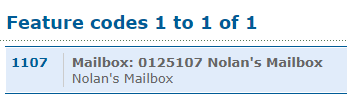
Reference the Feature Codes for Your Users as an Admin
Admins of the ES web portal can check the Feature Codes shown for all of their users using the web portal.
To check the feature codes for the whole account…
1. Log into the ES web portal.
2. Navigate to Features → Feature codes.
3. View and take note of the feature codes for your users.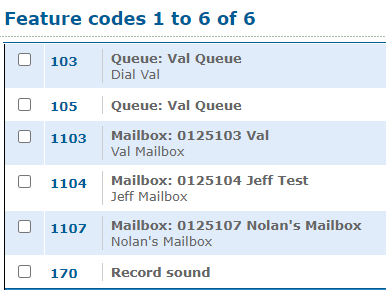
4. If needed, click the Export as .csv button to download this list of feature codes as a spreadsheet that you can keep record of and share with your team.
If you do not have access to the ES web portal, feel free to contact our technical support team to learn more about the dialable codes you can use.
- Click the Call button.
Cancel a Transfer
If a transfer is no longer needed, you can exit out of transferring by clicking the Cancel X icon.
Host a Conference Call
You have the ability to add more people to an active call to form a conference call. In this conference call, you can speak to multiple people at once.
Establish a Conference Call
To start a conference call…
- Click the Add call icon.

- Use the Add call dial pad to dial the extension number or phone number of the person you would like to add to the call.

- Click the Call button.
- When you are ready to merge the calls together, click the Merge icon.

- To add more people to the conference, repeat steps 1-4.
- To dismiss the conference call, click the End Call
 button.
Split a Conference Call
When you are ready to end a conference and speak to each caller individually, you can split the conference call into separate calls.
To do so…
- Click the Split icon.

- Select the caller you would like to resume talking to first.

✔ The user you do not select will be placed on hold as you speak to the user you selected.

Use the DTMF Keypad
Click the DTMF  button on the active call screen to open the DTMF keypad. Click the digits on the keypad to enter any inputs in a call. This can be useful for interacting with interactive voice menus, like auto attendants and voice mailboxes.
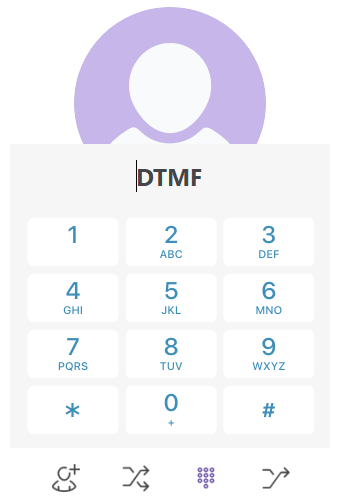
To use the DTMF keypad during a call:
- In an active call, click the DTMF button.
- Dial digits using the keypad as needed.
- To clear the digit field, click the Clear
 icon.
icon. - To close the DTMF keypad, click the DTMF button again.
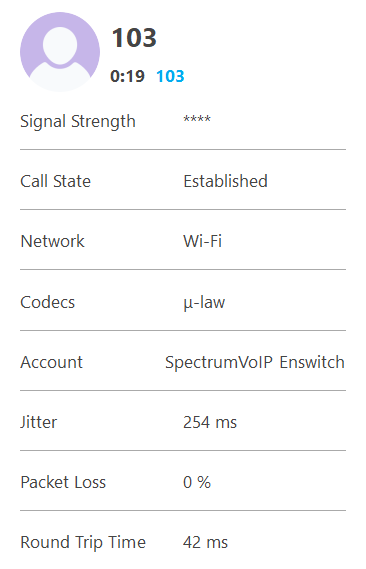
View the Metrics of a Call's Quality
Click the Information  icon to examine the metrics that measure the quality of your call.
Adjust the App's Sound Settings for a Call
Click the Select Audio Route  icon to select a different audio device or adjust your Sound Settings.
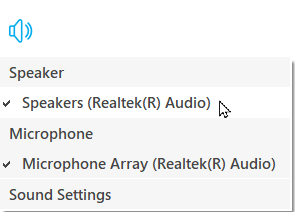
Clicking Sound Settings will pull up the Settings window with the Sound tab open so that you may adjust your audio.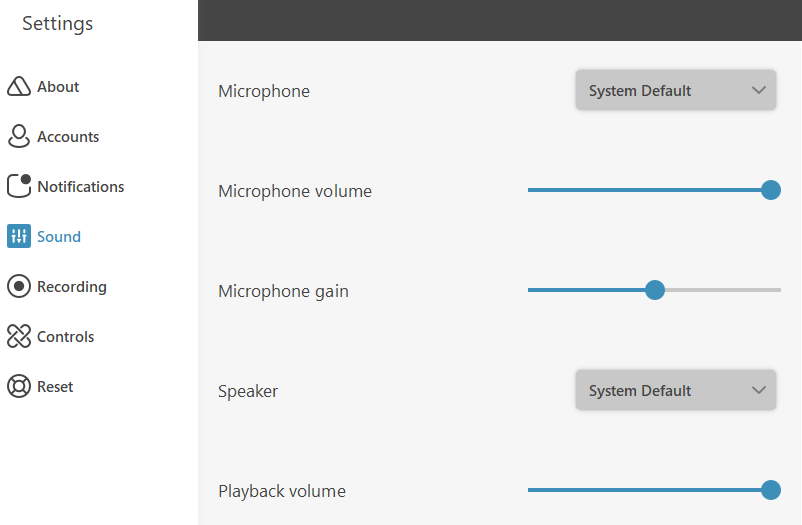
Note: To learn more about the different Sound Settings that can be adjusted, read this article.