Manage the Call History Page
Find out how you can use the Call History page to review the calls handled by your business, block phone numbers, and pull call recordings and transcripts.

Written by Adrian Angwenyi
Updated at March 11th, 2026
Table of Contents
View the Call History Page
On the Call History page, you can view all of the calls your users have been handling.

To adjust the different columns of information that you can view in the Call History table, click the Columns button to select the different columns to show/hide.

In the Call History page's chart, you can reference different columns that contain different details and data from each call.
| Column Name | Description |
|---|---|
| From Name | This is the FROM name provided by the caller's carrier. |
| From | This is the phone number provided by the caller's carrier. |
| Dialed | The phone number, extension number, or series of digits dialed to place a call. |
| To |
The destination the call connected to.
|
| Date | The date the call was placed. |
| Duration | The time elapsed (minutes:seconds) during a call. |
| Disposition | If you have had Technical Support add selectable Dispositions for your account, you can view the Disposition that a user has assigned to that call log using the Notes |
| Topics |
If call recording with transcription has been enabled for a user, call queue, or your whole account, their recorded calls will be analyzed to find the three biggest discussion topics.
|
|
Quick Links
or
|
• Block / Unblock - Block or unblock a phone number that has called you. • Download - If call recording has been enabled, download the call's recording to your PC. • Listen - If the call was recorded, open an audio player on screen to listen to the recording. If you have call recording transcriptions enabled, this icon will pull up the Call Transcript menu. • Call Flow - View a step-by-step list of the different functions and users a call connected to before the call was ended. This toll will also show information about calls that ended unexpectedly. • Add Notes - Add notes about the purpose and outcome of a call. If you have had Dispositions added to your account, you can also select and mark a call log with a Disposition and Reason. |

Note: Users with the scope of Basic User will only be able to view their own call history.
Office Managers will be able to view only their own call history under their account while also being able to view the entire Domain's Call History by first clicking on the Manage Organization link at the top of the web page.
Filter the Call History
Using the Filters button, you can filter your call history and view only the events of interest to you.
-
In the Call History page, click the Filters button.
✔ Doing so will make the Call History Filters modal appear.

- Complete the fields using this table:
| Setting | Description |
|---|---|
| Date Range |
Select the From and To dates for the events you want to view. The maximum From-To range is 31 days. The furthest back you can search within the Stratus Web Portal's Call History is 6 months. To view call data records from beyond 6 months, you can access the CDR Archives. |
| User | Enter the name or extension you want to view. |
| Caller Number | Enter the caller number you want to view |
| Dialed Number | Enter the dialed number you want to view |
| Call Type | Enter the type of call you want to view. Choices are: • Inbound • Outbound • Missed |
-
Click the Filter button.

✔ The Call History page will update to only show entries that match your criteria.
If no events match your criteria, a message will inform you that there are no matches to your
filter.
Block Phone Numbers
With the Stratus v42 update, you can use the Block ![]() icon and the Blocked Numbers menu on the Call History page to block phone numbers from calling your business and your users. Use the module below to explore the different ways you can block numbers from the Call History page.
icon and the Blocked Numbers menu on the Call History page to block phone numbers from calling your business and your users. Use the module below to explore the different ways you can block numbers from the Call History page.
Block a Recent Caller
If a user has recently spoken to someone that you need to block, you can block their phone number using the Block ![]() icon found on their call log.
icon found on their call log.
1. Filter and scroll to find the call of the person that needs to be blocked and click the Block ![]() icon.
icon.
2. On the confirmation message, click the Yes button.
✔ Users will now see a Blocked number icon next to the phone number in their own Call History page.
For any future calls users receive from the blocked number, the call will automatically be rejected, and a Blocked tag will appear in the Duration column for that call.![]()
Block Multiple Numbers
With the Stratus v42 update, there is now a new Blocked Numbers tool that can be used to block malicious phone numbers.
1. Click the Blocked Numbers button. ![]()
2. In the Blocked Numbers menu, type the phone number that needs to be blocked. 
3. Click the Add button to add this phone number to your Blocked Numbers list. ![]()

✔ You should see a confirmation message that the phone number was added to the list.![]()
You should also see the phone number listed alongside any other blocked numbers. 
4. Repeat steps 2 and 3 for additional phone numbers that need to be blocked.
✔ Now if any users receive calls from the phone numbers you have blocked, the calls will automatically be rejected, and a Blocked tag will appear in the Duration column for those calls.
![]()
Import a Spreadsheet
If you have a list of phone numbers that should be blocked, you can download and fill in a spreadsheet of those numbers. This spreadsheet can be imported so that the list of phone numbers gets added all at once.
1. Click the Blocked Numbers button. ![]()
2. In the Blocked Numbers menu, click the Import button. ![]()
3. In the Import From File menu, click the Download Template button. 
✔ You should see a .CSV spreadsheet download through your browser.

4. Open the downloaded template spreadsheet.
5. Type a phone number into the cells of column A.
6. When you have typed in your phone numbers, save the spreadsheet by pressing CTRL + S or clicking the Save icon.
7. Back in the Import From File menu, click the Browse button and select the updated template.
8. Click the Upload button. ![]()

✔ You should see a confirmation message that tells you how many blocked phone numbers were imported. It will also state if any of the phone numbers were duplicates.![]()
You should also see the phone numbers from the spreadsheet listed in the Blocked Numbers menu.
Now if any of your users receive any calls from the phone numbers you have blocked, the calls will automatically be rejected, and a Blocked tag will appear in the Duration column for those calls![]()
Unblock a Phone Number
If you have added a phone number to your Call History's Blocked Number list, you can remove it at any time. Removing a phone number from the Blocked Number list will unblock that caller so that you and your users can start receiving calls from that phone number again.
To allow a previously blocked number to call your organization…
- On the Call History page, click the Blocked Numbers button.

- In the Blocked Numbers menu, click the Delete icon next to the phone number that needs to be unblocked.

Quick Tip: Alternatively, you can click the Unblock
 icon next to the log of a recently received call from a blocked phone number.
✔ You should see a confirmation message that the phone number has been removed from the Blocked Numbers list.

- Repeat step 2 for each phone number that needs to be unblocked.
Pull Call Recordings
Using the Stratus web portal and our products, you and your users can record calls. To be able to record calls, call recordings have to be enabled. Call recording can be enabled for your whole business, a specific user, or a call queue through the Stratus web portal.
Note: If you would like to learn more about call recordings and how you can enable call recordings, review this article:
Record Calls as a Stratus User
IMPORTANT: If call recordings are enabled, SpectrumVoIP will host the recordings in the web portal for 30 days. After that time has passed, the call recording will no longer be available to listen to or download. This time can be extended at an additional cost.
If you would like to extend your call storage time for your account, you can speak with our Billing team by calling (469) 429-2500 and selecting Option 2 or emailing billing@spectrumvoip.com.
Another alternative is to have all call recordings pushed to a virtual drive as seen in this guide.
If you would like to push call recordings to cloud storage or a virtual drive, contact our technical support team by calling (469) 429-2500 and selecting Option 4, emailing support@spectrumvoip.com, or sending in a ticket using our knowledge base or our support website.
Once call recording has been enabled, you can download and listen to any calls that have been recorded. To do so…
- Navigate to the Call History page.

NOTE: Your call history view may differ depending on your User Scope.
For example, users set as Office Mangers will be able to view all call recordings on the domain, while users set as Basic User will only be able to view their own calls. - The Call History can be filtered by different parameters such as phone number, user, or date/time. Click the Filter button to filter what calls are shown.

- In the right-hand menu of the call history listing, there will be a recording icon to listen to the call and a download icon to download the recording. Your button select may differ depending on your user scope.

- If a Call does not have a recording, the icon will be grayed out and will display No Recording when hovering over it; as shown below.
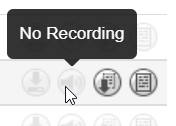
Note: If you see No Recording when call recordings should be enabled, please contact our technical support team to ensure your account has call recordings enabled.
- If a call has a recording that is still being processed, you might see Pending Conversation; as shown below. For these, simply wait for the call to be processed and it will eventually become available to play and download.
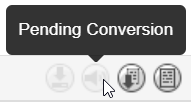
Quick Tip: Call recordings can take 30 minutes or longer to show in the Call History page.
It is recommended to wait an hour and then refresh or visit the Call History page again.
- If a Call does not have a recording, the icon will be grayed out and will display No Recording when hovering over it; as shown below.
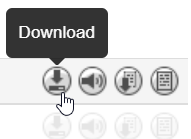
- When a recording is available, the Download
 and Listen
  icons will become active and clickable.
- Clicking the Download icon will save the audio file to your computer:
- Clicking Listen icon allows you to play the recording.

If you have recording transcriptions enabled, the Listen icon will pull up the Call Transcript menu instead. 
There are also options available (volume control and playback speed) for adjusting how the music is played back.
- Clicking the Download
Call Recording Transcripts
With the Stratus v43 update, call recordings can now have transcripts generated to make reviewing calls more effective and efficient.
Having transcriptions for call recordings enabled can give your users deeper insight into previous calls and their outcomes. This tool can also be essential for users that need accessibility options for reviewing audio recordings.
NOTE: Enabling call recording transcriptions costs $3.00 per month per user that has it enabled.
To speak with our team about any billing-related concerns, reach out to our Billing team by calling (469) 429-2500 and selecting Option 2 or emailing billing@spectrumvoip.com.
If you would like our team to enable transcriptions for your users, contact our technical support team by calling (469) 429-2500 and selecting Option 4, emailing support@spectrumvoip.com, or sending in a ticket using our knowledge base or our support website.
Access a Call Transcript
Now that the “recordings w/ transcription” setting has been enabled for users or call queues on your account, the calls of those users/call queues will be recorded, and a transcript will be generated from the dialogue that has taken place in the call.
You can view the transcript of a recorded call through the Call History page:
- Navigate to the Call History page.

-
Scroll down to the call that was recorded that you would like to review.
Quick Tip: Calls that have a transcript will be assigned Topics.

To quickly view call recordings with Transcripts, you can show the Topics column of the Call History table.

You can use the Call History Filters menu to narrow down your search for the call.

- Click the Listen icon next to the call.

✔ Doing so will pull up the Call Transcript menu for that recording.
Review a Call Transcript
In the Call Transcript menu, you will be able to listen to the recorded call, view a summary of the call, and review the dialogue that took place in the call. You can also download a CSV spreadsheet of this transcript's logs.

| # | Feature | Description |
|---|---|---|
| (1) | Play / Pause Button | Start or pause the playback of this recorded call. |
| (2) | Playback Bar | View the duration of the call as the call is played. You will see colored sections that indicate sections where a specific caller was speaking. You can click on sections of the playback bar to skip ahead to listening to that section of the call. The Transcript section will update to show the dialogue of the speaker in that portion of the call. |
| (3) | Search Box |
Type in a word or phrase that you would like to view in the transcript. The Transcript section will update to show the pieces of dialogue that includes the word(s) you searched for.
|
| (4) | Speakers | View the user(s) and caller(s) that participated in the call that was recorded. |
| (5) | Summary / Topics |
In this section, you can select between viewing the call's Summary and Topics: • Summary - View a generated description of the conversation that took place between the speakers in this call. |
| (6) | Transcript | Review and scroll through the dialogue of the speakers in this call. |
| (7) | Download Transcript Button |
If you need a copy of this transcript for your records, click the Download Transcript button to download a CSV spreadsheet.
|


Export Your Call History
You can export the call history as a spreadsheet in a CSV format. From there, you can open the information in Microsoft Excel or other spreadsheet software for further manipulation.
To download a spreadsheet of the call logs shown in the table, click the Export button.
Doing so will download a .CSV spreadsheet that you can view, edit, and store as needed.

Schedule a Call History Exports
To schedule a call history export…
- In the Call History page, click the Scheduled Exports button.

✔ Doing so will pull up the Scheduled Exports page where previously created export tasks can be edited or downloaded.

- In the Scheduled Exports page, click the New Export button.

✔ The Schedule New Export modal will appear.
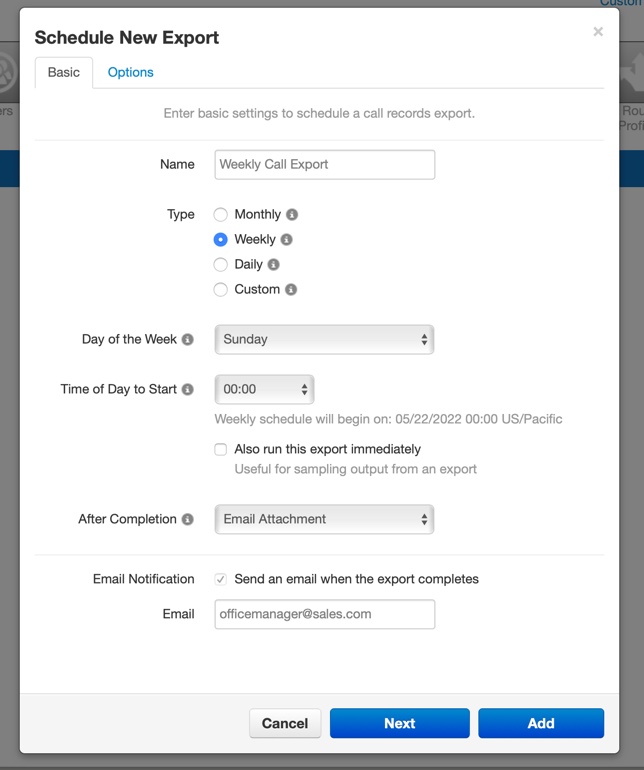
- Fill in the following field values:

| Field | Description |
|---|---|
| Name |
Type a descriptive, identifiable name for this export of call logs. The name can be no more than 64 characters long. No special characters other than a hyphen, space, or underscore. |
| Type |
• Monthly will send a report on the first of every month. • Weekly will send a report for the last 7 days, including the current day. For instance, select "weekly" and then "Sunday" to receive data from the previous work week (Monday - Sunday). • Daily will send a report at the same time every day. • Customize opens a wide range of capture periods. |
| After Completion |
After scheduling the export, choose where the data should be exported to. You can choose from the following options: • Do Nothing - Download the data to the portal. • Email Attachment - Have an email with an attached spreadsheet of the call logs sent to the email address entered in the Email box below. • Upload via FTP If you have a server that supports FTP (File Transfer Protocol) uploads, type the server's information to have these call logs uploaded directly to that server. • Upload via SFTP - If you have a server that supports SFTP (Secure File Transfer Protocol) uploads, type the server's information to have these call logs uploaded directly to that server. |
| Email Notification |
This option will send an email notification to the email address entered in the Email box when an export is ready to be reviewed/downloaded. If you have selected Email Attachment for the After Completion option, then the email will include an attached spreadsheet of the call logs. This option will be automatically enabled if the After Completion option is set as Email Attachment. |
- Visit the Options tab to configure how and what data should be shown in the export.

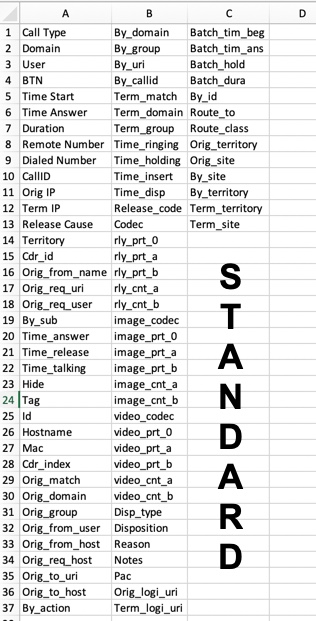
Formatted Export Examples
Basic Export
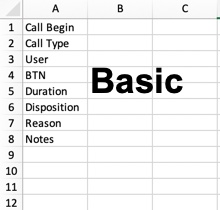

Advanced Export

Standard Export
✔ Once you have added a Scheduled Export, it will be listed alongside any others that have been added.

These listings will include columns that show the format of the spreadsheet that will be shown/sent, the period of time that will be recorded for the exports, and the date the next export will be available.
Each scheduled export will have icons that can be used to edit the settings of the export, download the export's spreadsheet, and delete the scheduled export completely.
![]()
CDR Archives
The CDR Achieves allow you to view call data reports past 6 months.
To access these data reports, click the CDR Archives button.![]()
A list of call history data will appear. Each report can be downloaded as a CSV spreadsheet.
