Ring All Queues
Learn how to create a Ring All call queue to fit your organization's call routing needs.

Written by Val Campos
Updated at August 27th, 2025
Table of Contents
In a call center environment, there are many types of call queues that can be used to handle routing calls to groups of agents. One of these types of call queues is called a Ring All queue.
✔ Agents in a Ring All queue will all have their phones ring for inbound calls. This method of ringing can be really useful for agents sharing an office space.
Step 1: Create a Ring All Queue
To add a Ring All queue…
- Login to the Stratus web portal and navigate to the Call Queues page.

- Take note of the next extension number available and click the Add Call Queue button.

Note: If you are updating an existing queue to be a Ring All queue, click the Edit
 icon next to the queue that needs its Type changed.
On the Basic tab of the queue's settings menu, use the Type section to select Ring All.

- In the Basic tab of the Add a Call Queuemenu, fill in the fields to create and customize a Ring All queue.

- Name - Give this call queue an identifiable name.
-
Extension - Type in the next available extension number that is not already in use.
Quick Tip: Using an extension number in the 8000s is recommended for call queues.
-
Type - Select Ring All.
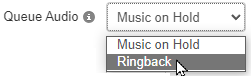
- In the Pre-Queue Options tab, the main setting adjusted is the Queue Audio.
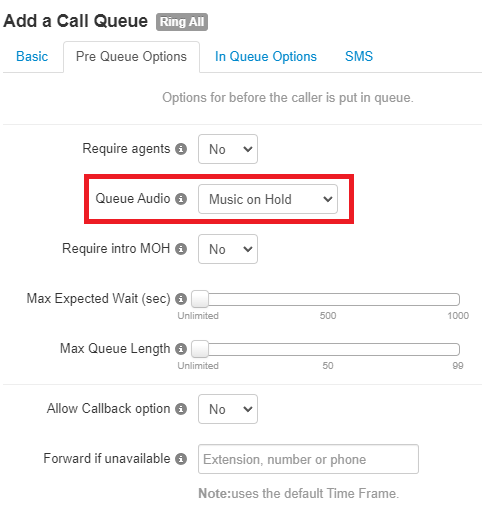
Note: By default, the queue will play the audio stored in the Music on Hold section.
To have the phone play ringing for callers in the queue, use the Queue Audio dropdown to select Ringback.
- In the In-Queue Options tab, set the Queue Ring Timeout to determine how long the queue should ring all agents in the queue.

Note: By default, the queue will ring for 30 seconds (6 rings; 1 ring = 5 seconds).
- If needed, set a forwarding destination to act as an exit option for calls that go unanswered by all agents.
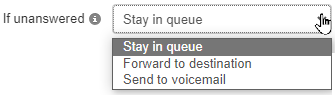
To do so, set the If Unanswered option to "Forward to destination".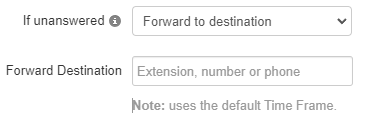
Quick Tip: With the Forward to Destination option, you can route unanswered calls to a call queue, auto attendant, user, or a 10-digit phone number.
- Once the Ring All queue has been configured, click the Next and then Add buttons.
Step 2: Add Agents
To ring users of the business, Agents will need to be added to the new Ring All call queue.
To do so…
- Click the Edit Agents
 icon next to the new Ring All call queue.
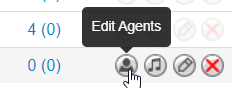
- In the Edit Agents menu, input the following:

-
Add Agent(s) by - Use the dropdown to select whether to either add an agent by their User or by their specific Phone.
- Add by User - Adding an agent by their User will ensure the ll queue follows their answering rules.
- Forwards will be followed.
- The user's other devices will ring if set in a rule.
- Add by Phone - Adding an agent by their phone will have the call queue ignore their answering rules and ring just the device selected.
- If needed, select more of the user's devices to ensure their other phones ring as well.
- Add by User - Adding an agent by their User will ensure the ll queue follows their answering rules.
- Agent Extension - Type and select the or extension number(s) of the agent(s) to be added.
- Status - Use the dropdown to set the agent(s) to be Online or Offline in the queue.
-
Add Agent(s) by - Use the dropdown to select whether to either add an agent by their User or by their specific Phone.
- Once you have selected the agent and configured their settings, click the Save Agent button.

- Repeat the process for any additional, new agents for the queue.
- Once all agents have been added, click the Done button.
