Enswitch Admin User Guide
Take a deep look into the Enswitch web portal and discover how you can use its features to manage your phone system as an admin.
Table of Contents
Access Your Enswitch Web Portal
Depending on the version of Enswitch your account uses, the link you use to log into your web portal will differ. Use the following links to log into your version of the web portal:
NOTE: If you are not sure which version of the web portal that your account is using, contact our technical support team to learn more.
Our technical support team can also help with getting logged into your web portal.
Once you log into your version of the web portal, you will be taken to the Home page.

Monitor Call Center Activity
Your Enswitch web portal offers two useful tools: the Control Panel and the Queue Panel.
The Control Panel allows you to view your agents' statuses and drag and transfer calls to users, mailboxes, IVR menus, queues, feature codes, and phone numbers that are set to be shown in the Control Panel. The Queue Panel can be used to view the activity of call queues and the agents assigned to those call queues.
The Control Panel
To view the general Control Panel. navigate to the Control panel page.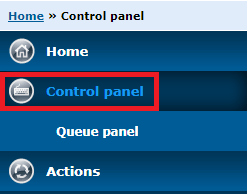
On this page, you will be able to view calls that are being handled and any functions (e.g., user, phone number, voicemailbox, queue, IVR menu, etc.) that have been configured to be shown in the Control Panel.

On the Control Panel page, you can do the following:
• View calls that are actively ringing or being handled by a user along with the caller's Caller ID and phone number.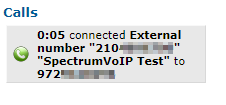
• Review which user is handling a specific call.
If you are not able to see a certain function (e.g., queue, IVR menu, mailbox, etc.) in the Control Panel, make sure that the function's settings have the Show in control panel option set as Yes.

Telephone Line Status
If needed, you can monitor an agent's status in their call queues by referencing the color of the User  icon.
icon.
| Status | Icon | Description |
|---|---|---|
| Idle |  |
Agent is currently not on an active call. |
| Inbound Call |  |
Agent is receiving or handling an inbound call from an external caller. |
| Outbound Call |  |
Agent is making an outbound call to an external phone number. |
| Internal Call |  |
Agent is calling another coworker's extension number or mailbox. |
| Unregistered |  |
Agent's device is unregistered, not connected to the internet, or unplugged from power. |
Redirect Calls
While looking at the Control Panel, you can drag an active call to a user, phone number, voicemailbox, queue, or IVR menu to redirect the call. 
The Queue Panel
The Queue Control Panel can also be used if your business relies on queues to handle customer interactions.
To view the Queue Control Panel, navigate to Control panel → Queue panel.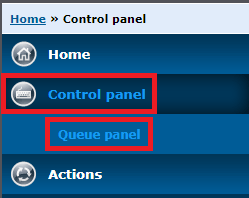
On the Queue Panel page, you will see a general breakdown of all of your queues' statistics and the agents in those queues. 
You can use the updated Queue Control Panel page to do the following:
• View calls actively ringing or talking in the selected queue(s).
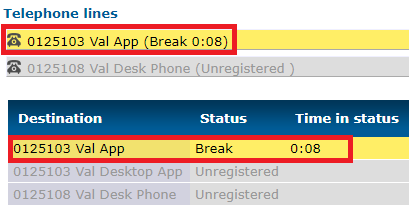
• View the Telephone lines set as agents in the queue and their status.
• Update the status of an agent.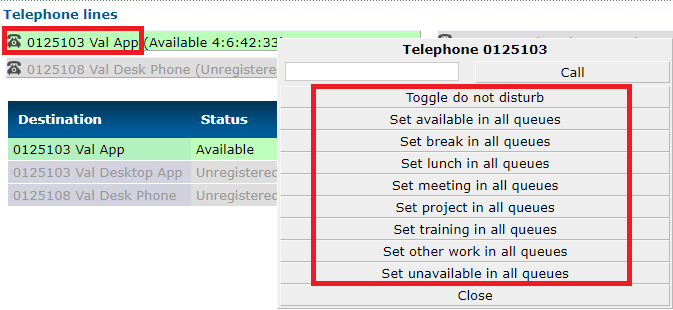
• Review a breakdown of each agent's queue stats (Destination Statistics table). 
• Monitor the statistics of the queue(s) (Queue Statistics Table).
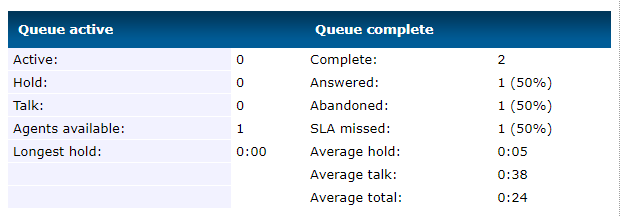
The Queue Control Panel can be fine-tuned and filtered to only show information that fits your preferences.
Adjust the Queue Panel's Options
To be able to accurately view specific queues and their agents, the Panel options will need to be adjusted.
To configure the Panel options, do the following:
1. Click the Panel Options button.
2. In the Panel options menu, adjust the following settings as needed: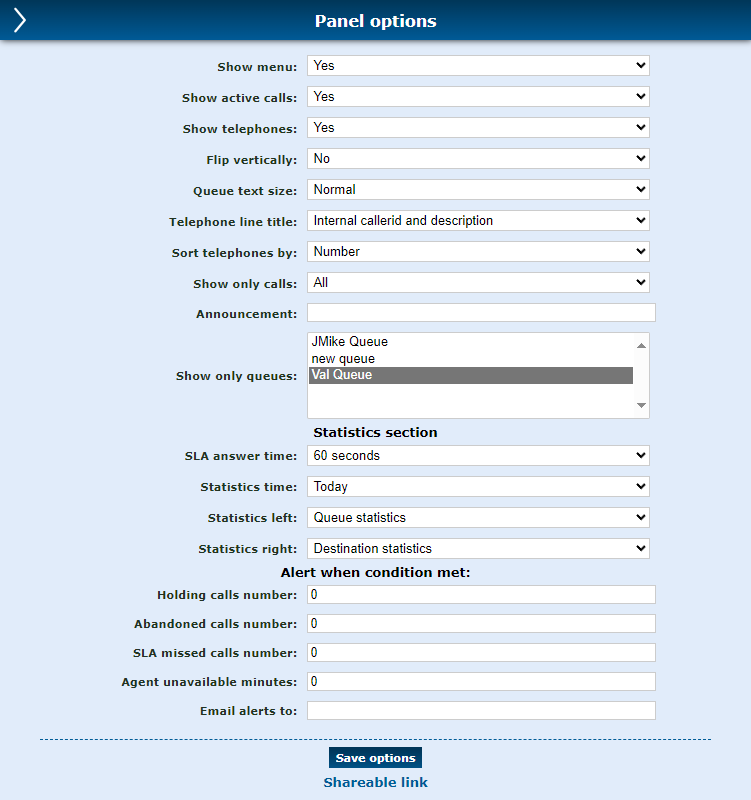
| Option | Description |
|---|---|
| Show menu | Select whether or not to see the Panel options menu you are viewing. |
| Show active calls | Select if active calls should be shown or hidden in the Queue Panel. |
| Show telephones | Show or hide the telephone lines (agents) in the Queue Panel. |
| Flip vertically |
Move the Queue Statistics and Destination Statistics tables above the Active Calls and Telephone Lines sections of the Queue Panel.
|
| Queue text size | Adjust the size of the text shown in the Queue Panel. |
| Telephone line title | Fine-tune what information and the order of the information is displayed for the agents shown in the Telephone lines section of the Queue Panel. The options that can be selected include… • Full number • Description • Internal callerid • Full number and description • Internal callerid and description • Description and full number • Description and internal callerid |
| Sort telephones by | Select whether the agents shown in the Telephone lines section should be sorted by Number (7-digit extension number) or Title (based off the option above) |
| Show only calls | Set the type of calls that should be shown in the Active calls section of the Queue Panel: • All calls - Show any active calls in the queue. • Answered - Show only calls that were answered and are being handled by an agent in the queue. • Unanswered - Show only calls that are not yet answered. |
| Announcement | Type a message to be displayed in red at the top-right of the Queue Panel:  An example message that could be set as an announcement is a reminder or note for a call center supervisor. |
| Show only queues | Select the queue(s) that should be shown in the Queue Panel page. • To select a single queue, click the preferred queue. • To select multiple queues, either click and drag to select multiple, or hold down Ctrl while clicking the queues. |
| SLA answer time | If your call center has a set standard for response time that may or may not be necessary for a Service Level Agreement, you can set the threshold for your expected SLA answer time (in seconds). Configuring this option… • Will update the SLA missed statistic shown in the Queue complete column of the Queue Panel's statistic table. • Is necessary if an SLA missed calls number alert will be set up below. |
| Statistics time | Select the time frame of the statistics shown in the Queue Statistics and Destination Statistics tables. Your options include: • This hour • Today • Yesterday • Last 7 days • This month • Last month |
| Statistics left | Show or hide the Queue Statistics table shown on the left of the Queue Panel page. |
| Statistics right | Show or hide the Destination Statistics table shown on the right of the Queue Panel page. |
| Alert when condition met | Email alerts can be configured to be sent when the thresholds for the following conditions are exceeded: • Holding calls number • Abandoned calls number • SLA missed calls number • Agent unavailable minutes Type a valid email address in the Email alerts to box to set where these email alerts should be sent. |
3. Once you are done making changes, click the Save options button.
4. In the confirmation message, click the OK button.
5. Wait 2-3 minutes to allow the webpage to save and apply your changes.
Quick Tip: It is recommended to wait until the webpage fully loads your changes to refresh.
WARNING: Refreshing too soon may result in the Queue Panel reverting to its previously set changes.
6. To close the Panel options menu, click the back arrow.
Actions
In the Enswitch web portal, you can use the Make a Call and Send a Fax features as convenient ways to handle job-related responsibilities.
Make a Call
Using your web portal's Make a Call feature, you can initiate a call between two individuals. This can be done using the Make a Call page of your Enswitch web portal.
✔ This can be useful for a receptionist/operator that needs to help a coworker initiate a call with a phone number or coworker that they are unsure how to contact.

To start a call using the Make a Call feature…
1. Navigate to Actions → Make a call.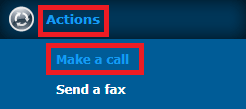
2. In the Make a call menu, use the Make first call to dropdown to select whether to place a call to an on number (Telephone) or to a phone number (Number).
3. Do one of the following depending on the option you chose above:
• If you chose to make a call to a Telephone, use the Telephone line dropdown to select the extension number of the coworker to contact.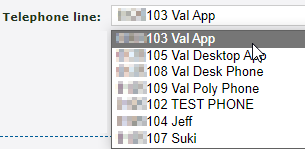
• If you chose to make a call to a Number, in the Number box, type the telephone number that should be called without any special characters or spaces.
4. In the When answered, forward to box, type the phone number or extension number to forward the call to when the first caller answers.
5. Use the Callerid on first call dropdown to select the phone number for the caller ID that the first caller should see.
6. Do one of the following depending on if you are placing a call to a telephone or a number:
• If you are initiating a call to a coworker's telephone, use the Request telephone to auto-answer dropdown to select whether or not the phone should attempt to automatically answer the call. 
NOTE: This option may not work for some phone models.
• If you are initiating a call to a phone number, use the Callerid on second call dropdown to select the phone number to show for the caller ID that the person receiving the forwarded call will see.
7. Once you are ready, click the Call button to initiate the call between these two people.
Send a Fax
If needed, the Enswitch web portal can be used to send eFaxes to people.
WARNING: Please take note of the warnings you will see on this page to ensure that your fax is sent properly.

1. Navigate to Actions → Send a fax.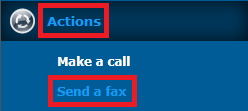
2. To send a fax to a fax number, use the Send a fax menu to do the following:
| Option | Description |
|---|---|
| File to send | Click the Choose File button to select the document to fax. |
| Cover page | Click the Choose File button to select a document to send as a cover page for the fax. |
| Send to | Type the fax number that should receive the fax. |
| Callerid | Select the phone number that should be shown to the recipient for faxing back if needed. |
| Send confirmation email to | Type a valid email address that should receive an email confirming when the fax is sent. |
| Copy file to mailbox as .pdf | Select a user's mailbox that should have a copy of the sent fax. |
3. When you are ready, click the Send button.
4. If you have set an email address to receive a confirmation email on step 5, you should receive a confirmation email letting you know when the fax has been sent.
✔ The recipient should receive the fax according to how their own fax services are set up.
If the recipient uses eFaxing, then they should receive an email with the fax and optional cover page attached. If they use a fax machine, their fax machine should print out the fax as they have configured.
Using the web portal, the user that had a copy of the fax sent to their mailbox can navigate to Messages → Faxes to view the faxes they have received as copies. 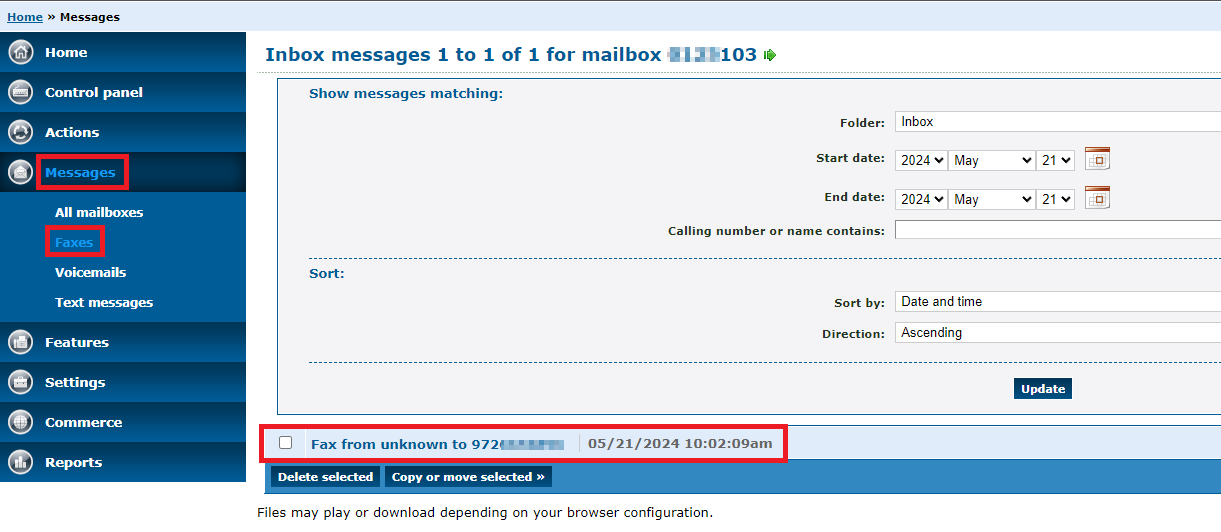
Messages
In the Enswitch portal, each user will usually have a mailbox that shares their 7-digit extension number. These mailboxes store faxes, voicemails, and text messages.
As an admin, you can view the mailboxes that have been created for your account. You can also view how many messages each mailbox contains.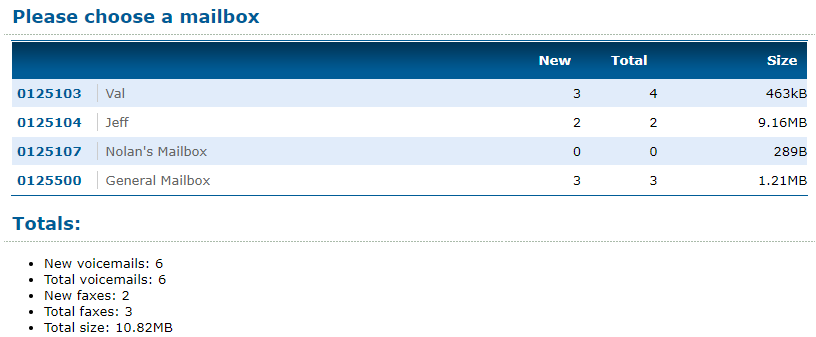
Using the side bar of the portal, you can narrow down the type of messages you are needing to view. 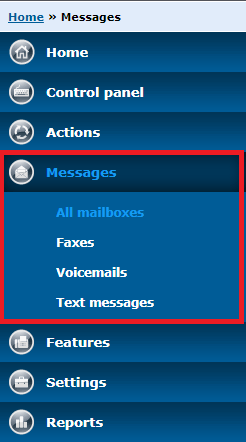
Check Voicemails
As an admin, you can use your Enswitch web portal to check the voicemail messages stored in a mailbox. You can view every mailbox your account has and the number of voicemail messages that each mailbox is storing.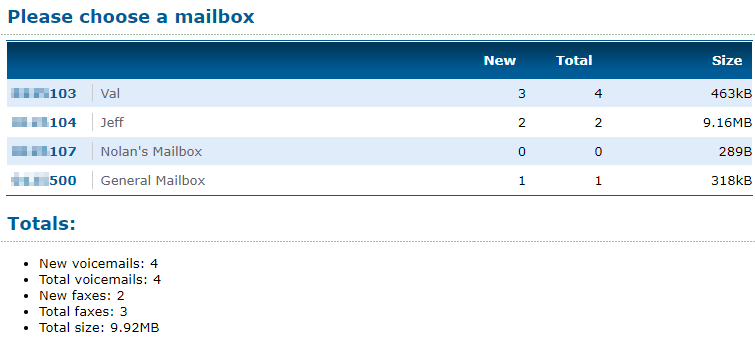
To check the voicemails in a mailbox…
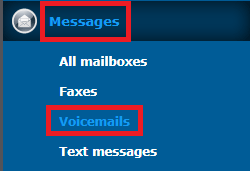
- Navigate to Messages → Voicemails.
- To manage a specific mailbox, click the extension number of the mailbox you wish to check.

- While viewing a mailbox, you can use the menu to filter and sort the messages a mailbox contains.
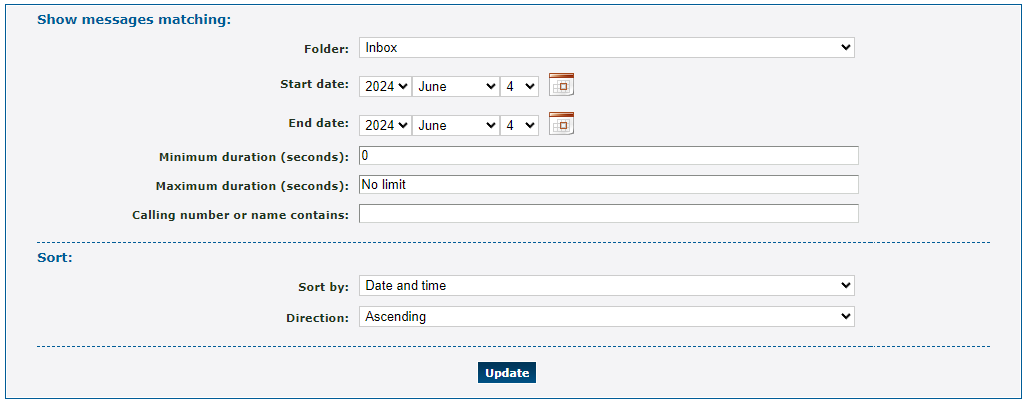
- While viewing a mailbox's voicemail messages, you can do the following:

Download a Vmail
If you need to keep record of an important voicemail message, you can download a voicemail to your PC. Once a voicemail message is downloaded, you can listen to and share the message using your PC.
To download a voicemail message onto your PC, click a voicemail.
Now you can listen to or share the downloaded audio file as needed.
Play a Vmail
If you want to avoid downloading the voicemail message to your PC, you can listen to the message through a phone call.
1. Click Play via call next to the message that you would like to listen to.
2. In the prompt that appears, type the extension number that should receive the call.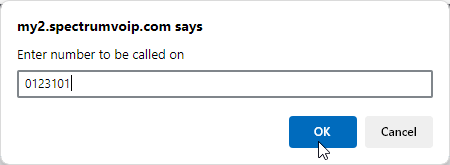
3. Click the OK button when the call is ready to be placed.
✔ You should see a confirmation message stating that the call has been made.
You should receive a call at the extension number you typed.
Delete a Vmail
A mailbox's voicemail messages can be deleted whenever they are no longer needed.
1. Select the voicemail(s) that needs to be deleted from the mailbox and click the Delete selected button.
2. In the message that appears, click the OK button to delete the selected voicemail(s).
✔ You should see a confirmation message stating that the message is now deleted.

Copy/Move a Vmail
In some scenarios, it may be necessary to copy or forward a voicemail message to a specific folder in a mailbox or to a different user's mailbox.
To copy or forward a voicemail message…
1. Select the voicemail(s) that need to be copied or forwarded and click the Copy or move selected >> button.
2. In the Copy or move message menu, use the first dropdown to select whether the selected voicemail(s) should be copied or moved.
3. Do one of the following:
• To copy/move a message to a specific folder of the mailbox you are viewing, use the To folder dropdown to select the folder that should store the message.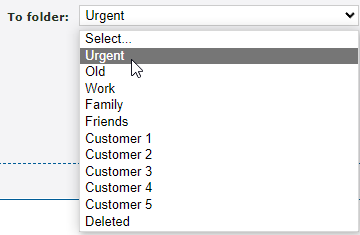
• To copy/move a message to a different mailbox or mailboxes, use the or to mailboxes section to select the mailbox or mailboxes that should store the message.
NOTE: You can only select a folder or a mailbox. Selecting both will make this error message appear:

4. When ready, click the Save button to confirm the copy or move. 
✔ You should see a confirmation message stating that the voicemail message has been copied or moved.

Manage Faxes
As an admin, you can use your Enswitch web portal to check the fax messages stored in a mailbox. To check a mailbox's stored faxes, navigate to Messages → Faxes.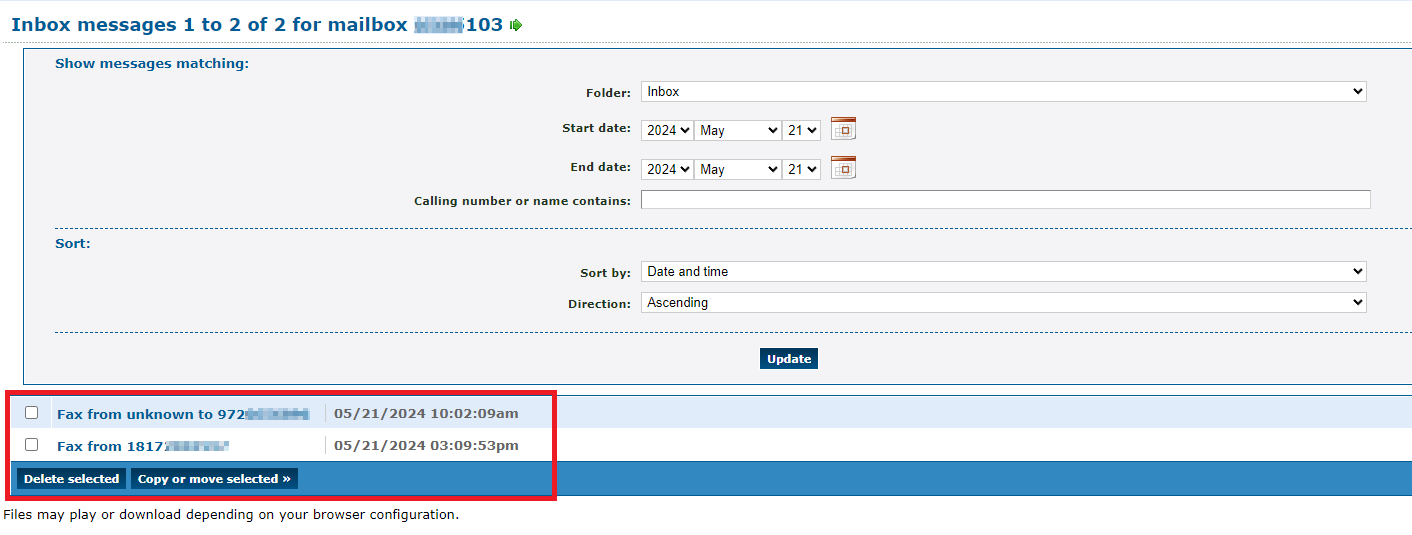
You can use the top menu to sort and filter the faxes shown in the mailbox.
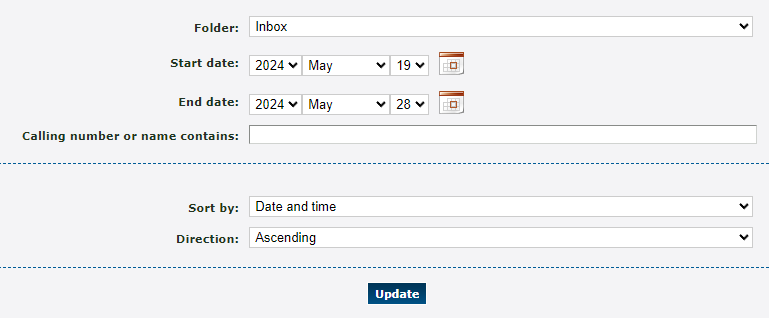
| Option | Description |
|---|---|
| Folder | Look at faxes stored in a certain folder of your mailbox. |
|
Start date & End date |
Select the start time and date and the end time and date to view faxes received or sent within a certain time frame. |
| Calling number or name contains | If you know the fax number or the caller ID of the fax number that sent/received the fax, type part of or all of the fax number's information here. |
| Sort by | Select how the results should be sorted. Your options include: • Date and time • Duration • Caller |
| Direction | Select if the results should be sorted in ascending or descending order based off of the Sort by option above. |
While viewing a mailbox's faxes, you can do the following:
Download a Fax
When you click one of the faxes shown, a copy of that fax will be downloaded to your PC:
You can open your downloaded fax files to view faxes you are sent and confirm what you have sent through a fax.
Copy/Move Faxes
If needed, you can organize your faxes by sorting them into folders.
1. Select the faxes that need to be organized and click the Copy or move selected >> button. |
|
2. In the Copy or move messages menu, select whether to move the selected faxes or create a copy of these faxes to a specific destination.
• Use the To folder dropdown to select a folder to move or copy the fax to.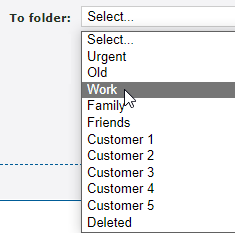
• To copy or move a fax to another user's mailbox, in the or to mailboxes section, select anxtension number and then click the << Add selected button.
3. Once you are ready to complete the move/copy, click the Save button.
✔ You should see a confirmation message telling you that the message is now either copied or moved.

Click Return to the list of messages >> to go back to the previous page to view the rest of your faxes.
Delete Faxes
When you need to declutter your mailbox, you can delete any unneeded faxes at any time.
To do so…
1. Select the faxes that need to be deleted and click the Delete selected button.
2. In the Warning message that appears, click OK to finish deleting the selected faxes.
✔ You should see a confirmation message telling you that the message is now deleted.

Click Return to the list of messages >> to go back to the previous page to view the rest of your faxes.
Manage Text Messages
If you have registered an SMS campaign, you can view and send text messages using the Enswitch web portal.
WARNING: To use SMS services, your business must have a registered SMS campaign.
If SMS is being used, you must adhere to our Privacy Terms.
To learn more about registering for a SMS Campaign and the charges associated with SMS/MMS messaging, feel free to read this article regarding these recent guideline changes.
- Navigate to Messages → Text messages.

- In the username and password boxes, type your login information for the Enswitch web portal.

From the SMS Web App, you can view the SMS messages you have, respond to those SMS messages, or compose a new message.

To compose a text message…
- In the Compose Message section, use the To box to type in the recipient's telephone number.
- In the Body box, type out the text that will be sent.
- If needed, click the Attach button to attach images to the text you are sending.

- Click the Send button.

Enswitch Features
Alerts
In the Enswitch web platform, alerts can be created to monitor certain conditions that may occur in your phone system. Setting up multiple alerts for different scenarios can help you monitor your call center's performance.
Create Alerts
As an Enswitch admin, you can create different alerts for different scenarios and conditions.
To configure an alert…
1. Navigate to Features → Alerts.
2. Click the New >> button.
3. In the Alert settings section of the New alert menu, fill in the following information: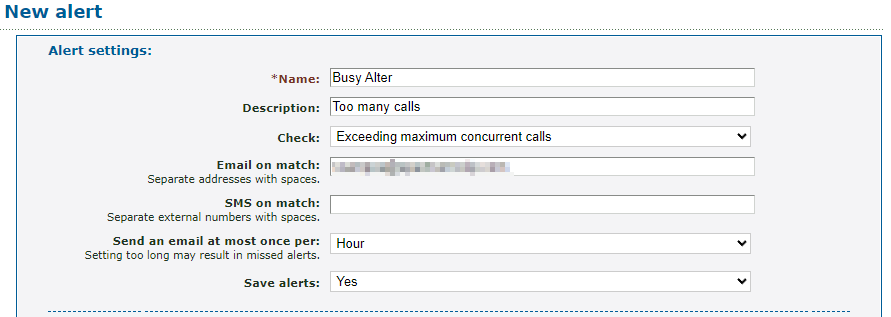
| Setting | Description |
|---|---|
| * Name | Type a name to identify the alert with. |
| Description | Type a brief note about the purpose to this alert. |
| Check |
Select what scenario would trigger an alert based off of conditions set in the Match all of section. Options for CheckThe types of alerts you can create include: Note: To learn what your account's maximum is, please contact our technical support team. • Numbers (checked daily) - A certain number of calls have been made within a set time frame. NOTE: In order for this alert to work, a queue needs to have its “Set destination unavailable after missing” setting configured.
• Queue call exited not answered - A call was forwarded to the destination set for calls unanswered in a queue. NOTE: In order for this alert to work, a queue will need to have its “When exiting queue, forward to” setting configured. |
| Email on match | Type a valid email address that should receive alert notifications via email. For multiple email addresses, separate each email with a space. |
| SMS on match | Type a cellphone number that should receive alert notifications via SMS. Message and data rates may apply according to your cellphone provider's requirements. For multiple phone numbers, separate each number with a space. |
| Send an email at most once per |
Select the frequency (every second, minute, hour, or day) that an email should be sent for as long as this alert is active. WARNING: If this is option is set to be less frequent than the alert condition occurs, some alerts will be lost. Note: This option is not used for some alerts. |
| Save alerts | Select whether or not to store alerts meeting these conditions for referencing later while viewing the Edit alert menu later. |
4. In the Match all of section, fill in the following information depending on the type of alert being created:
NOTE: The options shown in this section may differ depending on what is selected for the Check option in the Alert settings section.
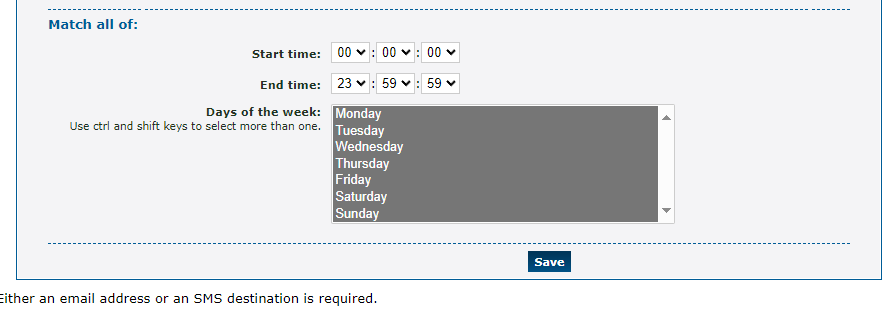
| Type of Alert | "Match All Of" Options |
|---|---|
| “Calls” Alert | If needed select different conditions calls must meet for an alert to be created and sent out, such as how long (in seconds) a call lasts, the billable time of a call, and calls to specific destinations.
|
| “Concurrent inbound and outbound calls” Alert | Type how many concurrent calls must be active for this alert to be created and sent out.
|
| "Destinations (checked daily)" Alert | Set the whole or part of a phone number or telephone line that would need to be called for the alert to be active. If needed, set how many times this destination would need to be called in a specific time period.
|
| “Exceeding maximum concurrent calls” Alert |
Select the days of the week and starting and ending times that alerts should be created when there are more concurrent calls than what is set as your account's maximum. Note: To learn what your account's maximum is, please contact our technical support team. |
| "Numbers (checked daily)" Alert | Set how many calls would need to be made to your business before an alert is created. 
|
| “Telephone lines” Alert | Set limits for how long (in minutes) that a certain number of telephone lines (user's devices) are idle or on DND before an alert is created.
|
| “Telephone lines losing registration” Alert |
Select how many telephone lines would need to be showing as offline before an alert is created. Quick Tip: Setting up this alert could be useful for getting quickly informed when your desk phones may be experiencing an issue, such as a power outage or internet outage. |
| “Telephone lines locked” Alert | Select how many telephone lines would need to be showing as locked on your account for an alert to be created.
|
| “People locked” Alert | Select how many people would need to be showing as locked on your account for an alert to be created.
|
| “Queue destination automatically set unavailable” Alert |
Select the days of the week and starting and ending times that this alert should activate during when an agent is automatically logged out of a queue for not answering a call. NOTE: In order for this alert to work, a queue needs to have the Set destination unavailable after missing setting configured.
|
| “Queue call exited not answered” Alert |
Select the days of the week and starting and ending times that matching calls must be made in for the conditions of this alert to apply. NOTE: In order for this alert to work, a queue will need to have its “When exiting queue, forward to” setting configured. |
5. Click the Save button.
6. Repeat steps 2-4 for each alert that needs to be configured.
✔ Now you should have a list of different alerts.

Once an alert has been activated, you should receive an email or SMS notification depending on what is set for the alert.
Bulk Dialer
For some businesses, it may be imperative that batches of phone numbers be automatically called at certain intervals. This can be done using a bulk dialer. Using a bulk dialer can be helpful for sending clients reminders and notices through a phone call.
Set Up a Bulk Dialer Campaign
To fully set up a bulk dialer campaign, the following needs to be completed:
1. Create a bulk campaign and configure its settings.
2. Add phone numbers as destinations for the campaign.
3. Set up a message to be played to destinations.
Step 1: Create a Bulk Dialer Campaign
As an Enswitch admin you can use the Enswitch web portal to create a bulk dialer campaign.
To create a bulk campaign…
1. Navigate to Features → Bulk dialer.
2. On the Bulk Campaigns page, click the New >> button.
3. In the New campaign menu, input the following information:
| Option | Description |
|---|---|
| * Name | Type a name for identifying this bulk dialer campaign. |
| Description | Type a brief note describing the purpose of this bulk dialer campaign. |
| Owner | If needed, select a user that should be able to view and edit this bulk dialer campaign. |
| Enabled | Select whether or not this campaign should be active and start making calls. |
| Only active when time group is active | Select an existing time group that the bulk dialer should actively dial its destinations. |
| Callerid | Select a phone number on your account that should be shown to the destinations that receive a call from this bulk dialer campaign. |
| Maximum concurrent calls |
Select the maximum number of calls that should be placed to the campaign's destinations at the same time. For example… If this is set to 1, then the campaign will only place calls to its destinations one at a time. |
| Number of attempts per destination |
Select the total number of calls that each destination should receive over time. Note: If a destination is called this many times without being considered a success, the campaign will stop calling this destination. |
| Retry destinations every | Select how long the campaign should wait before placing another call to each destination. |
| Call is considered successful when |
Select if a bulk dialer campaign call should be marked as successful if the destination answers the call or presses a key on their dial pad. Note: If a call to a destination is considered successful, the call will be forwarded according to the "When call is successfully made, forward to" option and the campaign will stop placing calls to that destination. |
| Record group | If calls made through this campaign should be recorded, select a record group that should record and store these recordings. |
| Detect answering machines |
You can have the campaign either retry later, mark the call as successful, or mark the call as failed. |
| When call is successfully made, forward to | Select where a call marked as successful should be forwarded, such as an IVR menu, a queue, or a specific user's telephone line. |
4. Once you are ready, click the Save button. 
✔ You should see a confirmation message stating that the campaign has been saved.

5. Repeat steps 2-4 for each bulk dialer campaign that is needed.
✔ You should now have a list of the different bulk dialers to be used for different scenarios.

Delete a Bulk Campaign
If a bulk dialer campaign is no longer needed, on the Bulk Campaign's page, select the campaign and click the Delete selected button.

Step 2: Add Destinations
Now that a bulk dialer campaign has been created, phone numbers to be called can be added as destinations. To add destinations to a bulk dialer campaign…
1. In the Bulk Campaigns page, click Destinations next to the bulk dialer campaign. 
Note: If you are viewing a campaign's settings, you can click the New destinations >> link in the Other options for this campaign section.

2. On the Destinations page, click the New >> button. 
3. In the New destinations menu, do one of the following to add the destinations:
• Create a text file to upload using a text editor, such as Notepad. 
Note: Once you have created the text file, click the Choose File and select the .txt file from your PC.

• In the “or enter destinations one per line” box, type the phone numbers that should receive calls, like so:
WARNING: Type these phone numbers without any special characters. It is also recommended to include the country code of the phone number to avoid any dialing issues.
4. Once you are done, click the Add button. 
✔ You should now see a confirmation message stating that the destinations have been added. 
Valid phone numbers that were added should now be listed as destinations for the campaign. 
Step 3: Add a Message
When destinations receive a call from this campaign, they will first hear a message.
To add the message that callers will hear,
1. On the Bulk Campaigns page, click the name of the bulk dialer campaign. 
2. In the Message to destinations section, do one of the following to add a message:
• Click the Choose File button to select a .wav file from your PC.
• Use the Sound file to use dropdown to select a sound that has been saved to the Sounds page.
3. Once the message has been selected, click the Use or upload button to apply the message. 

Manage a Bulk Dialer Campaign's Destinations
On the Bulk Campaigns page, click Destinations next to the bulk dialer campaign.
If you are viewing a bulk campaign, in the Other options for this campaign section you can click List destinations >> instead. 
In the Destinations menu, you can view the phone numbers that will be contacted according to the bulk campaign. While viewing these destinations, you can do the following:
View a Destination's Info
While viewing the destinations in a campaign, you can click a phone number to view its information.
You can view the phone number, the number of attempted calls made to this destination from the campaign, and its status.

The Status dropdown can be used to change the destination's status.
✔ Changing the status of a destination ensures that the campaign is no longer calling the destination. This can be useful if a client calls in regarding what the bulk dialer call addresses.
Update a Destination's Status
You can use the dropdown next to a destination to adjust its status.
Once the dropdown has been adjusted, select the destination and click the Update selected button.
✔ Once this button has been clicked, you should see a confirmation message that the destination has been updated.
Changing the status of a destination ensures that the campaign is no longer calling the destination. This can be useful if a client calls in regarding what the bulk dialer call addresses.
Delete a Destination
When a phone number no longer needs to be called through the bulk campaign, the obsolete destination can be deleted.
1. Select a phone number and click the Delete selected button to remove it from the bulk dial campaign.
2. On the prompt that appears, click the OK button.
✔ You should see a confirmation message stating that the destination has been deleted.

Call Recording
Call recordings that are created have to be stored in Record Groups. Multiple record groups can be created for different purposes, and multiple extension numbers (also known as telephone lines) can be assigned to a recording group.
To ensure that a user's calls are being recorded, the following will need to be done:
- Create a record group.
- Assign the record group to telephone lines.
Create a Record Group
To create a Record Group for storing different recordings from telephone lines…
1. Navigate to Features → Call recording. 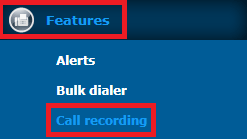
2. In the New record group menu, configure the following information: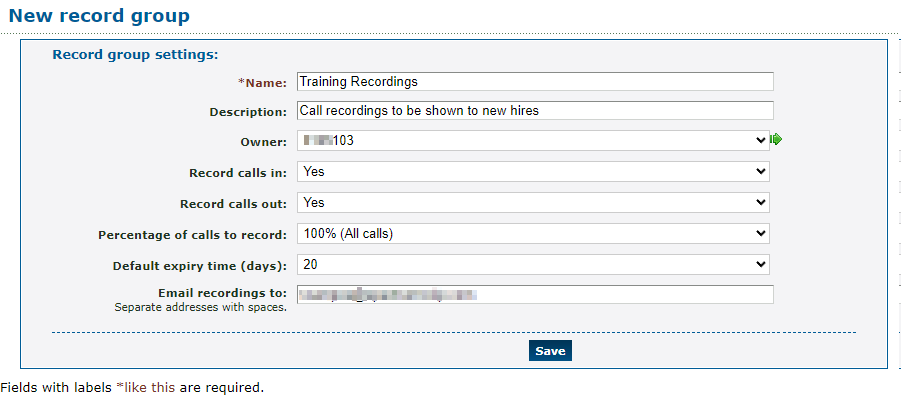
| Option | Description |
|---|---|
| * Name | Type a name to identify this record group with. Some businesses name record groups after the purpose of the call or the department handling the call. |
| Description | Type a brief description about this record group |
| Owner | If needed, select a user that should be able to view and edit this record group in the Enswitch web portal. |
|
Record calls in & Record calls out |
Set whether or not the record group should record inbound and outbound calls. |
| Percentage of calls to record | If needed, select the percentage of calls that should be recorded. |
| Default expiry time (days) | Select how many days the record group should store any expired recording before deleting the recording. Individual recordings can have their expiry time adjusted once they have been created and stored. |
| Email recordings to | If needed, type a valid email address that should receive a copy of any new recordings stored in this record group. |
3. Click the Save button.
4. Repeat steps 2 and 3 for each record group.
✔ Once you are done, you should have a list of different record groups that can store recordings for different people and purposes.

Assign a Record Group
Once a Record Group has been created, it will need to be assigned to a function to allow calls to start being recorded and stored via the record group. A record group can be assigned for either a phone number or a telephone line.
Assigning a record group to a phone number will ensure that calls that are made by or made to the phone number are recorded and stored according to its record group's settings.
Quick Tip: If a call goes through multiple phone numbers that use different record groups, the call would be recorded and stored to all record groups that are designated to the phone numbers.
Assigning a record group to a telephone line would have calls that are handled by the specific device recorded and stored in its selected record group. This can be useful for ensuring that a call that is made directly to a user's extension number by another user is recorded.
To a Number
A phone number can be assigned to a record group to ensure that calls going through or originating from the phone number are recorded and stored in its record group.
To assign a record group to a phone number…
1. Navigate to Features → Numbers.
2. Click the phone number that should be assigned to a record group.
3. In the phone number's settings, use the Record group dropdown to select the name of the record group that should store calls that route through this phone number.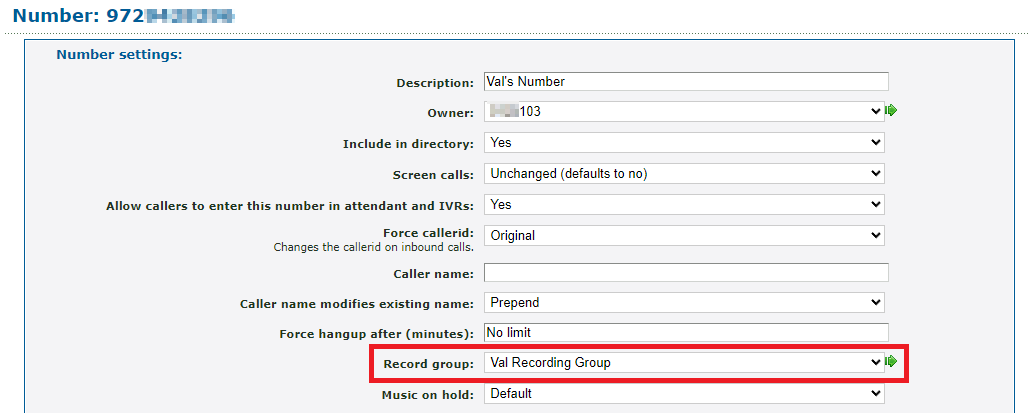
4. Click the Save button.
✔ You should see a confirmation message saying that the number has been saved.

Now calls going through this phone number will be recorded and stored in the selected record group according to the record group's settings.
To a Telephone Line
Once a Record Group has been created, telephone lines of users can be assigned to a record group to have their calls recorded and stored in that particular record group.
To do so…
1. Navigate to Features → Telephone lines.
2. Select the number of the device that should be part of a record group.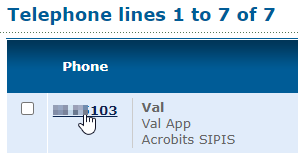
3. Scroll down to the Line settings section and use the Record group dropdown to select the name of the record group to add this extension number to.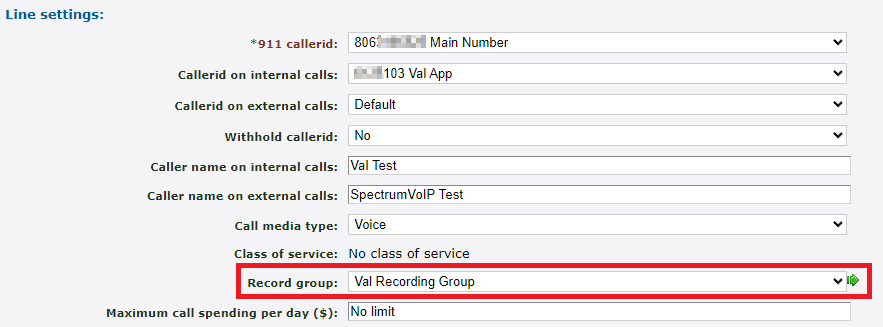
4. Scroll down to the bottom of the page and click the Save button.
✔ You should see a confirmation message saying that the telephone line has been saved.

Now calls handled by the device registered to this telephone line will be recorded and stored in the selected record group according to the record group's settings.
Manage Call Recordings
Once a record group has been created and then assigned, the telephone line(s) assigned to the record group will start recording calls which will then be stored in the record group. Once a recording is stored, it can be viewed and managed in the record group.
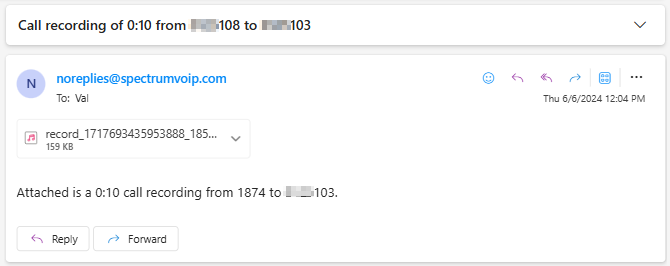
Quick Tip: If you have set an email address to receive notifications for recordings in a Record Group, that email address should receive an email from noreplies@spectrumvoip.com containing the call recording and information about the recording, such as its duration and the parties involved in the call.
To manage call recordings in a record group…
- Navigate to Features → Call recording.
- Click Recordings next to the record group storing the recording that needs to be referenced.

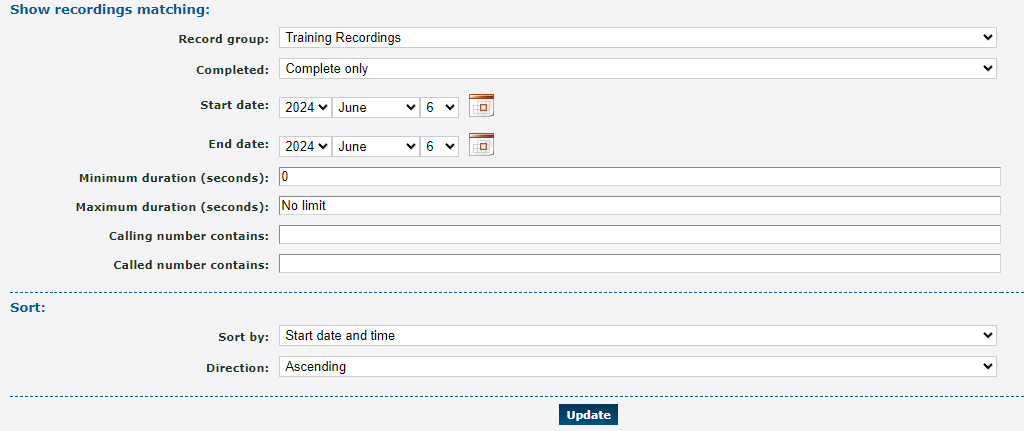
- On the Recordings page, use the menu to filter and sort the recordings that need to be managed and click the Update button.
- To listen to a call recording, click Play via call next to the recording.

- In the message that appears, type the extension number that should receive the call and click the OK button.
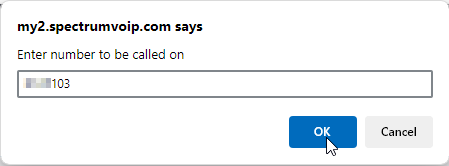
✔ The device registered to that extension number should receive a call that will be play the recording when answered.
- While viewing a recording, you can also do the following:
Download
If needed, call recordings can be downloaded for safe keeping.
To download call recordings, select the recordings that need to be downloaded to your PC and click the Download selected button

The downloaded call recording(s) can be stored, extracted, listened to, and shared as needed.

Copy or Move
If you have multiple record groups, you can copy or move a recording within one record group to another record group.
To copy or move a recording to another record group…
1. Select the recording(s) that need to be copy/moved and click the Copy or move selected >> button.

WARNING: If there are not any other Record Groups created, you will see this error:

2. In the Copy or move recording menu, do the following:

• Action - Select whether to copy or move the recording.
• To record group - Select the name of the record group to copy/move the recording to.3. When you are ready, click the Save button.
✔ You should see a confirmation message telling you that the recording has been copied or moved.

That recording can now be viewed in the record group that was selected.
Delete
Manually Delete a Recording
When a call recording is no longer needed, it can be deleted from a record group.
1. Select the recording(s) that should be deleted and click the Delete selected button.

2. In the message that appears, click the OK button.

✔ You should see a confirmation message telling you that the recording has been deleted.

The Expiry Date of Recordings
Call recordings are automatically deleted according to the record group's set Default expiry time setting. If needed, a call recording's expiry date can be adjusted to ensure it is automatically deleted on a certain date that differs from the default.
To set the expiry date of a specific recording…
1. Select the recording(s) that need a specific expiry date and click the Set expiry for selected >> button.

2. In the Set recording expiry time menu, select the date that the recording should expire.
3. When you are ready, click the Save button.✔ You should see a confirmation message telling you that the expiry time has been set.

Once that date is reached, the recording will be deleted. Before the date approaches, you can consider downloading or deleting the recording at an earlier date.
Export
If you need to keep record of the call recordings that have been stored, you can export the shown recordings as a .csv spreadsheet.
To do so,
1. Filter the call recordings that should be shown using the top menu.
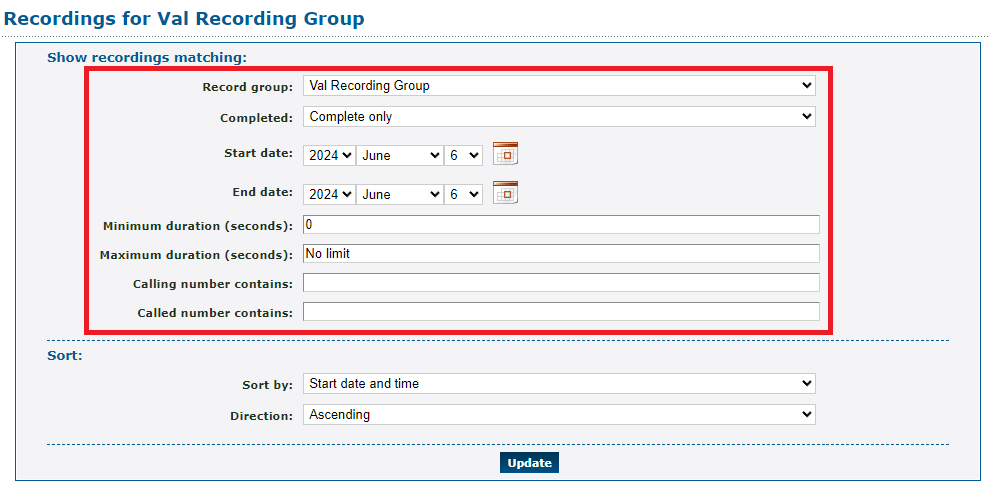
2. Once you have the correct recordings shown, click the Export as .csv button.
✔ A spreadsheet full of the recordings' data will be downloaded to your PC.

You can open, edit, print, and share this spreadsheet as needed.
Conferences
In many businesses, conferences are an essential means of communicating with multiple remote employees at once. A conference bridge allows multiple people to call into the system and talk together.
As an Enswitch admin, you can use your web portal to create and configure a conference bridge. Once a conference bridge has been created and implemented, callers can join the conference and use different actions to participate in the conference.
View the sections below to learn more about creating a conference bridge and how your conference's participants can join and participate in a conference.
Implement a Conference Bridge
As an Enswitch admin, you can use your web portal to create a conference bridge on the Conferences page. To ensure that one is properly set up, the following needs to be completed:
1. Create a conference bridge.
2. Add participants to notify for scheduled conferences.
3. Set up ways for callers to call in to join the conference.
Step 1: Create a Conference Bridge
1. Log into your Enswitch web portal.
2. Navigate to Features → Conferences.
3. On the Conferences page, click the New >> button.
4. In the New conference menu, fill in the following information:
| Option | Description |
|---|---|
| * Conference code |
This is the code that people calling into the conference will need to dial to join the correct conference. By default, a unique, 6-digit code is randomly generated. If you have a preference, type a unique series of numbers. |
| Description | Type a brief note to display alongside the conference code on the Conferences page. |
| Owner | Select a user that should be able to view and edit this conference. |
| * Administrator PIN | Type a series of numbers that an administrator would need to be dial. This PIN will only be needed if callers are prompted to enter a PIN while dialing into the conference. |
| * Talk PIN | Type a series of numbers that need to be dialed by participants that should be able to talk in the conference call. This PIN will only be needed if callers are prompted to enter a PIN while dialing into the conference. |
| * Listen PIN | Type a series of numbers that need to be dialed by participants that will only be able to listen in a conference. This PIN will only be needed if callers are prompted to enter a PIN while dialing into the conference. |
| Maximum people in conference |
Select the maximum number of people that should be allowed to join the conference call. Note: When a caller attempts to join the conference after it is full, the system will play an error message before disconnecting the caller. If there should not be a maximum, select No limit. |
| Ask callers to record name | Enable to this to require participants in the conference record their name before they are accepted into the conference call. |
| Play music to callers | Select whether or not to play music for while the first person that has joined a conference waits for other participants to join. |
| Callers are muted unless administrator present | If needed, set the conference to keep callers muted until the conference's administrator joins the call. |
| Play tone when new person joins | Select whether or not a tone should be played when new people join the conference. |
| Duration of conference | If needed, select how long this conference call should be able to be active. If there should not be a time limit, select Permanent. |
| First conference starts | Select the date and time that this conference should take place. |
| Repeats |
If this conference should take place on a recurring basis, select the frequency (e.g., Daily, Weekly, 2 weeks, Monthly, 2 months) that this call should take place. Note: The day and time that would be used is referenced from the First conference starts option. |
| Total number of conferences |
Select how many conferences should take place before the conference call stops repeating. For example… If a conference is set to start on a Monday and repeat daily for a total of 5 conferences, this conference would stop automatically starting a conference call on Friday. |
| Callerid for notification calls |
By default, the system will withhold any caller ID information when the system places calls to the conference's participants. Note: This can help prevent called participants from rejecting the call by mistake because they think they are receiving a spam call. |
| Show in control panel |
Select whether or not this conference bridge should be shown on the Control Panel page. Quick Tip: Showing this conference bridge will allow users that use the Control Panel to drag and drop calls onto the conference bridge for transferring. |
Note: The scheduling options (i.e., the “First conference starts”, “Repeats”, and “Total number of conferences” options) are not needed if this conference bridge will be called.
5. Click the Save button.
✔ Once you save, you should see a Confirmation message saying that the conference has been saved.
NOTE: It is recommended to save BEFORE adding participants in the bottom section of the page.
Sometimes adding participants before initially saving can cause the conference bridge to not save the extension numbers, telephone numbers, and email addresses entered.
Click Return to list of conferences >> to go back to the Conferences page.
Step 2: Add Participants
If a conference bridge is set up with the “First conference starts”, “Repeats”, and “Total number of conferences” settings configured, the extension numbers, telephone numbers, and email addresses of its participants can be set ahead of time so that they can be notified/called when the conference takes place.
NOTE: If participants are expected to call in using a call in number, feature code, or an IVR menu, then putting the contact information of people in this section is not necessary.
To add the contact information of participants for scheduled conferences…
1. On the Conferences page, click the conference code of the conference bridge that needs participants added ahead of time.
2. In the Notify the following when conference starts section, type the telephone lines and email addresses of the participants that should receive calls and email notifications for this conference.
3. Click the Save button.
✔ When the time and date set for the conference (according to the “First conference starts” and “Repeats” settings) is reached, the conference bridge will send the extension numbers and telephone numbers a call.
If there is a person's email listed, they will receive an email notification telling them how they can join the conference.
Step 3: Route Calls to a Conference Bridge
Once you have created and configured a conference bridge, there needs to be a way to contact it. As an Enswitch admin, you have several options for ensuring calls are routed to the conference bridge.
Use the following sections to explore the most common methods use for allowing callers to call into a conference bridge:
Conference Call In Number
A phone number can be set up as a call-in number for a conference bridge. This can make it easy for callers to dial into conference calls.
To change a phone number's destination to a conference bridge…
1. Navigate to Features → Numbers.
2. Click the phone number that should be dedicated to the conference bridge.
3. Scroll down to the Route calls to section and use the Default destination dropdown to select one of the following options:
• Conference, administrator - Allow callers to join the conference as an Administrator.
• Conference, ask for PIN - Have the callers enter the Administrator PIN, Listen PIN, or Talk PIN in order to join the conference as their respective role.
• Conference, listen - Allow callers to join the conference as listeners.
• Conference, talk - Allow callers to join the conference with the ability to listen and talk.
4. Click the Save button. 
✔ You should see the phone number listed with the conference bridge destination shown.

5. Place a test call to this phone number to confirm that you can access the conference bridge.
Conference Feature Code
A feature code can be created that internal user can dial on their desk phones to call into a conference bridge. If this feature code is set to allow callers to enter this code into auto attendants and IVR menus, then outside callers can dial this feature code as well.
To create a feature code that should route calls to the conference bridge…
1. Navigate to Features → Feature codes.
2. On the Feature codes page, scroll down and click the New >> button. 
3. In the New feature code menu, fill out the following information in the Feature code settings section:
| Option | Description |
|---|---|
| * Feature Code |
Type a unique series of numbers that users should dial on their desk phone to reach the conference. Quick Tip: Using the conference code as the feature code may be a good option. |
| Description | Type a note describing what this feature code is used for. |
| Owner | If needed, select a user that should be able to view and edit this feature code in the web portal. |
| Allow callers to enter this feature code in attendant and IVRs | Select whether or not callers in auto attendants or IVR menus should be able to dial this code. |
| Show in control panel |
Select whether or not this feature code should be shown on the Control Panel page. Quick Tip: Showing this feature code will allow users that use the Control Panel to drag and drop calls onto the conference bridge for transferring. |
4. In the Route calls to section, use the Default destination dropdown to select one of the following options:
• Conference, administrator - Allow callers to join the conference as an Administrator.
• Conference, ask for PIN - Have the callers enter the Administrator PIN, Listen PIN, or Talk PIN in order to join the conference as their respective role.
• Conference, listen - Allow callers to join the conference as listeners.
• Conference, talk - Allow callers to join the conference with the ability to listen and talk.
5. Click the Save button.
✔ You should see that new feature code listed in the Feature Codes page.

6. Place a test call to this feature code on a desk phone to confirm that you can access the conference bridge.
Conference Bridge IVR Menu
Some businesses create a special IVR Menu that is used solely to route callers to different conferences. This kind of IVR menu is commonly referred to as a Conference Bridge IVR Menu.
To create a Conference Bridge IVR Menu…
1. Navigate to Features → IVR menus.
2. On the IVR menus page, click the New >> button to create an IVR menu.
3. In the IVR settings section, fill out the following information:
| Settings | Description |
|---|---|
| * Name | Type a name to identify this IVR menu with. |
| Description | Type a note about the purpose of this IVR menu. |
| Allow caller to enter feature code or telephone line | Select whether or not callers should be able to dial feature codes or the extension numbers of users. |
| Time out after | Select how long (in seconds) that the menu should wait for input before following the Time out destination. |
|
PIN for IVR setup menu & PIN repeat |
If the IVR setup menu will be used, type and confirm a PIN that callers would need to enter to access it. |
| Show in control panel |
Select whether or not this IVR menu should be shown on the Control Panel page. Quick Tip: Showing this IVR menu will allow users that use the Control Panel to drag and drop calls onto the IVR menu for transferring. |
4. In the Destinations section, use the dropdown next to a dial pad menu option to select one of the following options.
• Conference, administrator - Allow callers to join the conference as an Administrator.
• Conference, ask for PIN - Have the callers enter the Administrator PIN, Listen PIN, or Talk PIN in order to join the conference as their respective role.
• Conference, listen - Allow callers to join the conference as listeners.
• Conference, talk - Allow callers to join the conference with the ability to listen and talk.
5. Click the Save button. 
✔ You should see a confirmation message stating that the IVR menu is saved and that a greeting should be added.

5. Make sure that the greeting of the IVR menu lists out the options callers should press to reach the different conferences.
Add an IVR Menu Greeting
1. Scroll down to the Message file section.
2. Add in the audio file that will replace the greeting of the IVR menu using one of the following methods:
• Use the Sound file to use dropdown to select an audio file that has been added to the Sounds page.
OR
• Click the Choose File button to select and upload a properly formatted 16-bit .wav file (8Khz, Mono, 16-Bit PCM).
3. Click the Use or upload button. 
5. Click the Save button. 
✔ You should see the new Conference IVR menu listed in the IVR Menus page.

7. Route a phone number you own or create a feature code for the Conference IVR menu.
Conference IVR Menu Phone Number
If you have an extra phone number, you can have it route calls to the conference IVR menu. This would allow your users and external callers to call into the IVR menu so that they can pick the conference they need to join.
To route a phone number to a conference IVR menu…
1. Navigate to Features → Numbers.
2. Click the phone number that should be dedicated to the conference bridge.
3. Scroll down to the Route calls to section and use the Default destination dropdown to select IVR menu and the name of the conference IVR menu. 4. Click the Save button.
✔ You should see the phone number listed with the IVR menu as a destination.

5. Place a test call to this phone number to confirm that you can access the conference bridge.
Conference IVR Menu Feature Code
A feature code can be created that internal user can dial on their desk phones to call into the conference IVR menu. If this feature code is set to allow callers to enter this code into auto attendants and IVR menus, then outside callers can dial this feature code as well.
To create a feature code that should route calls to the IVR menu used for joining conferences…
1. Navigate to Features → Feature codes.
2. On the Feature codes page, scroll down and click the New >> button. 
3. In the New feature code menu, fill out the following information in the Feature code settings section:
| Option | Description |
|---|---|
| * Feature Code |
Type a unique series of numbers that users should dial on their desk phone to reach the conference. Quick Tip: Using 2663, which spells out CONF on dial pads, may be a good option. |
| Description | Type a note describing what this feature code is used for. |
| Owner | If needed, select a user that should be able to view and edit this feature code in the web portal. |
| Allow callers to enter this feature code in attendant and IVRs | Select whether or not callers in auto attendants or IVR menus should be able to dial this code. |
| Show in control panel |
Select whether or not this feature code should be shown on the Control Panel page. Quick Tip: Showing this feature code will allow users that use the Control Panel to drag and drop calls onto the conference bridge for transferring. |
4. In the Route calls to section, use the Default destination dropdown to IVR menu and the name of the conference IVR menu.
5. Click the Save button.
✔ You should see that new feature code listed in the Feature Codes page.

6. Place a test call to this feature code on a desk phone to confirm that you can access the conference bridge.
6. Place a test call to this IVR menu to confirm that you can access and use it as intended.
Join a Conference
Once a conference bridge has been created, it can be joined in different ways according to the sections above.
If a feature code, IVR menu, or phone number has been set up for contacting the conference bridge, then conference participants can call in using those features to join their conferences.
If a conference has been configured with the “First conference starts”, “Repeats”, and “Total number of conferences” settings adjusted, the extension numbers, telephone numbers, and email addresses set at the bottom of the conference bridge's settings will be notified/called when the conference starts.
Participate in a Conference
While Administrators and Talkers are in a conference, they can press star (*) to hear the options they have for interacting in the conference. Unlike administrators and talkers, listeners are only able to listen to the call, so they do not have any options they can press.
View the following tables to learn more about the different actions conference administrators and talkers can use to participate in a conference call.
Administrator Actions
| Key to Press | Description |
|---|---|
| 1 | Mute or unmute yourself |
| 2 and 3 | Decrease and increase your listening volume. |
| 4 and 5 | Decrease and increase your talking volume. |
| 6 | Lock or unlock the conference so that new callers can not join. |
| 7 | Eject the last person that joined the conference call. Other administrators cannot be ejected. |
| 8 | Mute or unmute the talkers and listeners in the conference call. |
| * | Hear these options again. |
Talker Actions
| Key to Press | Description |
|---|---|
| 1 | Mute or unmute yourself |
| 2 and 3 | Decrease and increase your listening volume. |
| 4 and 5 | Decrease and increase your talking volume. |
| * | Return to the conference. |
Feature Codes
Feature codes are dialable codes that can be assigned different functions to meet your needs. Once created, these codes can be dialed on a SpectrumVoIP device, such as a desk phone, the SpectrumVoIP ES mobile app, or the SpectrumVoIP ES desktop app.
Create Feature Codes
More Info: To explore different examples of feature codes that could be added, check out this category of articles:
https://documentation.spectrumvoip.com/en_US/example-feature-codes
To create a new feature code…
1. In the Enswitch web interface, navigate to Features → Feature codes.
2. Click the New >> button.
✔ Doing this will make the New feature code menu appear:
3. Fill in the following boxes: (fields marked with * are required)
| Field | Description |
|---|---|
| * Feature code |
This must be a combination of numbers and/or * (for example, *123 or 123). Our Recommendations for Feature Codes • 3-digit Extension # = Call that user directly – For example. using 101 could be an alternative way to dial 0555101. DANGER: Do NOT use a N11 number, such as 911, 211, or 411. |
| Description | This text is displayed next to the code in the list of feature codes. |
| Owner | This person may edit the feature code even if they are not an administrator. |
| Screen calls | When set to Yes, the person answering is asked if they want to accept the call. |
| Allow callers to enter this feature code in attendant and IVRs | When set to yes, this feature code can be entered in the auto-attendant and IVR menus. |
| Caller name | Allows users on a SIP telephone to see which feature code the call came from. If not set, the caller name supplied by the caller will be used. |
| Caller name modifies existing name | Determines whether the caller name setting above replaces the caller name supplied by the caller, prepends to it, or appends to it. |
| Force hang-up after (minutes) | Hang up the call after a certain number of minutes. |
| Record group | Associates the feature code with a record group. |
|
PIN & PIN repeat: |
Set a digital PIN that needs to be entered to use this feature code. When this is enabled, you can call the number routing menu and change the temporary routing and announcement message. |
| Music on hold | When selected, users who dialed this code and are on hold will have music played back to them. |
| Show in control panel | When set to Yes, the feature code will be shown in the control panel. This cna be useful for drag and drop transferring. |
| Default destination | Where the call is sent unless overridden. |
| Temporary override | Overrides the main routing in the default destination. When you use the number routing telephone menu, the temporary routing changes. |
4. Click Save.
Export Feature Codes
Some users may want a list of the feature codes they have available to dial in their account.
To export the features codes as a spreadsheet…
1. Click Features
2. Select Feature codes.
3. Click Export as .csv.
✔ The system will download a .csv file to your PC that is readable by spreadsheet applications.
Default Feature Codes
Some feature codes have been created ahead of time for use. These dialable codes include…
| Feature Code | Function |
|---|---|
| *1 | Voicemail direct access. |
| *2 | Voicemail login. |
| *3 | Conference login. |
| *4 | Auto-attendant. |
| *5 | Number routing menu. |
| ** | Group pickup. |
| ***<telephone line> | Pickup specific telephone line. |
NOTE: These options are not shown on the feature codes configuration page.
If you create feature codes with these numbers, your feature codes override the defaults.
Feature Prefixes
Feature Prefixes are codes that are dialed alone or before a telephone line or phone number to modify the behavior of a call. These prefixes can have many different functions, or Purposes.
When a Feature Prefix is dialed, the phone system reads the prefix and then strips it off before routing the call according to the Purpose of the feature prefix.
Quick Tip: A commonly used example of a feature prefix is 9.
This prefix is usually set to only allow users to make external calls when they dial a 9.
Create a Feature Prefix
As an Enswitch admin, you can create feature prefixes that your users can dial on their SpectrumVoIP serviced devices.
To create a dialable feature prefix…
1. Navigate to Features → Feature prefixes.
2. Click the New >> button. 

3. In the New feature prefix menu, enter the following information:
| Setting | Description |
|---|---|
| * Called number prefix | Type the number(s) to be dialed and matched. |
| Called number minimum length | Minimum length of the called number to match. This includes the prefix. |
| Called number maximum length | Maximum length of the called number to match. This includes the prefix. |
| Description | Type a note to be displayed in the list of feature prefixes. |
| Purpose |
Use the dropdown to select what this feature prefix will be used for.
|
Feature Prefix Purpose Options
There are many different options available for customizing how a call should behave when a specific feature prefix is dialed. These options are called Purposes in the Enswitch web portal.
| Purpose | Description |
|---|---|
| Conference |
Using this feature prefix purpose, users can join conference calls in 4 different ways: • Conference, administrator - Allows the caller to join a conference call as an admin with more privileges. |
| External number | Users dial this feature prefix before they can place outbound calls to external numbers. |
| Hide callerid | Users can dial this feature prefix before a telephone number to prevent their caller ID from being shown to the other party. |
| Mailbox |
Dial this prefix followed by a mailbox number to directly call or transfer a call to that mailbox. Quick Tip: This is useful for transferring callers if you know the person you wish to transfer them to is unavailable. |
| Page telephone | As an alternative to using a feature code, this kind of feature prefix can be dialed along with the 7-digit extension number of the telephone line to be paged. |
| Park call | Type a feature prefix to be dialed to park a call. |
| Plugin |
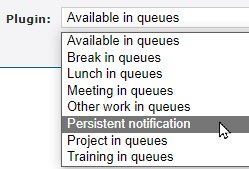
To use a certain plugin for that feature prefix, select from the Plugin drop-down: Extra Info: The plugin can access the remainder of the called number after the prefix using the ${ENSWITCH-SUBNUMBER} variable. |
| Record call |
The Record call feature prefix allows users to record the dialed call. That call's recording is stored in the Record Group that is selected using the Record group drop-down:
NOTE: The record group settings (such as “percentage of calls to record”) still apply. If the settings of the recording group the user's telephone line is a part of restricts recording, then it is possible the call may not be recorded. |
| Remote access |
Create a feature prefix to be dialed to use a remote access menu. To use the remote access prefix… 1. Dial the feature prefix. |
| Replace prefix |
Using this feature prefix, callers can replace what has been dialed with what has been typed into the Replaced with box.
Quick Tip: This feature prefix purpose allows for the creation of short, speed dials to external number ranges. This can also be used for replacing an international access code. |
| SIP domain | Route the call to the URI of a SIP domain that is typed in the SIP domain box. 
|
| Set call forwarding | Dial this feature prefix followed by a number to set call forwarding for the caller's telephone line to that dialed phone number. |
|
Set call media to fax & Set call media to voice |
Route the call according to the main voice or fax routing table. |
| Spy on last call to/from telephone |
Create feature prefixes to be dialed before a telephone line (i.e. the 7-digit extension number of an agent) to spy on that telephone line's call.
|
| Telephone line | Dial this prefix followed by a telephone line's account number to directly call that telephone line. |
| Use voucher | Allow users to use a voucher to make a call to the feature prefix by dialing <prefix> <voucher>. |
4. Click the Save button. 

5. Repeat steps 2-4 for each feature prefix users should be able to use.
Hunt Groups and Queues
When your business/organization experiences a large call volume, queues and hunt groups can help by distributing out calls to agents (known as destinations). Callers waiting in a queue/hunt group will hear music on hold or ringing until a destination is available to take a call.
- In a Queue, destinations ring one at a time when a call is waiting. If a destination is not able to answer a call, the call will move on to the destination with the next highest priority.

- In a Hunt Group, all destinations within a level will ring together when a call is placed to the hunt group. Once a destination answers the call, the other destinations will stop ringing. When none of the destinations in a level answer, the call will start ringing the next level of agents.

| Queues | Hunt Groups |
|---|---|
|
|
Add a Queue
As an Enswitch admin, you have the ability to add a Queue that can distribute calls to agents one at a time. Queues can be an amazing tool to help manage call flow for your business/call center. With a Queue, you can use the Queue Panel to monitor its activity and the performance of your agents.
Step 1: Create a Queue
On the Queues page, a call queue can be created to route calls to agents one-by one.
1. Navigate to Features → Queues.
2. Click New.
3. On the New queue page, fill in the following fields (fields marked with * are required):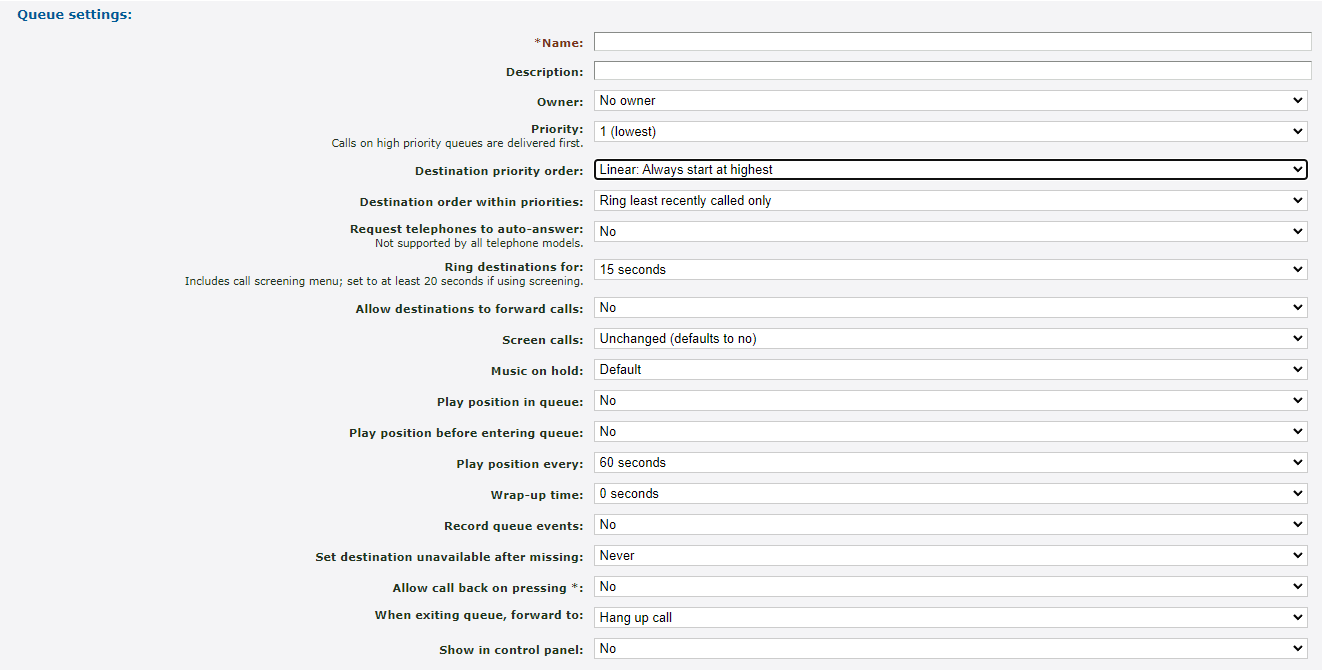
| Option | Description |
|---|---|
| * Name | Type a unique name for identifying the queue |
| Description | A note that is displayed alongside the queue's name in the list of queues. |
| Owner | Allow a user to edit the queue even if they are not an admin. |
| Priority | Calls on high priority queues are delivered first. Calls to queues of the same priority are delivered on a first come, first serve basis. |
| Destination priority order | Determines how the queue will ring agents. These options include… • Linear - The queue will ring agents with the highest level of priority. • Smart linear - The queue will ring the last level that answered before ringing linearly. • Circular - The queue will ring starting at the next level from the level that handled the previous call. • Smart Circular - The queue will ring the last level that answered and then continue ringing circular. |
| Destination order within priorities | Choose to either ring the next available line in a priority grouping or ring all available lines in a grouping at once. |
| Request telephones to auto-answer |
If necessary, you can enable the call to have the telephones of destinations auto-answer calls. WARNING: This feature is not supported by all phone models. |
| Ring destinations for |
Select how many seconds a call will ring to each destination. When a destination does not answer, the call is returned to the queue to ring the next destination. Note: If call screening will be enabled, set this time to at least 20 seconds. |
| Allow destinations to forward calls | It is recommended to leave this set to no to avoid causing loops. |
| Screen calls |
Choose whether or not to screen calls. ✔ When set to yes, the destination will be asked if they will accept the call. This can help mitigate ghost and spam calls. |
| Music on hold | Use this option to select if callers should hear music or ringing while waiting in the queue. |
| Play position in queue | Select whether or not to have the queue tell the caller their position in the queue. |
| Play position before entering queue | Select if the queue should tell callers their position in the queue before placing them in the queue to wait. |
| Play position every | Select how often (in seconds) the queue will play the position of the caller while they wait in the queue. |
| Wrap-up time |
Select how long (in seconds) the queue should wait after a destination ends a call before sending a new call to them from the queue. ✔ This is useful for giving your agents time to finish any notes and other tasks to finish processing the previous call. |
| Record queue events | Allows events in a queue to be recorded if queue statistics are enabled. |
| Set destination unavailable after missing |
Set how many calls a destination can miss before being set as unavailable in the queue. ✔ This can be useful when an agent steps away suddenly. |
| Allow call back on pressing * | When enabled, callers will be asked if they want a call back when they press * to exit the queue. |
| When exiting queue, forward to | Select a destination for callers to be forwarded to when agents are not available to take their call. |
| Show in control panel | Choose whether or not to show this queue and its status in the Control panel page of the web portal. |
Step 2: Configure a Queue's Exit Options
As a safeguard, settings that reference the When exiting queue, forward to option can be set up that can tell the queue how to handle calls that meet certain conditions.
Use these following fields to configure when callers will follow the queue's exit option:
| Option | Description |
|---|---|
| There are already calls in the queue |
This acts as the maximum queue length. Choose how many callers can wait in the queue at a time. ✔ When additional calls try to enter the queue when it is full, the extra callers will be sent to the destination set in the When exiting queue, forward to option. |
| Maximum hold time is reached | Set how long callers will be able to wait before the queue exits them out of the queue according to the When exiting queue, forward to option. |
| No destinations are logged in or entering the queue | Decide if callers should follow the When exiting queue, forward to option when there are not any destinations logged in to the queue when a call is made to the queue. |
✔ Once the queue has been configured, make sure to click Save.

Step 3: Set a Message for Callers
Sometimes it may be necessary to have a message played for callers as they wait in the queue.

To add in a message, you can either…
• Select a sound file saved in the Sounds page (Features → Sounds) of the web portal.
• Upload a .wav file created from a recording or text-to-speech.
DANGER: To upload a .wav file, it is recommended to ensure the file has been converted to the proper format (.wav 8Khz, Mono, 16-Bit PCM).
If needed, please contact our technical support team to set up this message by calling (469) 429-2500 or emailing support@spectrumvoip.com.
Uploading an incorrectly formatted audio file can result in unexpected, potentially catastrophic issues for your phone system.
Once a message has been added in, a new setting will appear in the Queue settings section: Play message to queued calls.
To have this message play to callers waiting, use the Play message to queued calls drop-down to select Yes.

Step 4: Add Agents to a Queue
Once the new queue has been saved, you can add in the destinations that callers will ring to. These destinations can be telephone lines and phone numbers.
To add a destination for the queue…
1. Navigate to Features → Queues.
2. Click the name of the queue.
3. In the Destinations section, click Add a destination.
4. On the New destination page, use the Destination drop-down to select if a Telephone line or Number will be the destination.
5. Do one of the following:
• If you selected Number, type the telephone number in the box.
WARNING: It is recommended to include the country code of the phone number to avoid any dialing issues.
• If you selected Telephone line, use the drop-down to select user's telephone line that will be rung.
6. Use the Available for calls drop-down to select if the destination should immediately be available for calls.
7. Use the Priority drop-down to select the priority of this destination.
8. Click Save.
9. If needed, click Add another destination to add more agents for the queue.
Step 5: Change an Agent's Status
Using the Queue Panel, you can update an agent's status in the queues they are present in.
To update an agent's status in their queues…
1. Navigate to Control panel → Queue panel.
2. Click the Options  icon to open the Panel options menu.
3. To show only a specific queue and its agents, use the Show only queues option to select the queue(s) to show in the queue panel.
4. Click the Save options button.
5. In the confirmation prompt, click OK.
6. Minimize the menu by clicking the arrow icon.
7. To change the status of an agent, click the agent and select the status to set them to.
✔ The agent should now show in the status you selected.
Add a Hunt Group
As an Enswitch admin, you have the ability to add a Hunt Group that can distribute calls to multiple agents set in a Level. Hunt Groups can be an amazing tool to help manage call flow for your business/call center.
Step 1: Create a Hunt Group
On the Hunt Group page, a new hunt groups can be created to help route calls to multiple agents at once.
1. Navigate to Features → Hunt groups.
2. Click New.
3. On the New hunt group page, fill in the following fields (fields marked with * are required):
| Option | Description |
|---|---|
| * Name | Type a unique name for identifying the hunt group. |
| Description | Add a note that will be displayed alongside the hunt group's name in the lists of hunt groups. |
| Owner | If needed, allow a user to edit the hunt group even if they are not an admin. |
| Ring each level for | Select how many seconds a call will ring to each destination. When a destination does not answer, the call will start ringing the next level. |
| Level order | Select what type of hunt group this hunt group will be, which decides how the levels are rung. • Linear - The queue will ring agents in Level 1 first. • Smart linear - The queue will ring the last level that answered before ringing linearly. • Circular - The queue will ring starting at the next level from the level that handled the previous call. • Smart Circular - The queue will ring the last level that answered and then continue ringing circular. |
| While ringing | Choose if the system will play ringing or music on hold for callers waiting in the hunt group. |
| Music on hold | Select the music that will be played to callers waiting.
|
| Screen calls |
Choose whether or not to screen calls. ✔ When set to yes, the destination will be told the caller ID of the caller and asked if they will accept the call. This can help mitigate ghost and spam calls. |
| Allow destinations to forward calls | Select whether or not agents should be able to forward calls elsewhere if needed. |
| Show in control panel |
Choose whether or not this Hunt Group should be shown in the Control Panel page. ✔ Enabling this option will allow calls to be dragged and transferred to the Hunt Group using the Control Panel page. |
4. Click Save.
Step 2: Set the Default Destination for a Hunt Group
Now that the queue's settings have been configured, a Default Destination should be set. The Default Destination is where calls will be routed if an agent is unable to answer.
1. In the Hunt group saved notice, click the Set the default destination option.
Quick Tip: Alternatively, you can click the destination shown under Default destination if no levels answer.
2. In the Destination Settings page, use the Destination drop-down to select a feature that will act as the default destination for unanswered calls.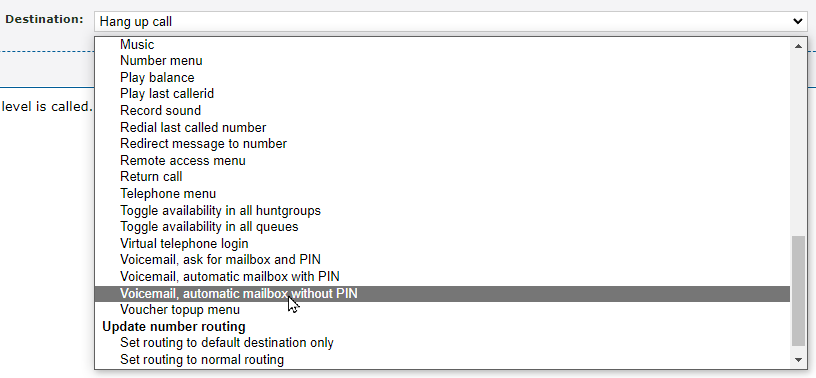
Note: To learn more about Destination Features, read this article.
3. Once the destination feature has been selected, click Save.
Step 3: Add a Destination to the Hunt Group
Once the new hunt group has been saved, you can add in the destinations that callers will ring to. These destinations can be telephone lines, phone numbers, and SIP URIs.
To add a destination for the queue…
1. Navigate to Features → Hunt groups.
2. Click the name of the hunt group.
3. In the Destinations section, click Add a destination.
4. On the New destination page, use the Level drop-down to select which group of agents this user will be in for the order that they ring.
5. Use the Destination drop-down to select if a Telephone line or Number will be the destination.
6. Once the Destination has been selected, use the box to type in the phone number, input the SIP URI, or select the telephone line that will be rung.


7. If necessary, use the Append to callerid box to type in a note that will appear alongside the phone number in the caller ID. 
WARNING: The portal will only accept numbers for this setting.
8. If needed, use the Screen calls drop-down to enable call screening for this agent.
✔ When call screening is enabled, the agent will be told who is calling (based on their caller ID) and if they would like to accept the call.
9. Click Save.
10. To add additional destinations, click Add a destination and fill in the fields.
IVR Menus

✔ Using an IVR menu can help organize your call flow and give your callers the power to choose how their call should be handled.
Create an IVR Menu
1. Navigate to Features → IVR menus.
2. If this will be a new IVR, click the New button. If you will be editing an existing IVR, click on the name of the IVR menu being adjusted.
3. In the IVR settings section, fill in the following information. Any field marked with * is required.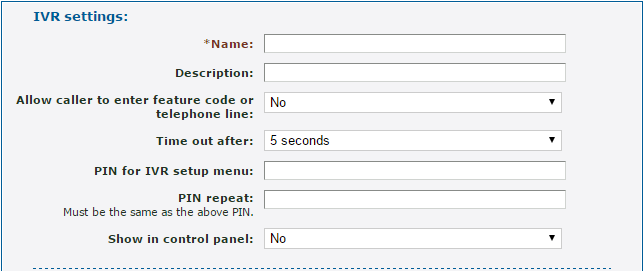
| Option | Description |
|---|---|
| * Name | Type in a unique name for the IVR. |
| Description | Type in a brief description of this IVR that will be displayed beside its name. |
| Allow callers to enter feature code of telephone line | Select whether or not callers should be allowed to interrupt the IVR's message by typing a feature code or a user's extension number. |
| Time out after | Select how long the IVR should wait for a response before timing out and following the Time out destination option. |
|
PIN for IVR setup menu & PIN repeat |
If this IVR should only be accessed by callers that have a PIN, use this box to type in a PIN that secures this IVR. ✔ This option is commonly used for IVRs that are meant for internal use only. |
| Show in control panel |
Choose whether or not this IVR should be shown in the Control Panel page. ✔ Enabling this option will allow calls to be dragged and transferred to the IVR Menu using the Control Panel page. |
4. In the Destinations section, use the drop-down menus to select what will happen when a caller selects that option on their dial pad. 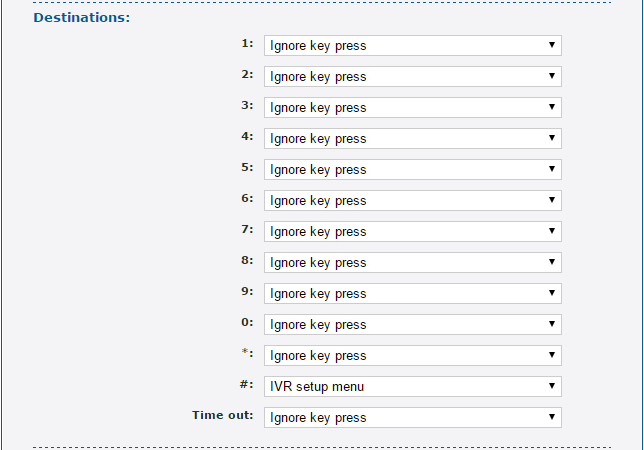
While there are many destinations that can be used for the dial pad options, the most commonly used ones are…
• Number - Forward the caller to an outside number, like a cellphone or remote call center.
• Telephone line - Direct the call to a user's extension.
• Mailbox - Forward a caller directly to an extension's mailbox.
• Queue - Direct the call to a call queue that has been set up.
• Hunt group - Direct the call to a hunt group that has been set up.
• IVR menu - Forward the call to another IVR menu.
• Feature Code - Forward the call to a feature set on a feature code. This option is commonly used to play Messages that are accessed through a Feature Code.
5. Use the Time out dropdown to select the exit option for calls that do not respond within the amount of time selected in the Time out after setting.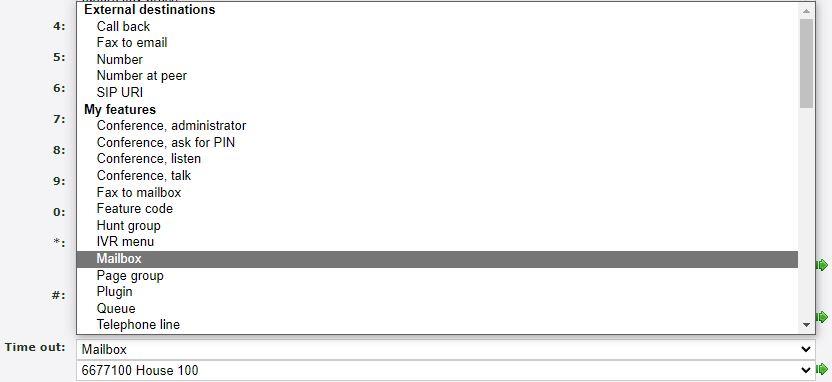
If needed, use the second drop-down menu that appears to specify where exactly the call will be sent.
6. Once any adjustments have been made, click the Save button and then click Return to the list of IVR menus.
Set Up a Greeting for an IVR
To allow callers to know what their options are in an IVR, a message will need to be set in the IVR menu.
1. Click the name of the new or existing IVR menu.
2. Record a greeting to be used in the IVR Menu by either…
• Dialing 170# on any desk phone and record a greeting.
• Record a greeting using an audio recording program on one of your devices, and then select Choose File to upload the recording to the IVR.
✔ This method allows you to use recordings you have create through a professional recording firm.
DANGER: The sound file needs to be in a WAV file, mono channel, and 8000 Hz format to be properly read in the phone system.
To convert your audio file, use this handy website:
3. Select a recorded greeting by either…
• If you dialed 170# to record a greeting, use the Sound file to use dropdown to select the new recording.
• If you have a pre-recorded greeting, click the Use or upload button to select the greeting's audio file from your PC.
4. Confirm the greeting you are using sounds correct by clicking the Download button to download the current recording onto your computer for you to listen to.
Route a Phone Number to an IVR Menu
1. Navigate to Features → Numbers.
2. Select the phone number that will route callers to the new IVR menu.
3. There are different ways you can add an IVR into a number's routing:
Always Route Calls to the IVR
1. In the Route calls to section, use the Default destination dropdown to select IVR menu as the destination.
2. When prompted, select the name of the IVR menu that should be used.
3. Click the Save button.
Only Route Calls to the IVR for a Certain Date or Time
1. In the Time Routes section, click the Add a time route button.
Quick Tip: If you already have a time route created for the number, click the name of an existing time route and skip to step 3.
2. Use the Time group drop-down to select an existing time group that has been created in Features → Times and dates.
3. Use the Forwards matching calls to dropdown to select the IVR menu destination option.
4. Use the second dropdown to select the name of the IVR menu.
5. Click the Save button.
Only Route Calls from Certain Phone Numbers to the IVR
1. In the Caller routes section, click the Add a caller route button.
2. Use the Caller number prefix box to type the whole or start of the caller's phone number that will be routed to the IVR menu.
Quick Tip: If only callers with a certain phone number should follow this routing, type the whole phone number.
If you would like callers from a certain area code to be routed to this IVR, type in the area code.
If you would like all callers with Unknown caller IDs to be routed to this IVR menu, leave the box blank.
3. In the Description box, type a brief description of the caller route.
4. Use the Forward matching calls to dropdown to select the IVR menu destination option.
5. Use the second dropdown to select the name of the IVR menu.
6. Click the Save button.
Mailboxes
When users receive a voicemail or fax, the message is saved into a mailbox. This makes it easy for users to view and manage their voicemails and faxes using the Enswitch web portal. A dialable Feature Code can also be created to allow for a mailbox to be easily dialed from a phone provided by SpectrumVoIP.
✔ Creating a new mailbox can be useful for users that need separate mailboxes. A new general mailbox can come in handy if several users need to share a single mailbox.
Create a Mailbox
On the Mailboxes page, a new mailbox can be created and an existing mailbox's settings can be edited.
To create a new mailbox…
1. Navigate to Features → Mailboxes.
2. Click the New button.
3. In the Mailbox settings section of the New mailbox page, fill out the following fields (fields with a * are required):
| Option | Description |
|---|---|
| * Mailbox number | The extension number that the mailbox will be identified with. For individual users, type their 7-digit extension number. |
| Description | Type a note that will be displayed alongside the feature code in the list of mailboxes. |
| Show in control panel |
If needed, select Yes to have this mailbox show in the control panel. ✔ Enabling this option will allow calls to be dragged and transferred to this mailbox using the Control Panel page. |
4. In the Voicemail menu section, fill out the following fields (fields with a * are required):
| Option | Description |
|---|---|
| Play messages | Choose the order that the mailbox should play messages. |
| Play callerid | Select whether or not the mailbox should play the caller ID of the person that left a message. |
| Play duration | Select whether or not the mailbox should play how long the voicemail is. |
| Play time message was left | Select whether or not the mailbox should play the time that the message was left in the mailbox. |
| Time zone | If this mailbox should not refer to the time zone set for the whole business, select the time zone here. |
| If caller presses 0 during greeting, forward to | This acts as an operator forward. Select where a caller should be forwarded if they press 0 while in the mailbox. |
| * PIN & * PIN repeat | Type in a PIN that will be used before users can check the mailbox's messages. |
5. In the Notification of new messages section, fill out the following fields (fields with a * are required):
| Option | Description |
|---|---|
| Notify for | Choose if you should receive notifications in this mailbox for faxes, voicemails, or both. |
| Notify by email | Select if the owner of the mailbox should receive a notification by email and whether or not the voicemail or fax file should be attached. |
| Notify backup email addresses | If there should be extra email addresses for email notifications, use this box to type in those addresses. For multiple email addresses, use commas to separate them. |
| Delete messages after sending emails |
Select whether or not to have the voicemail messages deleted from the mailbox when an email notification is sent. ✔ This can be helpful with managing the space available in the mailbox. |
| Notify by calling |
If you would like to receive a phone call that allows you to check your mailbox for voicemails when a new message is received, type in a phone number that the system should file. WARNING: Be sure to include the country code to avoid any dialing issues. |
| When call is answered, forward to | Choose how the system will handle the call that is sent to your phone number. |
| Callerid for notification calls | Choose if a certain user's caller ID should be shown in notification calls. The caller ID can also be withheld. |
| Notify by SMS | Select whether or not SMS notifications should be sent to the mailbox owner's phone number. |
6. Once all of the mailbox's settings have been configured, click Save.
Set a Mailbox's Greeting
In a mailbox that has been created and configured, a greeting should be added to ensure the mailbox gives callers a correct greeting.
To add a new greeting to a mailbox…
1. In the list of Mailboxes, click the mailbox number of the mailbox that needs a greeting.
2. Scroll down to the Greetings and audio name section.
3. Use the Greeting or name drop-down to select which kind of greeting you are uploading.
4. If you have a greeting already uploaded to the Sounds page, use the Sound file to use drop-down to select that audio file.
5. If you will be uploading a new greeting, click the Choose File button to select the .wav audio file from your device.
DANGER: To upload a .wav file, it is recommended to ensure the file has been converted to the proper format (.wav 8Khz, Mono, 16-Bit PCM).
If needed, please contact our technical support team to set up this message by calling (469) 429-2500 or emailing support@spectrumvoip.com.
Uploading an incorrectly formatted audio file can result in unexpected, potentially catastrophic issues for your phone system.
6. Click Use or upload.
Create a Mailbox Feature Code
In order to dial into a mailbox, a Feature Code will need to be created that will route calls to the mailbox when dialed. To do this…
1. Navigate to Features → Feature codes.
2. Click the New button.
3. On the New feature code page, fill out the following fields (fields with a * are required):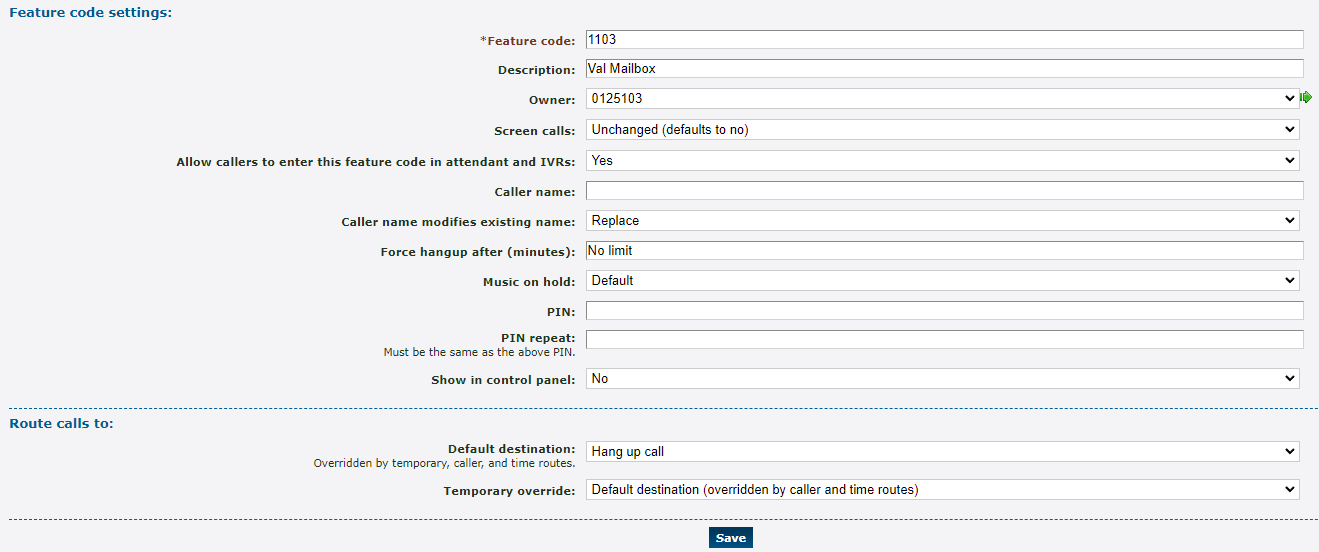
| Option | Description |
|---|---|
| * Feature code |
Type in a code that will be dialed on a SpectrumVoIP provided phone to reach the mailbox. Quick Tip: SpectrumVoIP technicians usually name this feature code as a 1 in front of the user's 3-digit extension number, such as 1101 for 101's mailbox. DANGER: Do NOT use a N11 number, like 911, 211, or 411. |
| Description | Type a note that will be displayed alongside the feature code in the list of feature codes. |
| Owner | Use the Owner drop-down to select someone that will be able to edit this feature code. |
| Allow callers to enter this feature code in attendant and IVRs | If this mailbox should be accessed when the code is dialed in an IVR, select Yes. |
| PIN & PIN repeat | A digital code that can keep the use of a feature code secure. If only certain users should be able to access this mailbox, setting up a PIN may be useful. |
3. In the Route calls to section, skip setting a Default destination (this will be done later).
Note: This has to be done after saving since the My features section of the drop-down will not appear until then.
4. Click the Save button.
5. Click the Feature Code to edit it.
6. In the Route calls to section, use the Default destination drop-down to select Mailbox under My features.
7. Use the second Default destination drop-down to select the mailbox of the user this feature code will dial. 8. Once done, click Save.
Numbers
As an Enswitch admin user or the set Owner of a phone number, you have the ability to view the phone number(s) you own and adjust their settings and routing.
To view your phone numbers, On the Numbers page, you can…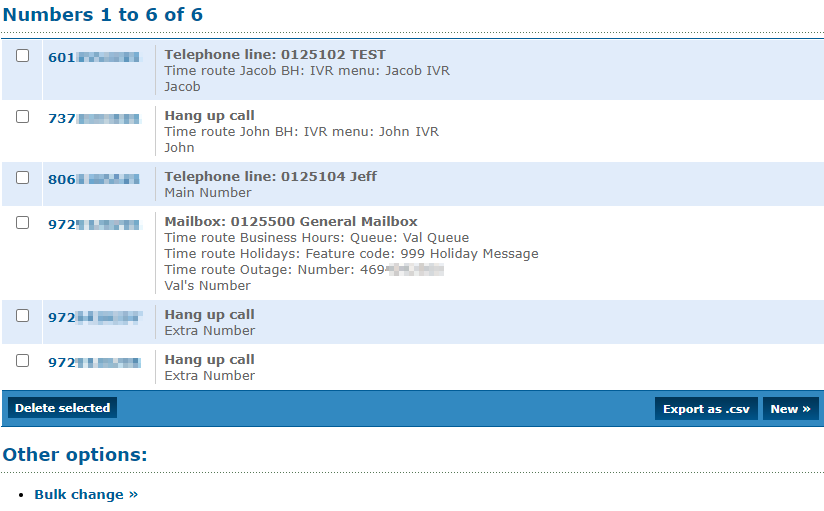
- View your owned phone numbers and their current routing.
- Check where each number routes according to set Time Routes.

- Confirm the Default Destination for calls outside of a Time Route.

-
Click a phone number to edit its settings and routing.

- Make bulk changes to multiple phone numbers.
Edit a Phone Number's Settings
As an Enswitch admin, you have the ability to adjust your phone number's settings to meet your company's standards.
To configure the settings of a phone number…
1. Click the phone number that needs adjustment.
2. In the Number settings section, adjust the following settings as needed:
| Option | Description |
|---|---|
| Description | If needed, you can adjust the Description shown for the phone number
|
| Owner | If needed, select a user that should have the ability to view and edit the settings and routing of the selected phone numbers. |
| Screen calls |
If needed, call screening can be enabled or disabled for calls to your phone number. Quick Tip: Enabling call screening can help mitigate robo calls and some spam calls. • Yes, and play caller id - The user that receives the call will hear a message that plays the caller's caller ID before prompting the user to press 1 to accept the call or hang up to reject the call. |
| Allow callers to enter this number in attendant and IVRs |
Select whether or not this phone number can be dialed by callers in an auto attendant or IVR menu. Quick Tip: Enabling this may be useful for internal phone numbers that an employee or vendor may know to dial to reach a certain department or employee. |
| Force callerid | If needed, the Caller ID for inbound calls to this phone number can be changed to look like one of your owned phone numbers. By default, the system should show the Original caller ID of the caller. |
| Caller name |
The Caller Name shown for calls made to the selected phone numbers. Quick Tip: Adding a Caller Name can be useful for distinguishing when a caller is calling a phone number that has a specific purpose, such as vendors calling a phone number meant for a shipping department. |
| Caller name modifies existing name | Select how the Caller Name should appear for agents receiving calls made to the phone number. • Replace - Replace the Caller ID of the caller with the Caller Name selected above. • Prepend - Add the Caller Name selected above to the front of the caller's Caller ID. • Append - Add the Caller Name selected above to the end of the caller's Caller ID. |
| Music on hold | Select the genre of music that should play for callers waiting on hold after calling the selected phone numbers. |
| PIN | Enter a series of numbers that the caller should enter to have their call routed. Doing this can be useful for phone numbers that should only be used by internal users. |
| Force hangup after (minutes) | Type how long (in minutes) that the system should allow this phone number to ring before hanging up the call. By default, this will be set to No limit. |
| Show in control panel |
Choose whether or not this phone number should be shown in the Control Panel page. ✔ Enabling this option will allow calls to be dragged and transferred to the IVR Menu using the Control Panel page. |
| Inbound SMS Destination |
If SMS services are enabled for your account, type the destination for SMS messages. WARNING: This phone number must be set up with SMS services through an SMS campaign. An Owner must also be set for this phone number. |
3. Once the phone number's settings have been adjusted, click the Save button or check out the Add a Time Route to a Phone Number section below.
Make Bulk Changes to Phone Numbers
If you have more than one phone number that needs the same settings updated, you can use the Bulk Changes feature to avoid having to edit the settings of your phone numbers one-by-one.
To make bulk changes to phone numbers..
1. On the Numbers page, click Bulk change >> under Other options.
2. On the Bulk change numbers page, use the Numbers to change box to select phone numbers that need the same changes and click << Add selected.

3. In the New settings section, adjust the following settings that should be updated for the phone numbers selected.
| Option | Description |
|---|---|
|
Change description & New description |
If needed, you can adjust the Description shown for the selected numbers. 
|
| Owner | If needed, select a user that should have the ability to view and edit the settings and routing of the selected phone numbers. |
|
Change caller name & New caller name |
The Caller Name shown for calls made to the selected phone numbers. Quick Tip: Adding a Caller Name can be useful for distinguishing when a caller is calling a phone number that has a specific purpose, such as vendors calling a phone number meant for a shipping department. |
| Caller name modifies existing name | Select how the Caller Name should appear for agents receiving calls made to the selected phone numbers. • Replace - Replace the Caller ID of the caller with the Caller Name selected above. • Prepend - Add the Caller Name selected above to the front of the caller's Caller ID. • Append - Add the Caller Name selected above to the end of the caller's Caller ID. |
| Music | Select the genre of music that should play for callers waiting on hold after calling the selected phone numbers. |
|
Change default destination & Default destination |
If needed, adjust the Default Destination that calls should be sent to when these phone numbers' Time Routes are not active.
Quick Tip: The Default Destination is usually treated as the destination for afterhours calls. |
| Temporary routing |
Setting routing using this method will forward calls until the routing is returned to normal. This is great for temporarily forwarding calls when an end time for forwarding is unknown. Note: To learn how to set forwarding for a specific amount of time, check out this guide • Default destination (overridden by caller and time routes) - Allow the numbers' caller and time routes to route calls. This option is used by default. Quick Tip: If Default destination (ignore caller and time routes) or Specific number are selected, select Default destination (overridden by caller and time routes) to return the routing to normal. |
| Announcement message | Select a saved Sound to use as a message to be played to callers when they dial the selected phone numbers. |
4. In the Caller and time routes section, you can add/replace Caller Routes and Time Routes:
Adjust a Caller Route
To add or replace a Caller Route, do the following: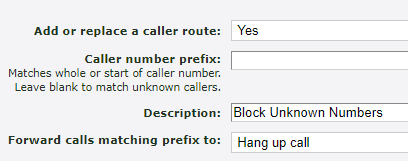
1. Use the Add or replace a caller route dropdown to select Yes.
2. In the Caller number prefix box, type a whole or part of a telephone number that this Caller Route should apply to.
Quick Tip: If you are wanting to use this Caller Route for callers with Unknown Number as their caller ID, leave this field blank.
3. In the Description box, type a note about the purpose of this Caller Route.
4. Use the Forward calls matching prefix to dropdown to select how calls from this caller should be routed.
Adjust a Time Route
To add or replace a Time Route, do the following:
1. Use the Add or replace a time route dropdown to select Yes.
2. Use the Time Group dropdown to select an existing Time Group to be referenced.
3. Use the Forward calls matching time group to dropdown to specify how calls during this time group should be routed.
5. When you are ready to apply these changes to the number(s) selected, click the Change button.
Phone Number Routing Methods
While you are viewing a phone number, you have the ability to adjust how the number handles routing.

You will have the options to…
• Update the phone number's Default Destination for calls made outside of the phone number's Time Routes.
• Set up Time Routes for scheduling call forwarding for the phone number.
• Implement a Temporary Override to indefinitely forward the phone number's calls.
The Default Destination
When a phone number receives a call outside of a phone number's set Time Routes, the call is routed according to what is set as the Default Destination.
• If the phone number does not have any Time Routes set, then the Default Destination will be where all calls are sent regardless of the time-of-day. 
• If there is a Business Hours time route, then the Default Destination will usually act as the destination for calls received after hours. 
Update the Default Destination
If you need to update the Default Destination for a phone number, do the following:
1. Scroll down to the Route calls to section and use the Default Destination dropdown to select the feature to route the calls to.
2. Use the second box that appears to specify where the calls should be sent.
Time Routes
Sometimes having calls forwarding indefinitely can be inconvenient since that forwarding would need to be disabled.
If you know how long calls should be forwarded for, you can create time groups that determine when the system should forward calls and time routes that tell the system where calls should be routed when a time group is active.
Step 1: Create a Time Group
In order to tell the system when a forward should start and end, a time group will need to be created.
To configure a time group…
1. Navigate to Features → Times and dates.
2. Click the New button.
3. On the New time group page, fill in the following information:
• *Name - Give the time group a unique name to identify it by.
• Description - If needed, add a description that will show by the time group's name.
• Priority - If this time group will be for emergencies, like an outage, use the Priority drop-down to select 10 (highest).
4. Click the Save button.
5. On the Time group saved message, click Add a new time period >>.
6. On the New time period page, use the Time period settings section to give the time period a descriptive name and an optional description.
7. In the When the time period starts and stops each day section, use the dropdowns to select the start and stop times for your temporary forward.
Note: The times shown will be in the 24-hour format.
8. In the Which days the time period is active section, select the day, month, and year that this specific period will be active for. 
Quick Tip: If needed, multiple days can be selected as long as they both follow the same start and stop times.
To select multiple days, either click and drag to highlight multiple, or press Ctrl while clicking selecting.
9. Click the Save button.
✔ You should now see this time period showing in the time group.

More time periods can be added in the future that will determine when this time group should be active.
10. If needed, click the New >> button and repeat steps 6-9 to add more time periods to the time group.
Step 2: Set Up a Time Route
Now that a time group has been created, a time route can be set up for a number that will tell the system where calls should be routed when that time group is active.
To configure a time route for a phone number…
1. Navigate to Features → Numbers.
2. Select the phone number that needs to be temporarily forwarded.
3. In the Time routes section, click the Add a time route >> button.
4. In the New time route window, fill in the following information:
• Time group - Use the drop-down to select the time group that this route will use.
• Forwards matching calls to - Select the destination for calls that are forwarded during this time. Commonly used destinations include…
– Number
– IVR menu
– Mailbox
– Dial by name menu
5. Click the Save button.
✔ You should now see the new time route and where it will route calls.

The destination of this time route can be edited at any time by clicking its name.
Clicking Edit time group will take you to where you can add more time periods for the time group to be active in.
Temporary Overrides
One of the ways you can forward your calls is by setting up a temporary override on one of your phone numbers. Calls forwarding in this way will continue to do so until the temporary override is removed.
To indefinitely forward calls to a different phone number using a temporary override…
1. Navigate to Features → Numbers.
2. Select the phone number that needs to temporarily be forwarded.
3. In the Route call to section, use the Temporary override drop-down to select Specific number.
4. In the Number box, type the phone number that calls should be routed to.
5. Test this forwarding by giving your business' number a call to see where it routes
✔ This temporary forward will remain active until the temporary override option is returned to normal.
Remove a Temporary Override
Once you are ready for calls to stop forwarding, the temporary override can easily be removed.
To return the number's routing back to normal, use the Temporary override drop-down to select Default destination (overridden by caller and time routes).
Page Groups
As an alternative to multicast paging, the Enswitch system can page phones using phone calls. When a page group is dialed, the phones it has set as destinations will receive calls. When a page call is answered by the devices, the devices will play the audio of the page.
As an Enswitch admin, you can create page groups that page specific groups of devices. To create one, the following will need to be completed:
- Create a page group.
- Add devices as destinations for the page group.
- Create a feature code to allow the page group to be dialed.
- Add a speed dial that dials the page group's feature code.
Create Page Groups
To allow a group of devices to be paged, a page group will need to be created.
To create a page group…
1. Navigate to Features → Page groups.
2. On the Page groups page, click the New >> button.
3. In the New page group menu, fill in the following information:
| Setting | Description |
|---|---|
| * Name | Type a name to identify the page group with. |
| Description | Type a note describing the page group, such as its purpose or the type of phones being paged. |
| Owner | If needed, select a user that should be able to view and edit the page group using their version of the web portal. |
| Request telephones to auto-answer | Have the system prompt the phones to answer the page automatically. If auto-answer is not an option for the device (such as the mobile app or a cellphone), then the user will need to answer the page call on their device. |
| Play beep to caller | Select whether or not a beep sound should be played before the paged devices can hear the paged message. |
| Allow destinations to talk | Select whether or not to let the paged devices talk to the device doing the page. |
| Allow destinations to forward calls | Select whether or not the paged devices should be able to forward the page call elsewhere. |
| Record group | If the message being paged should be recorded, select a record group to store the recording in. |
| Show in control panel |
Select whether or not this page group should be shown on the Control Panel page. Quick Tip: Showing this page group will allow users that use the Control Panel to drag and drop a call onto the page group for transferring. The call that is transferred to the page group will initiate a page to the devices in that page group. |
4. Click the Save button. 
✔ Once you save, you should see a confirmation message stating that the page group has been saved.
Now that a page group has been created, devices can be added to the page group.
5. If needed, repeat steps 2-4 for addtional page groups.
✔ You should now have a list of your created page groups.

Add Destinations
When a page group is added and configured, it can have devices added to it. Once a device has been added to a page group, it will receive a page when a user dials the page group it is a part of.
To add devices as destinations for a page group…
1. If you are on the Page groups page, click the name of the page group that needs devices added to it.
Quick Tip: If the page group was just saved, you can click Add a destination >> instead.

2. ln the Destinations section, click the Add a destination >> button.
3. In the New destination menu, do one of the following:
• If you are adding a user's desk phone or mobile app, select Telephone line and the ion number of the device that should be paged in this page group.
• If you are adding an agent's telephone number, select Number and type the agent's telephone number.
NOTE: If you type a telephone number, it is recommended to include the country code to avoid any dialing issues.
For example, if this telephone is from the U.S., I would need to add a 1 to the beginning of the phone number.
4. Click the Save button. 
✔ Once you save, you should see a confirmation message stating that the destination has been saved.
• If needed, click Add another destination >> and repeat steps 3 and 4 to add another phone to the page group.
• To edit the settings of the page group, click Continue editing the page group >>.
• To view all page groups, click Return to the list of page groups >>.
Create Feature Codes
Now that a page group has been created and has destinations added to it, you can create a feature code that dials that page group. This will allow your users to dial to page the phones in a page group. Once a page group's feature code is dialed, a page will be started to the devices in the page group.
To create a feature code that dials a page group…
1. Navigate to Features → Feature codes.
2. Scroll to the bottom of the Feature Codes page and click the New >> button.
3. In the New feature code menu, fill in the following information:
| Setting | Description |
|---|---|
| * Feature Code |
Type in a code that will be dialed on a SpectrumVoIP provided phone or softphone to call the page group. Quick Tip: SpectrumVoIP technicians usually name this feature code as a 2 in front of the user's 3-digit extension number. DANGER: Do NOT use a N11 number, such as 911, 211, or 411. |
| Description | Type a note that will be displayed alongside the feature code in the list of feature codes. |
| Owner | If needed, select a user that should be able to view and edit the feature code in their web portal. |
| Allow callers to enter this feature code in attendant and IVRs | Select whether or not callers in an auto attendant or IVR menu should be able to dial this feature code. |
|
PIN & PIN repeat |
If needed, set a digital code that can keep the use of a feature code secure. If only certain users should be able to dial this mailbox, setting up a PIN may be useful. |
| Show in control panel |
Select whether or not this feature code should be shown on the Control Panel page. Quick Tip: Showing this conference bridge will allow users that use the Control Panel to drag and drop calls onto the feature code for transferring. |
4. In the Route calls to section, use the Default destination dropdown to select Page group and then select the name of the page group.
5. Click the Save button. 
6. If needed, repeat steps 2-5 for any additional feature codes needed for your page groups.
✔ You should now see your feature codes for paging listed in the Feature Codes page.

Add Speed Dials
Once you have feature codes created for dialing page groups, you can create speed dials that dial those feature codes. Using Enswitch's Speed Dials feature, you can create these dialable speed dials and add a button for them to your users' desk phones.
To create a speed dial that dials a page group's feature code…
1. Navigate to Features → Speed dials.
2. On the Speed dials page, click the New >> button.
3. In the New speed dial menu, fill in the following information:
4. Click the Save button. 
✔ Once you save, you should see a confirmation message stating that the speed dial has been saved.

5. Repeat steps 2 and 3 for each speed dial needed for the page groups.
✔ You should now see the speed dials listed.

6. Once every speed dial has been created, have your users reboot their phones to see these new buttons.
Pattern Menus
Pattern menus are flexible, automated menus that allow callers to enter a specific string of digits to have their call routes to different places. In contrast to an auto attendant or an IVR menu, a pattern menu allows callers to dial a larger range of digits to do certain things.
The digits and the functions of those dialed digits are set using patterns. A pattern menu can reference and use many different patterns.
✔ A Pattern Menu can be useful in the following example scenarios:
• Phone number routes to a pattern menu for employees to call for internal purposes.
• Users can dial a feature code to be routed to a pattern menu used for internal purposes.
• Call Route routes callers with a specific area code to a pattern menu.
• Callers need to be able to dial a series of numbers that are not usable in an auto atttendant or IVR Menu.
Set Up a Pattern Menu
A Pattern Menu can be created using your Enswitch web portal. To create and configure a functional pattern menu, you will need to…
• Create a pattern menu.
• Add patterns to the pattern menu.
• Check and adjust the pattern menu's greetings.
• Set up a way for callers to reach the pattern menu.
Step 1: Create a Pattern Menu
| Option | Description |
|---|---|
| * Name | Type a name to identify the pattern menu with. |
| Description | Type a brief description of what the pattern menu will be used for. |
| Owner | If needed, select a user that should be able to view and edit this pattern menu in the web portal. |
| Ask caller to enter digits | Set the maximum number of digits callers should be able to enter. |
| Show in control panel | Select whether or not to show this pattern menu in the Control Panel to allow calls to be drag and drop transferred via the Control Panel page. |
✔ You should see a confirmation message stating that the pattern has been saved.

Click Add a pattern >> to add patterns for the pattern menu to reference.
Click Return to the list of pattern menus >> to view your Pattern Menus and add another if needed.
Step 2: Add Patterns
Now that a Pattern Menu has been created, patterns can be added to it so that the pattern menu can recognize when certain digits have been dialed so that it can route the calls as needed.
1. While viewing the pattern menu, scroll to the Patterns section and click the New >> button.
2. In the New pattern menu, fill in the following information: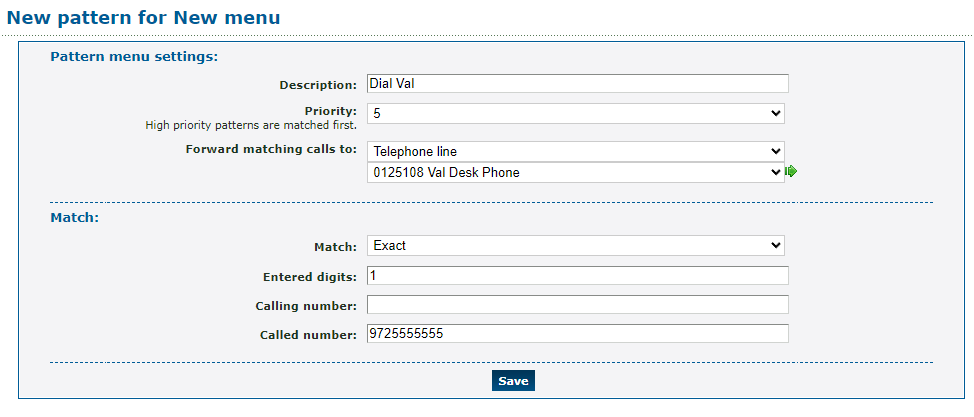
| Option | Description |
|---|---|
| Description | Type a brief description of the purpose of this pattern. |
| Priority |
If needed, set a priority for this pattern. Quick Tip: Setting a priority for a pattern can be useful if there is a similar pattern using the same digit but has a different destination, calling number, or called number. |
| Forward matching calls to | Use the dropdowns to select where calls will be sent according to this pattern. |
| Match | Select how calls should be matched according to the options below. |
| Entered digits | Type the digits (numbers only) that a caller would dial to have their call routed using this pattern. |
| Calling number | If needed, type the phone number of a caller that this pattern should apply to. |
| Called number | If needed, type the phone number that was dialed by the caller to reach the pattern menu. |
3. Click the Save button.
4. Repeat steps 1-3 for each needed pattern.
✔ You should now be able to see a list of the patterns you have created.
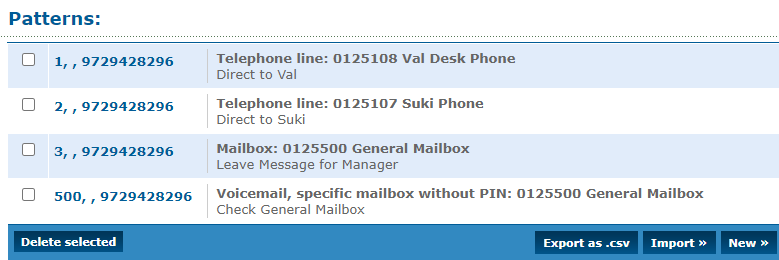
Now when a caller in the pattern menu dials the digits set in these patterns, their call will be routed according to the destination set in the patterns.
Import Multiple Patterns
If there are multiple patterns that should be added, you can import a spreadsheet of patterns to add them all at once. This can help cut down time by eliminating the need to add patterns one-by-one.
To make sure that the spreadsheet you create the patterns in is formatted correctly, it is recommended to do the following:
1. Click the Export as .csv button to download a spreadsheet that is already formatted.
2. Open the downloaded spreadsheet.
3. In the spreadsheet, fill in the information for each applicable column.
4. Once you are done, save the file by clicking Save or pressing Ctrl+S.
5. Back in the web portal, click the Import >> button.
6. In the Import pattern menu, click the Choose File button to select the edited spreadsheet from your PC.
7. If needed, adjust the following options:
• Delete all existing patterns first - If there are already patterns created, you can select Yes to delete the old patterns and replace them with the patterns in the spreadsheet.
• Overwrite existing patterns - If patterns that already exist have been adjusted in the spreadsheet, you can select Yes to overwrite the edited patterns.
8. Once you are ready, click the Import button.
✔ You should see a confirmation message stating that the patterns have been imported.
When you return to the pattern menu, you should see those patterns now listed.
Export a Spreadsheet of Patterns
If needed, the patterns listed in the pattern menu can be exported as a spreadsheet.
✔ Downloading, printing, and handing out a spreadsheet of these patterns can be done to help your users keep track of the patterns they may need to use to interact with internal pattern menus.
To export a spreadsheet of these patterns, click the Export as .csv button.
You can open, view, and print the downloaded spreadsheet as needed.
Step 3: Adjust the Greetings
Each created Pattern Menu will have default greetings in place that gives callers instructions on what to do.
These greetings include…
• A greeting asking the caller to dial the digits they need referenced.
• A greeting stating that the digits dialed are invalid.
• A greeting telling the caller goodbye.
You can listen to these greetings by placing a call to the Pattern Menu. If needed, these greetings can be replaced.
The “Enter Digits” Greeting
Using the Upload greeting section, you can adjust a specific greeting used by the Pattern Menu. One of these greetings is the “Enter digits” greeting. This is the greeting callers will first hear when they reach the pattern menu. Once the Invalid greeting plays, the Enter Digits greeting will play again.
Usually, this greeting tells the caller to put in their input. Some businesses may replace the default greeting with one that tells callers what they need to dial to do certain things.
To edit the Enter digits greeting, use the Greeting dropdown to select Enter digits. Either select a saved Sound from the Sounds page of the web portal or use the Choose File button to select a .wav audio file from your PC.

The “Invalid” Greeting
Using the Upload greeting section, you can adjust a specific greeting used by the Pattern Menu. One of these greetings is the “Invalid” greeting. This is the greeting callers will hear when they dial digits that are not set as a pattern. Once the Invalid greeting plays, the Enter Digits greeting will play again.
The default Invalid greeting will tell callers the number they dialed does not exist. Some businesses may replace the default greeting to adjust its verbiage or add in a snippet about the digits they should dial to do certain things.
To edit the Invalid greeting, use the Greeting dropdown to select Invalid. Either select a saved Sound from the Sounds page of the web portal or use the Choose File button to select a .wav audio file from your PC.

The “Goodbye” Greeting
Using the Upload greeting section, you can adjust a specific greeting used by the Pattern Menu. One of these greetings is the “Goodbye” greeting. This is the greeting callers will hear when they incorrectly dial digits 3 times.
The default Goodbye greeting will tell the caller that the number they dialed does not exist before saying “Goodbye” and then ending the call. Some businesses may replace the default greeting to tell the caller to try dialing a different number.
To edit the Goodbye greeting, use the Greeting dropdown to select Goodbye. Either select a saved Sound from the Sounds page of the web portal or use the Choose File button to select a .wav audio file from your PC.

Once the greetings have been adjusted, you can use the Download or play greeting section to select a greeting and either download it or have the greeting play through a call. 
If a greeting is no longer needed, use the Delete greeting section to delete a specific greeting.
Step 4: Route Calls to a Pattern Menu
To allow callers to be able to interact with a pattern menu, routing will need to be created that will allow calls to be forwarded to a pattern menu. Depending on how and by whom the pattern menu will be used, the way calls are routed to a pattern menu may differ.
The three, main ways to route calls to a pattern menu include…
• Dialing a feature code.
• Setting the default destination of a phone number to route calls to a pattern menu.
• Creating a time route for a phone number to route calls to a pattern menu.
• Creating a caller route for a phone number to route calls to a pattern menu.
Feature Code
A feature code can be created to allow your users to dial a pattern menu directly using their desk phone or the SpectrumVoIP ES mobile app.
To create a feature code to be used for directly dialing a pattern menu…
1. Navigate to Features → Feature codes.
2. Click the New >> button to create a new feature code.
3. In the menu, fill out the following information:
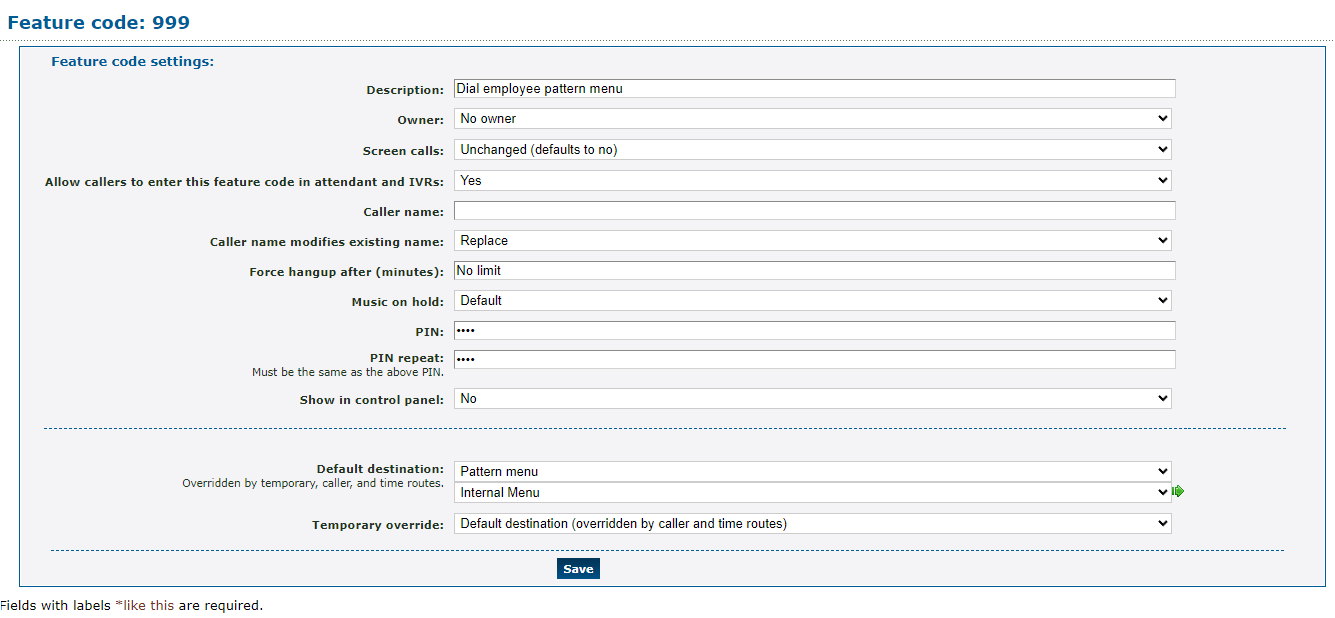
| Option | Description |
|---|---|
| Description | Type a brief description of the purpose of this feature code. |
| Owner | If needed, select a user that can view and edit this feature code in the web portal. |
| Allow callers to enter this feature code in attendant and IVRs | Select whether or not callers can dial this feature code in an auto attendant or IVR menu to access the pattern menu. |
| Show in control panel | Show or hide this feature code from the Control Panel page. Showing this feature code allows for a web portal user to drag and drop an active call onto the feature code to transfer. |
| Default destination | Select Pattern menu. In the second box, select the name of the pattern menu that this feature code should send calls to when dialed. |
4. Once the feature code's information has been put in, click the Save button.
✔ Users should now be able to dial the new feature code (999 for this example) on their desk phone or the SpectrumVoIP ES mobile app to place a call directly to the pattern menu selected for this feature code.
Default Destination
If a phone number should solely be used to dial a pattern menu, you can set the Default Destination of a phone number to route calls to a pattern menu.
To do this…
1. Navigate to Features → Numbers.
2. Click the phone number that should be used solely for the pattern menu.
3. In the Route calls to section, use the Default destination dropdown to select Pattern Menu, and use the second box to select the specific pattern menu to be used.
4. Click the Save button.
✔ You should now see that phone number listed with its destination set as the pattern menu you selected, like so:

Caller Route
If callers with a specific area code or phone number should be sent to a pattern menu, you can create a Caller Route in a phone number's settings so that callers that call in with a matching phone number will be sent to the selected pattern menu.
To do this…
1. Navigate to Features → Numbers.
2. Click the phone number that should be used solely for the pattern menu.
3. In the Caller routes section of the phone number's settings, click the Add a caller route >> button.
4. In the New caller route menu, fill in the following information.
| Setting | Description |
|---|---|
| Caller number prefix | Type the whole or starting part a caller's phone number that should be sent to the pattern menu. |
| Description | Type a brief note describing this caller route. |
| Forward matching calls to | Select Pattern Menu to send calls from this caller route to a pattern menu. Use the second dropdown to select the specific pattern menu that should receive the call. 
|
5. Click the Save button when ready.
✔ You should now see the new caller route routing calls to the pattern menu you wish to use.

Time Route
If there is a specific time or date that calls should be sent to a pattern menu, you can edit a phone number's time routes to route calls to a selected pattern menu.
To do so…
1. Navigate to Features → Numbers.
2. Click the phone number that should be used solely for the pattern menu.
3. In the Time routes section, click the name of the time route that needs its destination changed.
Note: To learn more about creating Time Routes and editing Time Groups, check out this guide.
4. In the menu, use the Forward matching calls to dropdown to select Pattern Menu, and the second dropdown to select the name of the pattern menu to be used.
5. Click the Save button.
✔ You should now see the time route set to route calls to your pattern menu when the time group it is based off is active.

People
As an Enswitch admin, you have the ability to view and adjust the settings of the users on your Enswitch account. To view the users that have been added to your Enswitch account, navigate to Features → People.
On the People page, you can view each user that has been added to your account. 
These users can log into the web portal. The features they have access to will depend on their Role. These users can also view different features and functions that they have been set as Owners for.
Update a User's Settings
To view a person's settings, click the 7-digit extension number or name of the user.
On the Person page for the user, you can check and update their settings. These settings include…
| Setting | Description |
|---|---|
| Description | Type a note to be displayed for this user on the People page. |
| Role | View the access level this user has in the web portal. |
| Title, First name, & Last name | View and update the preferred name of this user. |
| Company | If needed, type the name of the company this user is a part of. |
| Email address(es) | Type one or more email addresses that should receive any email notifications set up for this user. For multiple email addresses, separate each with a space. |
| Main telephone number, Fax number, & Mobile phone number | If needed, type the telephone numbers this user uses as their main phone number, fax number, and mobile number. |
| Dial by name forwards to | Type the feature code, 7-digit extension number, or telephone number that should receive calls when this user is reached using the Dial-by-Name Directory. |
| Country | Select the country this user lives and works in. |
| Date format & Time format | If needed, update the format of the date and time to match the user's preferences. |
| Change password | If this user is having issues logging into the web portal, you can help update their web portal password. |
| Only allow web access from IP address(es) | If needed, this user's web portal access can be restricted to specific IP addresses. This can help ensure that users are only allowed to login at approved IP addresses. |
Access a User's Web Portal
As an Enswitch admin, you have the ability to masquerade as the users on your Enswitch account. This can help with visualizing what the web portal looks like for a user for troubleshooting and monitoring purposes.
To view your users, navigate to Features → People. On the People page, you can click Switch next to a user to access the portal as that user. 
If you are viewing a specific user's settings, you can click Switch to this person in the Other options for this person section.
✔ Once you have clicked Switch, you will see a confirmation message that you are now logged in as that user. From here, you can troubleshoot issues a user is having with their web portal or check on different functions this user is set as an Owner of.

Pickup Groups
When a user is unavailable, it may be necessary to pick up their call. This can be done using Pickup Groups.
The telephone lines of users can be present in more than one pickup group. As a member of multiple pickup groups, your telephone line can pick up a call ringing to any telephone line in the pickup groups they are a member of. If there are multiple calls to multiple telephone lines, the call that is picked up will be random.
✔ Members of a pickup group can dial ** to intercept a call from another member of their joined pickup groups.
WARNING: If there are multiple calls ringing to multiple telephone lines, the call that is picked up is uncertain.
Create a Pickup Group
As an Enswitch admin, you can create multiple pickup groups for different groups of users.
1. Navigate to Features → Pickup groups.
2. Click the New >> button.
3. In the New pickup group menu, do the following:
• * Name - Type in a unique name for the pickup group.
• Description - Type in a note to display alongside the name in the list of pickup groups.
• Contains telephones - Select the telephone lines that should be and click Add selected.

✔ Doing so will add that line to the left box of members that can pick up each other's calls.
4. When you are done, click the Save button.
5. Repeat steps 2-4 for each unique pickup group.
Remote Access
The remote access feature allows users to call in to the system and have the system call out to another number. The main remote access menu will reference remote access accounts that are created on the Remote Access page of the web portal.
✔ One way the remote access feature is commonly used is to have the phone system place a long-distance call that connects back to a user's phone number.
Implement the Remote Access Menu Feature
To allow your users to use the Remote Access Menu, the following must be completed:
- A remote access account must be created for the main Remote Access Menu feature to reference.
- A feature code or phone number must route to the main remote access menu feature so that the created remote access accounts can be used.
Step 1: Create a Remote Access Account
The Remote Access feature references the different remote access accounts that are created for your account through the web portal.
The different types of remote access accounts that can be created are the Remote access menu, Call back to the callerid, and Dial the called number accounts.
Remote Access Menu
The Remote Access Menu is an automated menu that allows the user to dial a phone number to call. This menu can also be set up to automatically dial a specific phone number instead of giving users the option to dial a phone number of their choosing.
✔ This is the most common type of remote access account created as it allows any user to dial out via the remote access menu.
Create This Type of Remote Access Account
1. Navigate to Features → Remote access.
2. In the Remote access accounts page, click the New >> button. 
3. In the Account settings section of the menu, fill in the following information:
| Setting | Description |
|---|---|
| * Name | A unique series of numbers to use to identify this remote access menu. By default, the system will provide a random series of numbers. |
| Description | Type a brief note describing the purpose of this remote access menu. |
| Type | Select “Remote access menu” to use the automated menu version of the remote access feature. |
| Owner | If needed, select a user that should be able to view and edit this remote access menu. |
| Dial plan |
Used for outbound calls when the system is configured for dial This option is not usually adjusted. |
| Class of service | If needed, restrict the calls that can be made through this remote access menu. Your options include: • No class of service • Allow International • Forbid International • internal only |
| Record group | If these calls should be recorded, select a recording group that should record these calls. |
| Callerid on internal calls | If needed, select the extension number or telephone number to show for internal calls. |
| Callerid on external calls | If needed, select the telephone number to show for external calls. |
| Withhold callerid | Select whether or not to show the caller ID of |
| Locked | If this remote access menu should not be in use, select Yes to lock this menu. |
| Play DTMF to caller when outbound call connects |
If needed, type a DTMF sequence that should be relayed to the caller. This option is not usually adjusted. |
4. In the Require all of the following section, set up any needed options to help secure this remote access menu. 
Note: For this type of remote access, the Account Number option is required.
| Option | Description |
|---|---|
| Callerid | If needed, type a phone number that the user's caller ID must match. |
| * Account number |
Type a series of numbers that the menu will prompt the user to enter to gain access. Note: This Account Number will be asked for by the remote access menu when it is called. |
| PIN & PIN Repeat | If needed, type a PIN that the caller will be prompted to input by the menu. |
5. When you are ready, click the Save button. 
Call Back
The Call Back to the Callerid option allows a user calling from a specific extension number or phone number to be called back. This user will receive a call back from the Remote Access Menu so that they can dial a phone number as needed. This menu can also be set up to automatically dial a specific phone number instead of giving users the option to dial a phone number of their choosing.
✔ This remote access account option is sometimes used if only a specific user or desk phone should be making calls using the remote access menu.
Create This Type of Remote Access Account
1. Navigate to Features → Remote access.
2. In the Remote access accounts page, click the New >> button. 
3. In the Account settings section of the menu, fill in the following information:
| Setting | Description |
|---|---|
| * Name | A unique series of numbers to use to identify this remote access menu. By default, the system will provide a random series of numbers. |
| Description | Type a brief note describing the purpose of this remote access menu. |
| Type | Select “Dial the called number” to use the remote access feature to dial a set phone number. |
| Owner | If needed, select a user that should be able to view and edit this remote access menu. |
| Dial plan |
Used for outbound calls when the system is configured for dial This option is not usually adjusted. |
| Class of service | If needed, restrict the calls that can be made through this remote access menu. Your options include: • No class of service • Allow International • Forbid International • internal only |
| Record group | If these calls should be recorded, select a recording group that should record these calls. |
| Callerid on internal calls | If needed, select the extension number or telephone number to show for internal calls. |
| Callerid on external calls | If needed, select the telephone number to show for external calls. |
| Withhold callerid | Select whether or not to show the caller ID of |
| Locked | If this remote access menu should not be in use, select Yes to lock this menu. |
| Play balance | Select whether or not to play your phone system account's balance while accessing this menu. This option is not usually used. |
| Automatically dial |
By default, the menu will ask you to dial a phone number. If only a specific phone number should be dialed, type the phone number in this box. |
| Play DTMF to caller when outbound call connects |
If needed, type a DTMF sequence that should be relayed to the caller. This option is not usually adjusted. |
4. In the Require all of the following section, set up any needed options to help secure this remote access menu. 
Note: For this type of remote access, the Callerid option is required.
| Option | Description |
|---|---|
| * Callerid | Type the 7-digit extension number or phone number that the user's caller ID must match. |
| Account number |
Type a series of numbers that the main remote access menu will prompt the user to enter to gain access to this specific menu. Note: This Account Number will be asked for by the remote access menu as a method of authentication. |
| PIN & PIN Repeat | If needed, type a PIN that the caller will be prompted to input by the menu. |
5. When you are ready, click the Save button. 
Dial Called Number
This niche option of the remote access menu allows callers that do not use normal SIP authentication to place calls to your users' SIP devices using a secret prefix. This prefix is stripped off while the outbound call is being received and authenticated.
Note: This feature is not usually needed, so it is not normally implemented.
If you would like to learn more about this option, it is recommended to contact our technical support team to see if this is a feature that is needed and should be implemented.
Step 2: Route Calls to the Main Remote Access Feature
Once a Remote Access Menu has been created, it will not be immediately reachable. To allow users to call into the main remote access menu, one (or both) of the following will need to be done:
- Create a Feature Code that can dialed on a SpectrumVoIP device to reach the remote access menu.
- Set a phone number to forward calls to the remote access menu.
Feature Code
A feature code can be created that internal user can dial on their desk phones to call into the remote access menu. If this feature code is set to allow callers to enter this code into auto attendants and IVR menus, then outside callers can dial this feature code as well.
Once the user accesses the remote access menu, the menu will ask for the Account Number of the specific remote access feature to use.
To create a feature code that should route calls to the remote access menu…
1. Navigate to Features → Feature codes.
2. On the Feature codes page, scroll down and click the New >> button. 
3. In the New feature code menu, fill out the following information in the Feature code settings section:
| Option | Description |
|---|---|
| * Feature Code |
Type a unique series of numbers that users should dial on their desk phone to reach the remote access menu. Quick Tip: Some users use 6368 (MENU) or 736683 (REMOTE) as the feature code. |
| Description | Type a note describing what this feature code is used for. |
| Owner | If needed, select a user that should be able to view and edit this feature code in the web portal. |
| Allow callers to enter this feature code in attendant and IVRs | Select whether or not callers in auto attendants or IVR menus should be able to dial this code. |
| Show in control panel |
Select whether or not this feature code should be shown on the Control Panel page. Quick Tip: Showing this feature code will allow users that use the Control Panel to drag and drop calls onto this feature code for transferring. |
4. In the Route calls to section, use the Default destination dropdown to select Remote access menu:
5. Click the Save button.
✔ You should see that new feature code listed in the Feature Codes page.

6. Place a test call to this feature code on a desk phone to confirm that you can access the remote access menu.
Direct Phone Number
A phone number can be set to direct calls to the remote access menu. This can make it easy for users to dial into the remote access menu for remotely placing calls.
To update a phone number's destination to the remote access menu…
1. Navigate to Features → Numbers.
2. Click the phone number that should be dedicated to the remote access menu.
3. Scroll down to the Route calls to section and use the Default destination dropdown to select Remote access menu.
4. Click the Save button. 
✔ You should see the phone number listed with remote access menu shown as the destination.

5. Place a test call to this phone number to confirm that you can access the remote access menu.
Use the Remote Access Feature
Once you have created remote access accounts and a way to contact the main remote access menu, you can call into the remote access menu to use the “Remote access menu” or "Call back to the callerid" features.
Use the following sections to learn more about the process of using these different options:
Remote Access Menu
Requirements: In order to use the Remote Access Menu, a remote access menu account must be created, and a feature code or phone number must route to the main remote access menu feature.
1. Dial the feature code or phone number associated with the main remote access feature.
2. When prompted, input the Account Number set for the remote access menu account. 
3. If you have set up a PIN, input the PIN when prompted.
4. Once the menu accepts the account number and the optional PIN, dial the phone number when prompted.
5. Handle the phone call as needed.
Call Back to the Callerid
Requirements: In order to use the Remote Access Menu, a remote access menu account must be created, and a feature code or phone number must route to the main remote access menu feature.
1. Dial the feature code or phone number associated with the main remote access feature from an extension number or phone number assigned to a “Call back to the callerid” account.
2. Once the call starts ringing, hang up the call.
2. The system will call the extension number/phone number back. Answer the call back.
3. Once you answer, the menu will prompt you to dial a phone number to call. Dial the number you need to call.
4. Handle the phone call as needed.
Sounds
At any time, you can upload greetings and messages to the Sounds page to allow users to easily select and use that audio file for features, such as their own mailboxes or IVR menus.
More Info: To explore different sounds and greetings that could be uploaded and used in your phone system, check out these articles:
https://documentation.spectrumvoip.com/en_US/view-and-manage-sounds
To upload an audio file to the Sounds page…
- Navigate to Features → Sounds.
- In the Sound files page, click the New >> button.

- In the Sound settings section of the New sound page, fill in the following information:

- * Name - Give the sound file a unique name.
- Description - If needed, add a note about this sound file that will display along with the sound file's name.
-
* .wav file to upload - Select and upload a .wav audio file from your PC.
DANGER: The audio file needs to be in a .WAV file, mono channel, and 8000 Hz format to be properly read in the phone system.
To convert your audio file, use this handy website:
G711.org - Telephony File Converter
When using this website to convert the file, select the “Standard Definition” option for the Output Format.
- Click the Save button.

✔ You should now see your new sound listed in the Sounds page.
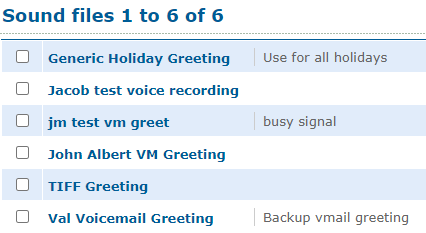
That sound can now be selected and used by different functions, such as mailboxes and IVR menus.

Speed Dials
Speed Dial is a function that allows a user to quickly dial another person by greatly reducing the number of keys that need to be pressed. In the Enswitch platform, a speed dial can be a short series of digits to press, or a button added to a user's desk phone.
As an Enswitch admin, you have the ability to create speed dials that every user on your account can dial from their desk phone or SpectrumVoIP ES mobile app. You can create speed dials that dial the 7-digit extension number of users or an external telephone number.
Create a Speed Dial
On the Speed Dials page, you can create new speed dials for your teams to use on their desk phones and mobile apps.
To create a new speed dial…
1. Navigate to Features → Speed dials.
2. Click the New >> button.
3. In the New speed dial menu, fill in the following information:
| Setting | Description |
|---|---|
| *Speed dial number | Type what should be dialed by users to use this speed dial. |
| Description | Type a brief note about what this speed dial will call. |
| * Destination | Type the 7-digit extension number or a telephone number that this speed dial should contact. |
| Button on telephones | Use the dropdown to select if this speed dial should be added as a button/option on your account's devices. Choose an option that is shown as an option for the specific brand your phone is made by (e.g., Aastra, Polycom, or Yealink). 
|
| Force caller name on calls from this destination | If needed, calls from the destination shown in the speed dial can have a specific name forced onto the caller ID. For example, if I set this option to show “Support”, a call I receive from the number set for the speed dial will show “Support” for its caller ID. |
4. Click the Save button.
✔ You should now see that new speed dial added to the list.

Once a speed dial has been created, you can manage that list of speed dials by…
- Deleting any obsolete speed dials.
- Exporting a spreadsheet listing out these speed dials.
- Importing a formatted .csv spreadsheet of speed dials to add/edit speed dials.
Delete Speed Dials
When a speed dial is no longer needed, it can be removed at any time. To do so…
1. Select any speed dials that need to be deleted and click the Delete selected button.
2. In the message that appears, click the OK button to confirm the deletion.
✔ You should see a confirmation message stating that the speed dial has been deleted.

Export Speed Dials
If needed, a spreadsheet listing out your created speed dials can be downloaded to your PC. This can be useful for keeping record of your account's speed dials. Some users print out this spreadsheet to share with their team.
To export a spreadsheet of your speed dials, click the Export as .csv button.
✔ You should see that the spreadsheet has downloaded.
Now you can open, view, and share the spreadsheet as needed.

Import Speed Dials
If you need to create multiple speed dials at once, you can import multiple speed dials at a time using the Import feature. We recommend exporting a spreadsheet to use as a template for formatting new speed dials.
To export and then import a spreadsheet of speed dials…
1. Click the Export as .csv button to download a spreadsheet of your existing speed dials. 
2. Open the downloaded spreadsheet to use as a formatted template.
3. Edit the spreadsheet as needed for any speed dials that need to be updated or created.
4. Save the spreadsheet.
5. In the web portal, click the Import >> button.
6. In the Import shared speed dials menu, click the Choose File button and select the edited and saved spreadsheet.
7. In the menu, fill in the following information:
| Option | Description |
|---|---|
| Button on telephones | Use the dropdown to select if this speed dial should be added as a button/option on your account's devices. Choose an option that is shown as an option for the specific brand your phone is made by (e.g., Aastra, Polycom, or Yealink). 
|
| Delete all existing speed dials first | If needed, you can delete the existing speed dials before adding the speed dials set up through the spreadsheet, |
| Overwrite existing speed dials | If you have edited any existing speed dials using the spreadsheet, select Yes to make sure that the speed dials are overwritten to match what is set in the spreadsheet. |
8. When ready, click the Import button.
✔ You should see a confirmation message stating that speed dials have been imported.
Any changes and additions made in the spreadsheet should now be shown in the list of speed dials.
Telephone Lines
On the Telephone Lines page, you can view the different devices your users have.
You will notice that each device is registered to its own 7-digit extension number. This 7-digit extension number is referred to as a Telephone Line.

On this page, you can do the following:
- View a device's 7-digit extension number and model.

-
Click an extension number shown to edit the settings of a telephone line.

- In the Last Provision From column, view the date and time the device was last registered and the WAN IPv4 address the device was connected to.

- The Red Flag will indicate if a phone is not currently registered and connected to our server.

- Check the 911 Caller ID number that would be shown if they dialed 9-1-1 from the device.

To learn more about how you can manage your existing telephone lines and edit the settings of a specific telephone line, view the following dropdowns of information:
Manage Telephone Lines
While viewing your account's extension numbers and the devices registered to them, you will notice buttons that allow you to take certain actions.
Add or Delete Telephone Lines
Telephone lines can be added and deleted from your account as needed. Adding and removing telephone lines may affect your bill.
It is recommended to contact our technical support team to have a telephone line added/deleted. Our support team can help ensure that your bill is accurate.
Our support team can also help make the following changes that may be needed when creating a telephone line, such as…
• Registering devices to a new telephone line.
• Configuring the new telephone line's settings to meet your organization's needs.
• Creating feature codes and speed dials for dialing the new telephone line.
• Setting a new telephone line as a destination for a queue, IVR menu, phone number, etc.
They can also help with the following changes that may be needed when deleting a telephone line:
• Adjust the telephone line to be an “empty” or “open” telephone line instead of removing it.
• Help update the telephone line's settings to match a new person/device instead of completely deleting the telephone line.
• Assign a new, alternate destination for a call routing function (e.g., a queue, IVR menu, phone number, etc.) that used the old, deleted device.
• Remove functions (such as mailboxes, speed dials, feature codes, etc.) that were associated with the old, deleted telephone line.
Reboot Devices
Whether you are applying changes to phones or troubleshooting issues with devices, you will need to reboot a user's phone at some point. As an Enswitch admin, you can use your web portal to remotely reboot devices.
✔ Power cycling a device can help make sure the phone is healthy while also giving it an opportunity to apply any updates it finds available when it reconnects to our server.
To reboot one or more devices at once, select the device(s) that need to be rebooted and click the Reboot selected button.
✔ Once the Reboot selected button is clicked, you should see this confirmation message:
The phones that were selected should turn off and back on again.
Note: If you notice a device is not rebooting, reconnecting, or applying any changes, please contact our technical support team to troubleshoot any issues that may have occurred.
Deregister Devices
If needed, one or more devices can be remotely deregistered through the Enswitch web portal.
To deregister devices, select the device(s) that need to be deregistered and click the Deregister selected button.
✔ Once you click the Deregister selected button, you should see this confirmation message:
The telephone line should show a Red Flag icon indicating that it is Not Registered.
Once the device re-registers itself, the Red Flag icon will disappear, and the time and date shown in the Last Provision From column will update. 
Note: If the device does not re-register itself automatically, try rebooting the device.
If the phone still has issues re-registering, please contact our technical support team to troubleshoot any issues that may have occurred.
Adjust Telephone Line Settings
As an Enswitch admin, you can edit the settings of your account's different telephone lines.
To edit a specific extension number's settings, click the extension number that needs its settings adjusted.
In the telephone line's settings, you can view the telephone line's information and update its settings as needed. 
View the tabs below to learn more about the different settings and options that each section has to offer:
Status
In the Status section, you can view information about the device registered to this telephone line, such as:
• The public IPv4 address the device registered itself from and the date and time of that registration.
• The public IPv4 address the device sent a provisioning request from and the date and time that request was made.
• The last number (extension number, telephone number, speed dial, or feature code) that was dialed by this phone.
• The phone number of the last person to place a call handled by this device.
• The 911 Address that will be shown to responders when this device dials 9-1-1.
Account Settings
In the Account Settings section, you can view settings affecting the device that is registered to this extension number.

| Option | Description |
|---|---|
| Description | Type a brief note about this device, such as who is using it. |
| Owner |
Select the 7-digit extension number of a user that should be able to view and edit this telephone line. Quick Tip: The email address set in this Owner's People settings would be used for receiving email notifications for missed calls if the Send owner email notifications of missed calls option is enabled. |
| MAC address | This field should have the device's MAC address. |
| Provisioning template |
This is the template used to provision the device using this extension number. This template is what automatically configures the phone's buttons. WARNING: The template selected has to match the model of the phone. |
| Provisioning data | Our technical support team may use this box to set scripts that can be used to remotely change a phone's settings. This option is not normally used by users. |
| SIP ping telephone |
Select whether or not to send SIP OPTIONS pings to the telephone. This is not normally used. |
| Only allow from source IP address(es) |
If needed, you can require this device to only be registered and provisioned from a specific IP address or range of addresses. Quick Tip: Ranges can be specified using CIDR netmasks, such as “192.168.0.0/16”. Multiple addresses and/or ranges can be entered, separated by spaces and/or commas, for example “10.0.0.0/8, 192.168.1.1” |
| Expect to be registered |
Select whether or not the telephone is expected to be registered. If this telephone line does not have a device being used, you can set this to “No” Quick Tip: When this option is set to “No”, the Red Flag icon will not be displayed, and this device being unregistered will not count towards the “Telephone lines losing registration” alert. |
Line Settings
In the Line settings section, there are many options that can be adjusted that determine how the extension number should act and handle certain scenarios.
Quick Tip: In this section, you can adjust the caller ID information for calls from this extension number.
This is also where you can assign an extension number to a Record Group, Pickup Group, and Queue.

| Option | Description |
|---|---|
| * 911 callerid | Select the phone number that should be shown to emergency responders when this device dials 9-1-1. |
| Callerid on internal calls | Select the 7-digit extension number that this device should show as when placing an internal call to another user's extension number. |
| Callerid on external calls | Select the phone number that the device should show as when placing a call to a telephone number. Selecting Default will have your account's main phone number shown. |
| Withhold caller id |
If needed, select “Yes” to hide this telephone line's caller id. A person that receives a call from a device with this setting enabled will see Unknown shown as the caller ID. |
|
Caller name on internal calls & Caller name on external calls |
Type the name that should be shown as your caller ID when you place a call to internal users or to an external phone number. NOTE: If you place a call to a caller that has saved your phone number in a Contact, the name in their contact will be shown instead. |
| Call media type | Select whether the media being relayed through this device is Voice or Fax. This option normally does not get adjusted. |
| Record group | If this device's calls should be recorded, select the record group that should store its call recordings. |
|
Maximum call spending per day ($) & Maximum calls to/from telephone line |
If needed, set maximum limits this device should follow regarding the number of calls and the amount of money spent for calls that this device handles. |
| While ringing | Choose if callers to your device should hear ringing or music. |
| Music |
Select the genre of music that callers will hear when this device places them on hold.
|
| Pickup groups |
If this device should be added to a pickup group to help pick up calls from a group of users, select the pickup group and click << Add selected. If needed, you can remove this device from a pickup group by selecting the pickup group and clicking Remove selected >>. |
| Available in queue |
If this device should receive calls from a queue, select the name of the queue and click << Add selected.
|
| Allow callers to enter this telephone line in attendant and IVRs | Select whether or not callers in an auto attendant or IVR menu should be able dial this device's 7-digit extension number to place a call directly to this device. |
| Send owner email notifications of missed calls | If needed, select Yes to have an email notification for missed calls sent to the email address of the person set as the Owner in this telephone line's Account Settings. |
| Mailbox for message waiting light and automatic voicemail access |
Select the mailbox that the phone should directly access and flash its Power LED for voicemail messages waiting to be checked. Quick Tip: Some users set this to a General Mailbox instead of their own mailbox. |
| Show in control panel |
Show or hide this device from the Control Panel page. Showing this device allows for a web portal user to drag and drop an active call onto the device's 7-digit extension number to transfer. |
User Settings
In the User settings section, you can adjust settings that will affect this specific device, such as toggling Do Not Disturb or call screening.

| Option | Description |
|---|---|
| Do not disturb | If this device needs to temporarily stop receiving calls, select Refuse calls. When calls should start being received again, select Accept calls. |
| Calls without callerid | Select if this device should Accept or Refuse calls from phone numbers that do not have a callerid. |
| Screen calls | If needed, you can enable or disable call screening. • Yes, and play callerid - Enable call screening to have a message play to the agent that answers that lets them know the caller id of the caller before prompting them to accept the call. • Yes, and ask caller to record name - Enable call screening and require the caller to record their name. The agent receiving the call will hear a message that plays the recorded name before prompting the agent to accept the call. • Unchanged (defaults to no) - Leave this setting to what was set previously. If this setting has never been changed, call screening will remain disabled. • No - Disable call screening. |
| Ring for | Select how many seconds this phone should ring before the call is treated as unanswered and forwarded according to the “On no answer” setting in the Forward to section. |
|
Change password & Password repeat |
Use this option to update the password this phone uses to register itself. WARNING: Changing this password will result in the phone being deregistered. It is recommended to have a SpectrumVoIP support technician change this password to ensure that the device is re-registered. |
Forward To
In the Forward to section, call forwarding and routing can be set up for just this extension number.

| Option | Description |
|---|---|
| All calls, without ringing telephone, to number | If the device registered to this extension number should have its calls forwarded, type an extension number or a telephone number that should receive its calls. To remove this forwarding, delete out the number from this field and then click the Save button. |
| On no answer |
Select where calls should be forwarded when a call is not able to be answered on this device. Quick Tip: The destination set in this option is often set as a mailbox, a cellphone number, or a different device's extension number. |
| Use same destination on busy or unregistered |
Select whether or not calls should be forwarded to the destination set for the “On no answer” option when this device is busy or disconnected. If you select “No”, you can use the “On busy” and “On unregistered” options to select where calls should be forwarded.  |
|
Follow in hunt groups, page groups, and queues or Follow unregistered in hunt groups, page groups, and queues |
The name and destination of this option will differ depending on if the “Use same destination on busy or unanswered” is set to Yes or No. • Select “Yes” to have calls that are not answered by this device in a queue, hunt group, or page group follow the forwarding destination set for the "On no answer" or “On unregistered” options. |
Times and Dates
On the Times and dates page (Features → Times and dates), you can view the different Time Groups that have been created for your account. 
Once a time group has been created, time periods can be added to it. A time period determines the date and time that call routing/forwarding should be active.
Create a Time Group
As noted before, a time group is created to group together time periods.
To create a time group for a specific routing/forwarding scenario…
1. Navigate to Features → Times and dates.
2. Click the New button.
3. On the New time group page, fill in the following information:
• *Name - Give the time group a unique name to identify it by.
• Description - If needed, add a description that will show by the time group's name.
• Priority - If this time group will be for emergencies, like an outage, use the Priority drop-down to select 10 (highest).
4. Click the Save button.
You should see a confirmation message telling you that the time group has been saved.
Click Add a new time period >> to start adding time periods to the new time group.
Add Time Periods to a Time Group
When there is an existing time group, time periods can be added to it to schedule dates and times that the time group should be active.
To add a time period to a time group…
1. Click the name of the time group you want to add a time period to.
Quick Tip: If you are still viewing the Time group saved confirmation message, you can click Add a new time period >> instead.

2. In the Time periods section, click the New >> button.
3. On the New time period page, use the Time period settings section to give the time period a descriptive name and an optional description.
4. In the When the time period starts and stops each day section, use the dropdowns to select the start and stop times for this time period.
Note: The times shown will be in the 24-hour format.
5. In the Which days the time period is active section, select the day, month, and year that this specific period will be active for. These options can be set in different ways depending on
Quick Tip: If needed, multiple days can be selected as long as they both follow the same start and stop times. To select multiple days, either click and drag to highlight multiple, or press Ctrl while clicking selecting.
Example Time Period Setups
Depending on the frequency and use case of the time period, the way the times, days, and date can be selected may differ. Below are common example time periods created for different scenarios.
• If the time period recurs at the same times during certain days of the week, you can focus on selecting the Start time, End time, and Days of the week options.
For example… For the business hours, you can just select the start and ending time of the hours and the days that are open during those times.
If there is a day that is open for a different time frame, you would need to add another time period that accounts for that day of the week and its different hours.
• If the date recurs on a yearly basis on a specific date, such as Christmas, New Year's, Memorial Day, etc., you can use just the Days of the month and Months options to select the specific date.
For example… The 4th of July occurs yearly on the 4th day of July, so I can select the 4th of July like so:
• If the date occurs on a specific date once or yearly on a different date, use all of the options to select the appropriate date.
For example… Father's Day occurs on a different date each year. For 2024, I would select the date for Father's Day for that year, like so:
To prepare for 2025, I would create another time period for the date Father's Day would take place in 2025.
6. Click the Save button.
✔ You should now see this time period showing in the time group.
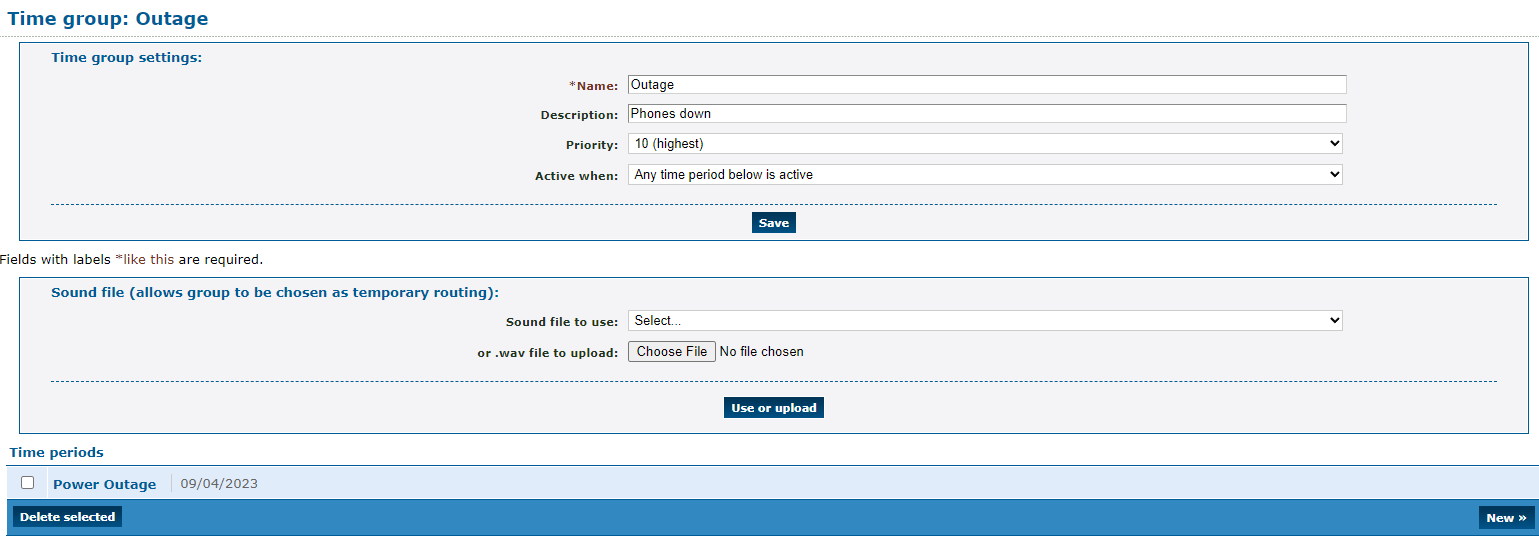
More time periods can be added in the future that will determine when this time group should be active.
7. If needed, repeat steps 2-6 for each time period that should be added to the time group.
Once a time group has been created and has had time periods added to it, the time group can be used to create a time route for a phone number. A phone number's time route tells the system where calls should be routed when a time group is active.
Create a Time Route for a Phone Number
Now that a time group has been created, a time route can be set up for a number that will tell the system where calls should be routed when that time group is active.
To configure a time route for a phone number…
1. Navigate to Features → Numbers.
2. Select the phone number that needs to temporarily be forwarded.
3. In the Time routes section, click the Add a time route button.
4. In the New time route window, fill in the following information:
• Time group - Use the drop-down to select the time group that this route will use.
• Forwards matching calls to - Select the destination for calls that are forwarded during this time. Commonly used destinations include:
– Number
– IVR menu
– Mailbox
– Dial by name menu
5. Click the Save button.
✔ You should now see the new time route and where it will route calls.

The destination of this time route can be edited at any time by clicking its name.
Clicking Edit time group will take you to where you can add more time periods for the time group to be active in.
Reports
In the Enswitch web portal, you can generate reports to help monitor your phone system and its activity. These reports can be reviewed through the Reports tab of the sidebar. 
There are four types of reports that can be generated and referenced:
- Active calls - View calls that are actively ringing or being handled in your phone system.
- Call history - Reference a list of calls that have been handled by your users within the last 30 days.
- Call history Archive - Download a .csv file that contains call logs from a month in the past.
- Call statistics - Generate a comprehensive report of statistics that need to be recorded for your purposes.
Active Calls Report
In the Active calls report, you can view the different calls being handled by your users. You can use the top menu to filter and sort the calls shown. You can also set how often this report should refresh itself.

- Use the top menu to filter and sort the calls shown.

- In the Refresh section of the top menu, set how often (in seconds) that the page should refresh to show more current calls.

-
View different active calls and the information of the callers participating in the call.

- Click the View in new page >> button to view these calls in a separate tab.
Hang Up an Active Call
At some point, it may become necessary to remotely hang up a call. This could be useful for dropping a stuck call or preventing a spam/robo caller from wasting the time of your agents.
On the Active Calls page, you can easily hang up calls. Simply, select one or more calls and click the Hang up selected button.
✔ You should see a confirmation message stating that the call has been hung up.

Call History Report
Using your web portal, you can check your call history to grab a caller's information, keep record of your calling activity, and more. The Call history page can search for and display calls from the last 30 days.
To view your account's call logs…
- Log into your Enswitch web portal.
- Navigate to Reports → Call history.
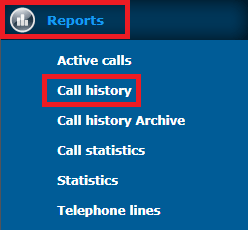
- In the Call history menu, filter the call logs shown using the options below:
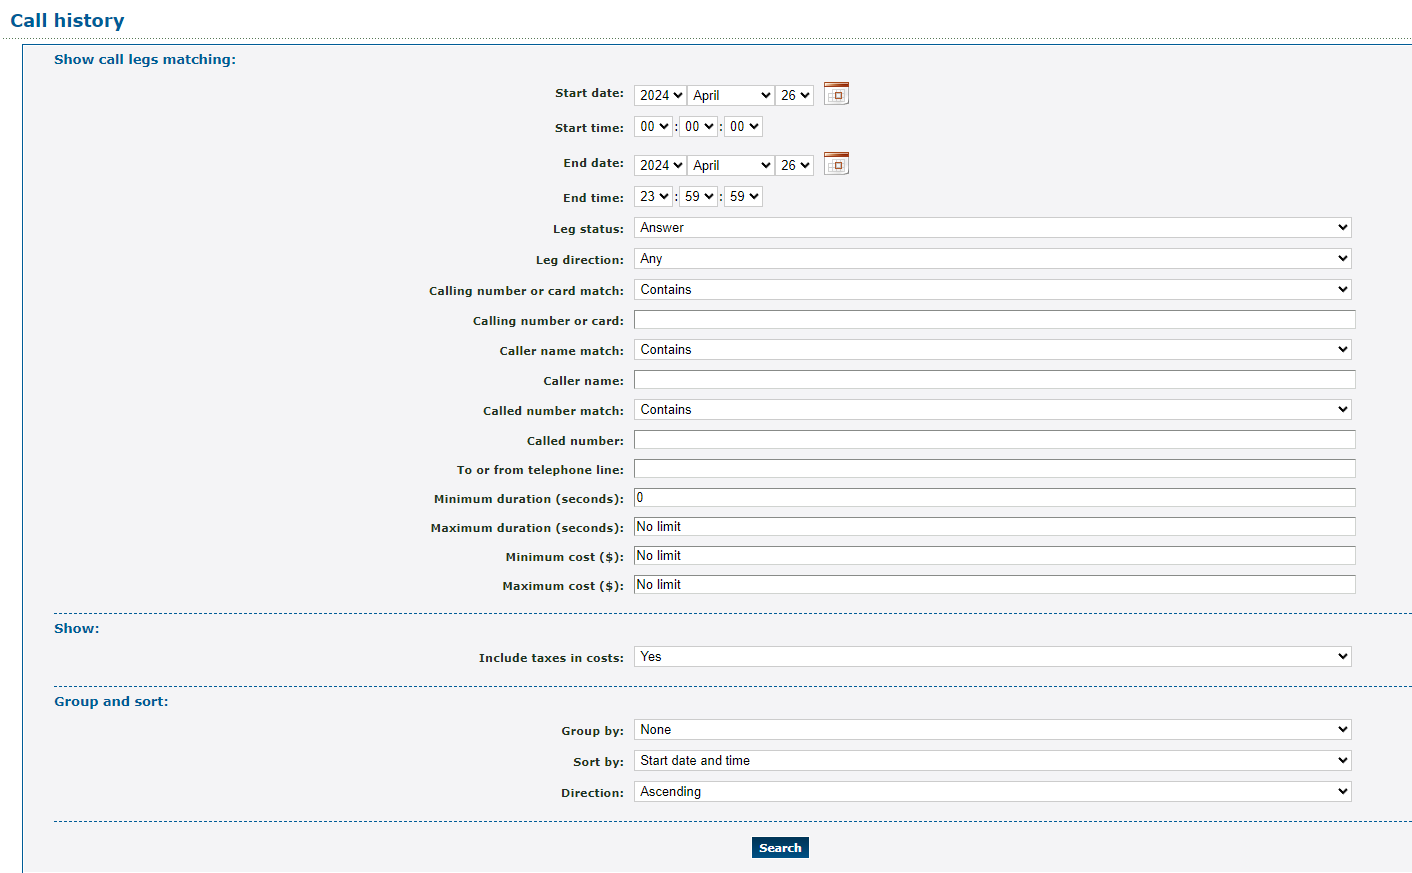
| Show call logs matching | Description |
|---|---|
|
• Start date & Start time • End date & End time |
Select the starting and ending date and time of the call(s) you would like to view. |
| Leg status | View either Answered or Unanswered (No Answer) calls. |
| Leg direction | View Any call, or view only Internal, Inbound, or Outbound calls. |
|
• Calling number or card • Caller name • Called number |
Narrow down your results by typing in either the calling number, caller's name, or the called number. |
|
• Calling number or card match • Caller name match • Called number match |
Determine how the system should search for calls based on the information put in for the Calling number or card, caller name, and called number entered in the options shown in the table above. • Exact - Only search for calls that exactly match what is typed in the fields. • Starts with - Search for calls that start with the letters or numbers entered. • Ends with - Search for calls that end with the letters or numbers entered. • Contains - Search for calls that contain the name or numbers entered. |
| To or from telephone line | If needed, type the extension number that handled the call you are looking for. |
| Minimum duration (seconds) & Maximum duration (seconds) | If you do not know the caller's information but you do know how long the call lasted, type in the minimum or maximum duration of the call. |
| Minimum cost ($) & Maximum cost ($) | If you are looking for calls that cost a certain amount, type the minimum or maximum cost of the calls in these fields. |
| Show | Description |
| Include taxes in costs | If you are looking for calls that cost a certain amount, select whether or not to include the taxes in the cost shown. |
| Group and sort | Description |
| Group by | Determine whether the calls should be grouped together by Day, Month, Type, or Type and number. If the Group by option is used, the Sort by option will be hidden. |
| Sort by | Determine the order the results will appear in depending on which of the following factors is selected: • Direction (i.e., Internal, Inbound, or Outbound) • Caller name • Called number • Start date and time • End date and time • Billable time • Cost. |
| Direction | Select if you want the results sorted/grouped in ascending or descending order. |
- Once the filters and options have been set, click the Search button.
✔ You should see a list of calls matching your search parameters.

If needed, click the Export as .csv button to download a spreadsheet of these call logs.
Call History Archive
If you are looking for a call that is not able to be found in the Call history page due to how long ago it was handled, you can view the Call history Archive to pull a .CSV file of calls from the month of that call.
To view your Archive call history page, navigate to Reports → Call history Archive.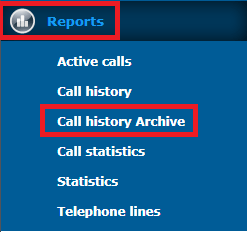
In the Archived call history menu, you can find and download that specific month's call logs as a CSV file. You can open the downloaded spreadsheet to find a specific call.
Call Statistics Report
In a call center environment, it may be necessary to monitor and keep record of your business' call statistics. This can help ensure your business is meeting set standards and expectations.
Create a Call Statistics Report
As an Enswitch admin, you can use the Enswitch web portal to generate different call statistics reports.
To generate and view a Call Statistics report…
1. Navigate to Reports → Call statistics.
2. On the Call statistics page, click the New report >> button.
3. At the top of the Report options menu, fill in the following information:
| Option | Description |
|---|---|
| * Name | Type a descriptive name to use for this specific report. |
| Owner | Select a user that can view and edit this report. |
| Report type |
Select the type of report that needs to be generated. You can generate reports that sort and show call statistics according to either a specific time frame or the destinations that handled the calls. Note: If you create a Destinations report, you can use the Display destinations section to fine-tune what destinations are shown. |
| SLA answer time | If your organization has a Service Level Agreement (SLA) that needs to be followed, you can set the SLA answer time to ensure the “SLA ok” stat shown in the Call statistics section is accurate. |
| Short abandon time |
Set the time limit that a caller has to abandon the call in order for it to be treated as a short abandon call. Note: An abandoned call can be the result of many scenarios affecting by a caller, such as having technical issues, realizing they called the wrong number, or deciding they do not have the time to do a call. |
| Telephone lines title | Select the information that should be shown for a user in the report. |
|
Start day & Start time |
Set a starting time and date that this report should show calls and their statistics. |
|
End day & End time |
Set an ending time and date that this report should show calls and their statistics. |
| Email report |
If needed, emailed reports can be scheduled. Select how frequently a report should be emailed and type the email address(es) that should receive these reports.
For multiple email addresses, separate each email address with a space. |
4. Use the Call statistics, Queue statistics, and Queue agent statistics sections to select the types of statistics that should be shown in this report.
Call Statistics
In your report, you can select specific call statistics that should be calculated and displayed.

The following call statistics can be shown in a report:
Note: The number shown for these stats depend on the Report type selected and the destinations that are shown in the Display destinations section.
| Option | Description |
|---|---|
| Total calls | The total number of calls that were handled. |
| SLA ok | If you have set the SLA answer time option, you can choose to display how many calls were answered within your set SLA answer time. |
|
Answered & Not answered |
How many calls were answered and not answered by agents. |
| Inbound calls | The total number of calls that were dialed to a user/agent. |
|
Inbound answered & Inbound no answer |
The number of inbound calls that were answered or not answered by a user/agent. |
| Outbound calls | The total number of outbound calls that were made by users and agents. |
|
Outbound answered & Outbound no answer |
The number of outbound calls placed by an agent that were answered or not answered. |
|
Hold time minimum & Hold time maximum |
The shortest and longest time that calls from a destination/time were waiting on hold.
|
| Hold time average | The average time calls were on hold from a destination/time. This is calculated using the Hold time minimum and Hold time maximum stats. |
|
Talk time minimum & Talk time maximum |
The shortest and longest time that users were actively on a call for that destination/time.
|
| Talk time average | The average time calls were actively being handled. This is calculated using the Talk time minimum and Talk time maximum stats. |
|
Total time minimum & Total time maximum |
The shortest and longest time a call was handled within a destination/time.
Note: The total time includes talk time and hold time. |
| Total time average | The average time a call was handled. This is calculated using the Total time minimum and Total time maximum stats. |
| Total time total | The total time calls were handled within a destination/time. This total is found by adding up the total time of every call. |
Queue Statistics
Select the different statistics you want to show that center around your queues.

| Option | Description |
|---|---|
| Abandoned by caller |
The number of calls that were abandoned by the caller. A call may be abandoned due to technical issues on the caller's side or other small issues like the caller realizing they dialed a wrong number. |
| Short abandon by caller | The total number of calls that were abandoned within the set Short abandon time option. |
| No agents available | Display how many agents were not available in their queues. |
| Time-out in queue | How many calls were not answered in time and followed an exit option. |
| Key press by caller | The number of calls where a caller pressed a key on their dialpad. |
| Agent completed | The total of calls ended and completed by agents. |
| Caller completed | The number of calls ended by a caller. |
| Transfer by agent | How many calls were transferred to another destination by an agent. |
Queue Agent Statistics
If this report is going to focus on agents in your queues, you can show the availability statuses that your agents used and for how long they were on that status.

If your agents do not switch their status while handling calls, then showing these statistics may not be necessary for your report.
5. If you are creating a Destinations report, use the Display destinations section to select the different users, callers, numbers, and queues that should be displayed in the report.
Display Destination Options
There are several destinations in the table that you can show and hide. For some special destinations, you can select specific phones, users and queues that can be shown.

| Option | Description |
|---|---|
| All calls |
Show or hide the All calls row of the Destinations report
|
| External callers |
Show or hide the External callers row of the Destinations report
|
| Internal call legs |
Show or hide the Internal call legs row of the Destinations report
|
| External destinations |
Show or hide the External destinations row of the Destinations report.
|
| Numbers and codes |
Select feature codes and numbers that should be shown in the report. For this option, you can select… • All numbers - Show every number and feature code on your account. |
| Queues |
Select queues that should be shown in the report. For this option, you can select… • All queues - Show every queue on your account.
|
| Queue agents |
Show all or specific agents that are part of a queue. For this option, you can select… • All agents - Show every user that is part of a queue.
|
| Telephone lines |
Show all or specific telephone lines (aka extension numbers). For this option, you can select… • All telephone lines - Show every telephone line on your account. |
| Total |
Show or hide the Total row from the Destinations report.
|
6. Click the Load data button.
✔ Doing so will load a table of the data selected so far. 
This table shown may differ in appearance depending on the Report Type that was selected.
Here is an example of a Days of the week report:
To edit this report's options, click the Open options button on the right.
7. If you would like to save this report to use at later dates, click the Save report button.
✔ You should see button change to say “Report saved” and a Save as copy button appear.
If needed, click the Save as copy button to create a copy of this report for the Call statistics page.
View a Call Statistics Report
Once you have created a Call Statistics Report, you can view and edit the report by clicking the name of the report on the Call statistics page. 
While viewing the report, you can use the toolbar on the right to do different things with the report:

While viewing the data of the report, you can get a more detailed view of the calls that contributed to a specific stat.
1. Click the stat that needs to be viewed in more detail.
2. In the window that appears, you can view the information of the calls that contributed towards the selected stat.
3. If needed, click the Export as .csv button to download a spreadsheet of the data shown.
4. Click the Close window button to return to the main view of the table.


