Pre Queue Options - Call Queues
Find out how to configure and customize call queues with special pre-queue settings to better serve your call flow needs.
Table of Contents
Pre Queue Settings
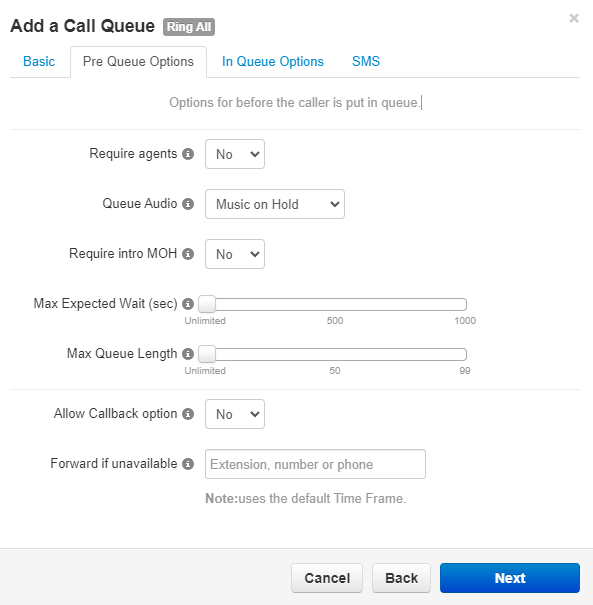
While adding a call queue, there will be a Pre Queue Options tab full of settings that configure the selected call queue. The Pre-Queue Options determine what happens for callers before they are placed in the queue. 
Require Agents in Queue

The Require agents option ensures that callers are not able to enter the queue unless an agent is present.
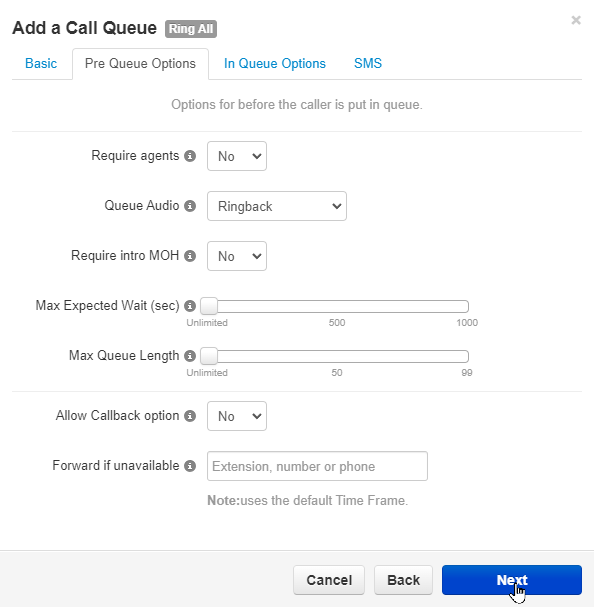
Setting the Queue to Play Ringing
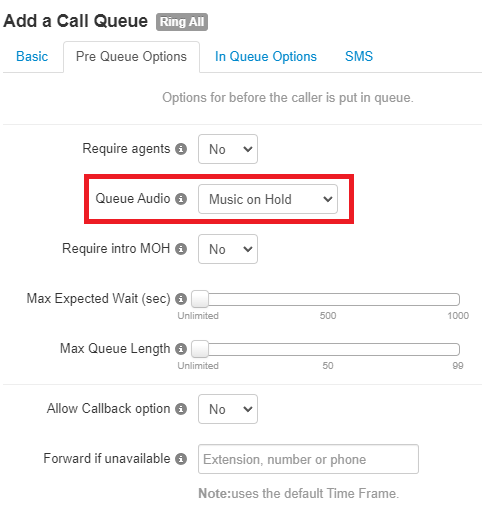
The Queue Audio setting is the main option changed in the Pre-Queue Options tab.
NOTE: This setting is only shown when creating a queue.
If an existing queue needs to have this setting adjusted, please reach out to our technical support team.
By default, the queue will play the audio stored in the Music on Hold section. 
To have the phone play ringing for callers in the queue, use the Queue Audio drop-down to select Ringback. 
Require Intro MOH

If the caller should listen to an Introductory Greeting for the call queue fully before being placed in the queue, use the Require Intro MOH dropdown box to select Yes.
Adjusting How Callers Wait

The Max Expected Wait and Max Queue Length parameters allow for the beginning of the call queue placement process to be customized.
Max Expected Wait
The Max Expected Wait determines how long callers can wait before being placed into a queue that was full.

Note: By default, the max expected wait is set to Unlimited to allow callers to wait as long as needed to get placed in the queue.
This setting is relevant when a max queue length has been set and exceeded.
Callers will have until this wait time before their call is forwarded to an exit option, set as the destination for Forward if Unavailable, unless the call is picked up by an agent in time.
Max Queue Length
The Max Queue Length sets the maximum number of callers that can wait in the queue.

When the queue is full, callers will follow the max expected wait before forwarding to any set Forward if Unavailable destination.
Note: By default, the the max queue length is set to Unlimited to allow as many callers to be in the queue as possible.
Allow Callbacks
The Allow Callback option setting enables the callback feature of the queue for callers that have been waiting in the queue longer than the time set by the Queue Ring Timeout setting of the call queue.
Set Up Callbacks for a Queue
Set a Queue Ring Timeout
To have the call queue recognize when it will need to give callers the option to set up a callback, the Queue Ring Timeout will need to be adjusted.
The Queue Ring Timeout determines how long callers can wait in the queue before being offered a callback or following a destination set with the If unanswered option.
To set the Queue Ring Timeout…
1. Navigate to the Call Queues page.
2. Click the Edit  icon next to the call queue needing this change.
3. Visit the In Queue Options tab.
4. Use the Timeout slider to set how long (in seconds) the queue should ring all agents for.
5. Ensure that the If unanswered drop-down is set to Stay in queue.
Allow Callbacks
To set the queue to allow callers to set up a callback, we will need to enable the Allow Callback option setting.
To enable this setting…
1. In the Pre Queue Options tab, click the Allow Callback option drop-down and select Yes.
2. Click the Save button.
The Callback Process
Once the caller has waited longer than the queue ring timeout, they will be prompted by the queue to…
• Press 2 to leave a voicemail.
Note: This option will leave a voicemail in the call queue's voicemailbox.
To check the call queue's voicemailbox, you can either…
– Log in as the call queue in the web portal.
– Dial 03 and the n number of the call queue and press star (*).
– Pressing * will allow you to enter the call queue's voicemail PIN.
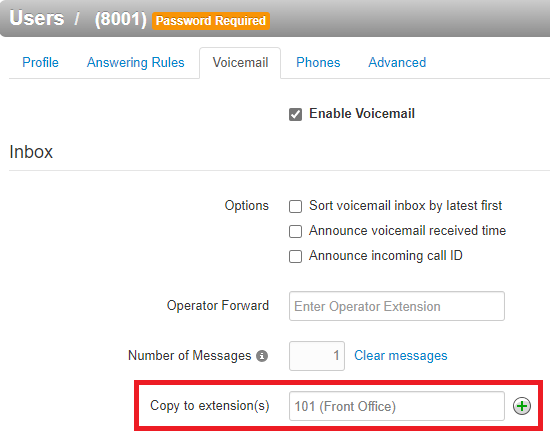
Alternatively, you can go into the call queue's Voicemail tab and set the queue to copy voicemails to a different extension:
• Press 3 to keep their place in the queue and receive a callback when an agent becomes available.
• Press # to return to the queue to continue waiting.
If they press 3 to receive a callback, they will be prompted to either…
• Press 1 to confirm their number is correct for a callback.
• Press 2 to enter a different phone number to receive the callback.
When an agent becomes available in the queue, they will receive a call from the queue itself. This call will notify them that they are receiving a call to complete a callback.
When the agent presses 1 to connect the call, the call queue will call the callback number left by the caller.
Forward if Unavailable
NOTE: This option only routes calls from callers that have exceeded a set Max Expected Wait and Max Queue Length.
Since these options are not commonly used, this forward does not have to be set.
To set the destination, type in the extension number of a call queue, auto attendant, voicemail, operator, or user. A 10-digit phone number can also be used as a destination for these calls. 
✔ Once the pre-queue options have been adjusted, click the Next button to move onto adjusting the In-Queue Options.
