Implement an Overflow Call Queue
Explore how you can set up an overflow call queue so that when calls are not answered in one queue, they can rollover into another queue.

Written by Val Campos
Updated at August 26th, 2025
Table of Contents
Why Use an Overflow Queue?
If you frequently have high call volume in your queues, it may be beneficial to set up an Overflow queue, aka a Rollover Queue, for callers that have been waiting too long in a queue. An Overflow queue is a separate call queue that is dedicated to handling excess calls from other call queues. Whenever a caller times out in a queue, the caller can then be forwarded to an overflow queue where more agents help handle calls.
An overflow queue can be a handy asset for ensuring your callers' calls are handled in a timely manner. If your organization relies heavily on call reporting and statistics, implementing an overflow queue can also help with visualizing how calls are being handled.
Step 1: Create an Overflow Queue
An overflow queue can easily be created and configured on the Call Queues page of the Stratus web portal. To create one…
- Navigate to the Call Queues page.

- Click the Add Call Queue button.

- In the Add a Call Queue modal, complete the following fields in the Basic tab:

Quick Tip: Hover your mouse over the Information
 icon to view more information about any terms shown.
- Name - Type a unique name that describes the call queue.
-
Extension - Type an extension number that is not currently in use.

Quick Tip: Call Queues are usually given an extension number in the 8000s range.
-
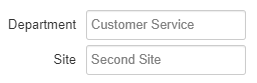
Department/Site - If needed, sort this queue into a Department and Site.
-
Type - Select how the call queue should distribute calls.

✔ Overflow queues are commonly set as Round-Robin, Ring All, or Linear Hunt queues.
- Record Calls - If you would like calls from this queue to be recorded, select Yes.
- Statistics - If you would like the statistics for calls handled by agents in this queue to be recorded and displayed on the Call Center page for call center reporting purposes.
- Message to Agent - After adding the queue, you can set a custom message that will be played for agents that answers a call from this queue.
- Complete the following options in the Pre-Queue Options tab.
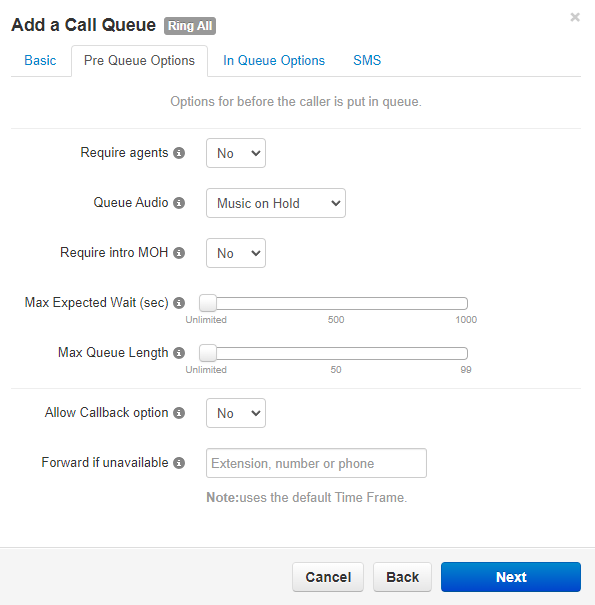
- Require agents - If you would like the queue to require at least one agent present in the queue for calls to be able to wait in the queue, select Yes.
-
Queue Audio - Select whether or not the queue should play ringing (Ringback) or play your music and messages from the Music on Hold page.

- Require intro MOH - If you have an introduction message, such as a recording warning or a comfort message, that is supposed to play to callers before they enter the queue, select Yes.
- Max Expected Wait - If needed, select how long (in seconds) that the queue's wait time can reach before the queue makes itself unavailable to new callers. Once the queue's wait time is shorter than the max expected wait, new callers can join the queue again.
- Max Queue Length - If needed, select how many callers can wait in the queue at once before the queue makes itself unavailable to new callers. Once the number of callers in the queue is less than the max queue length, new callers can join the queue again.
-
Allow Callback option - If you would like to allow the queue to give callers the option to stay in the queue, set up a callback call, or leave a voicemail, select Yes.
Note: To learn more about setting your queue up to use callbacks, check out this guide.
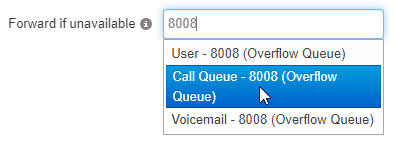
- Forward if unavailable - If you have set a Max Expected Wait or a Max Queue Length, type in a name, extension number, or phone number to have calls forwarded to when these limits are met.
- Click Next to proceed to the In-Queue Options.
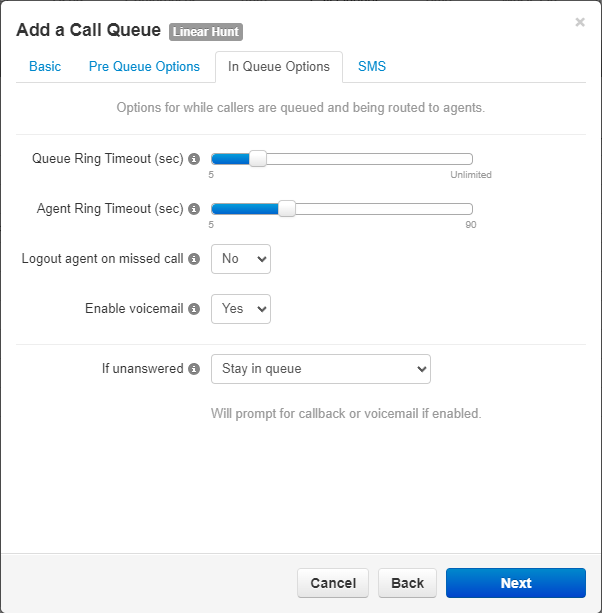
- In the In-Queue Options tab, complete the following options:
-
Queue Ring Timeout - Select the total amount of time that the queue should ring all agents before forwarding the call according to the If unanswered option.

-
Agent Ring Timeout - If you are creating a Linear Hunt queue, select how long each agent should ring.
This option will only show for Linear Hunt, Linear Cascade, and Tiered Round Robin queues.NOTE: This value should mathematically make sense with the Queue Ring Timeout.
For example, if my linear hunt queue should ring 5 agents for 20 seconds each, the Queue Ring Timeout should be set to 100 seconds to account for all 5 agents (e.g., 5 agents * 20 seconds = 100 seconds).
Not making sure these options make sense together can result in agents not receiving calls as intended.
For the above example, if I set the queue ring timeout to 80 seconds instead of 100 seconds, the fifth agent would not receive a call. - Logout agent on missed call - If needed, select whether or not the call queue should log out agents when they miss a call.
- Enable voicemail - If you would like to utilize the call queue's own voicemailbox, select Yes.
-
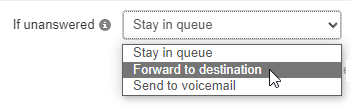
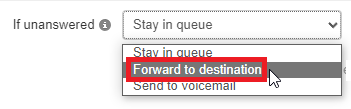
If unanswered - Select where callers should be directed if an agent is unavailable to take their call.
-
Stay in queue - If you want callers to stay in the queue until their call is answered, then select this option.
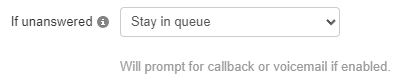
Quick Tip: Stay in queue should be selected if you plan on using callbacks.
-
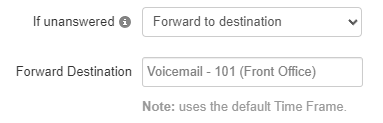
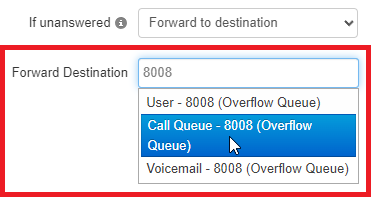
Forward to destination - If you would like to send callers to another call queue, an auto attendant, a user, or a voicemailbox, then select this option.
In the Forward Destination box, type and select the extension number or name of the destination.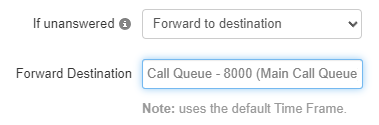
-
Send to voicemail - Select this if you would like to send callers to the call queue's voicemail.

If Enable voicemail is set to No, the Send to voicemail option will not be available.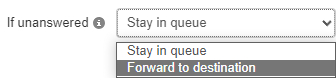
Note: If you are wanting to send callers to a general voicemailbox or the voicemailbox of a user, then you would use the Forward to destination option like so:
-
Stay in queue - If you want callers to stay in the queue until their call is answered, then select this option.
-
Queue Ring Timeout - Select the total amount of time that the queue should ring all agents before forwarding the call according to the If unanswered option.
- Click the Next button and the Add button to apply these details.
Step 2: Assign Agents to the Overflow Queue
Now that an overflow queue has been created, agents will need to be added to the queue so that any future calls that are waiting can be answered.
To add agents into the overflow queue…
- Click the Edit Agents
 icon next to the queue that needs its agents adjusted.
 - Click the Add Agent button.

- In the Edit Agents menu, input the following:

-
Add Agent(s) by - Use the dropdown to select whether to either add an agent by their User or by their specific Phone.
- Add by User - Adding an agent by their User will ensure the ll queue follows their answering rules.
- Forwards will be followed.
- The user's other devices will ring if set in a rule.
- Add by Phone - Adding an agent by their phone will have the call queue ignore their answering rules and ring just the device selected.
- If needed, select more of the user's devices to ensure their other phones ring as well.
- Add by User - Adding an agent by their User will ensure the ll queue follows their answering rules.
- Agent Extension - Type and select the or extension number(s) of the agent(s) to be added.
- Status - Use the dropdown to set the agent(s) to be Online or Offline in the queue.
-
Add Agent(s) by - Use the dropdown to select whether to either add an agent by their User or by their specific Phone.
- Adjust the remaining settings for the agent(s) as needed.
Agent Settings
Setting Description Wrap up time Use the slider to specify the amount of time the agent is allocated to complete paperwork after finishing a call and before a new call is dispatched. Max Simultaneous calls Use the slider to specify the maximum number of calls an agent can take at one time. This will almost always be 1. Order in Linear Hunt Sets the dispatch order. If a call is dispatching, it will go to the available agent with the lowest order. Queue priority for agent Sets weighting for an agent that is servicing multiple queues. If you have an agent servicing two queues and both queues have a person waiting, for example, the agent will get the call from the queue whose priority is highest (lowest number). Request Confirmation Enables or disables request confirmation.
Choices are:
· Enabled = Requires the agent to confirm that they want to receive a call each time a call is dispatched to them in the queue.
· Disabled = Agent does not have to confirm the call.Auto Answer Enables or disables auto answer. This feature can only be used in Linear Hunt and Round Robin queues.
Choices are:
· Enabled = Agent's phone answers automatically (not all phones support this feature).
· Disabled = Agent's phone will not answer automatically. - When the agent is ready to be added, click the Save Agent button.

- Once all agents have been added, click the Done button.

Step 3: Route Unanswered Calls to the Overflow Queue
Now that the new overflow queue has agents added so that calls can be answered, the overflow queue needs to be added into your organization's inbound call routing. The most common way overflow queues are implemented is as an exit option for other queues.
To use the overflow queue as a destination for calls from other call queues…
- Click the Edit Queue
 icon next to the call queue that need unanswered calls forwarded to the overflow queue.
 - If the call queue uses a Max Expected Wait or a Max Queue Length, visit the Pre Queue Options tab.

- On the Pre Queue Options tab, consider adjusting the following options:

-
Max Expected Wait - If needed, update how long (in seconds) that the queue's wait time can reach before the queue makes itself unavailable to new callers.
Once the queue's wait time is shorter than the max expected wait, new callers can join the queue again.
-
Max Queue Length - If needed, update how many callers can wait in the queue at once before the queue makes itself unavailable to new callers.
Once the number of callers in the queue is less than the max queue length, new callers can join the queue again.
-
Forward if unavailable - If there is a Max Expected Wait and/or Max Queue Length set, type in the name or extension number of the overflow queue to use as an exit option for callers that are not able to enter the queue.
-
Max Expected Wait - If needed, update how long (in seconds) that the queue's wait time can reach before the queue makes itself unavailable to new callers.
- Visit the In Queue Options tab.

- On the In Queue Options tab, adjust the following options:

-
Queue Ring Timeout - Select the total amount of time that the queue should ring all agents before forwarding the call according to the If unanswered option.
-
Agent Ring Timeout - If you are adjusting a Linear Hunt, Linear Cascade, or Tiered Round Robin queue, select how long each agent should ring.
NOTE: This value should mathematically make sense with the Queue Ring Timeout.
For example, if my linear hunt queue should ring 5 agents for 20 seconds each, the Queue Ring Timeout should be set to 100 seconds to account for all 5 agents (e.g., 5 agents * 20 seconds = 100 seconds).
Not making sure these options make sense together can result in agents not receiving calls as intended.
For the above example, if I set the queue ring timeout to 80 seconds instead of 100 seconds, the fifth agent would not receive a call. -
If unanswered - Select Forward to destination.
-
Forward Destination - Type and select the extension number or name of the overflow queue.
-
Queue Ring Timeout - Select the total amount of time that the queue should ring all agents before forwarding the call according to the If unanswered option.
- Once the changes are made, click the Save button.
