Stratus Web Portal Admin User Guide
Learn how to effectively manage your Stratus account as a Site Manager or Office Manager with this comprehensive user guide.

Written by Val Campos
Updated at July 2nd, 2026
Table of Contents
View and Download an Admin User Guide
Access the Portal
NOTE: If you are having trouble logging in, please contact our support team.
- Visit www.stratus.spectrumvoip.com.
✓ Visiting this link will pull up Stratus' Login page:
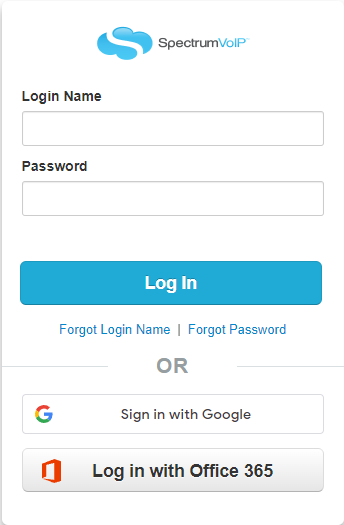
- In the Login Name box, type your login name.
- In the Password box, type your password.
- Click Log In.
Login Help
If you have forgotten your login name or password for the Stratus web portal, the Login page offers two links for requesting emails to remember a login name or reset a password.
Request Your Login Name
To find out the login name to use for logging into Stratus…
1. Click on the Forgot Login Name link.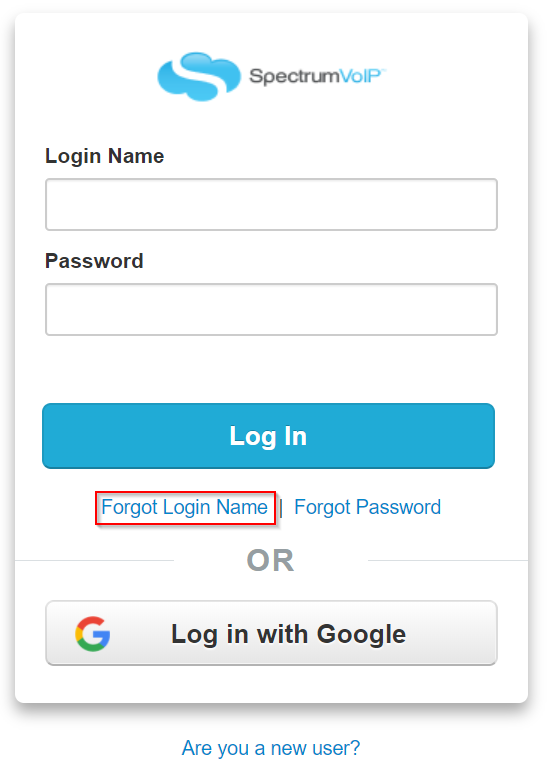
2. In the Forgot Login Name menu, type your email address in the Email box.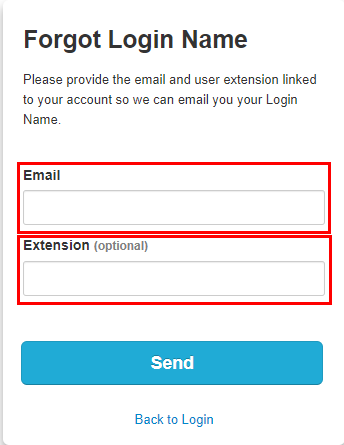
3. If known, type nsion number in the nsion field.
4. Click the Send button.
✓ Clicking Send should send out an email with the login name:
Reset Your Password
To reset a forgotten password to get logged in again…
1. Click on the Forgot Password link.
2. On the Forgot Password menu, type your login name in the Login Name box.
3. Click the Send button.
✓ Clicking Send should send out a password recovery email that looks similar to this:
4. In the password recovery email, click the Reset Password button and follow the prompts.
The Home Page
On the Home page, you can get a breakdown of your organization's performance and status.

Active Calls
Use the CURRENT ACTIVE CALLS module to view the calls your business is receiving.
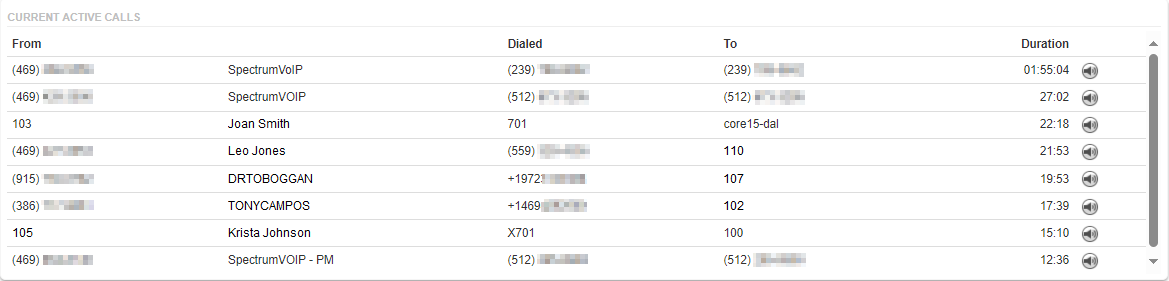
By clicking the Listen In  icon, you can monitor calls using the Audio Monitoring tool.
When listening to a call using the Audio Monitoring feature, administrators can use the Join Call or Whisper to buttons to interact with the call.

NOTE: Join Call (Barge) / Listen Only are available on all calls (i.e., on-net to on-net, and on-net to offnet).
Whisper only works for a call by an agent/employee (on-net) connected to a call that is offnet.
Note: Since audio monitoring sessions start in Listen Only by default, only the Join Call and Whisper To buttons will be visible.
After switching to either Barge or Whisper mode, a Listen Only button will appear in the other buttons' place.
Join Call (Barge)
The Join Call (Barge) feature allows a listener to join into the call, rather than just listen (as is the case with Listen Only). Barge allows both parties of the call to hear the user joining the call.
To barge into a call, click the Join Call button on the Audio Monitoring pop-up.
✔ You should now be able to hear and speak to both calling parties.
Whisper
The Whisper feature allows the whisperer to speak only to the agent (on-net user) on a call. The Caller (off-net) is not able to hear the whisperer.
Warning: The whisper option is only available on Calls where one party is an on-net user, and the other party is an off-net user. This can be either an inbound or outbound call.
To whisper to the agent of the call, press the Whisper To button on the Audio Monitor pop-up.
✔ You should now be able to speak to the agent without the caller hearing.
Listen Only
The Listen Only feature allows the listener to hear both sides of a call but not be heard by either of the other parties.
To use Listen Only after using either Join Call or Whisper, click the Listen Only button on the Audio Monitoring pop-up.
The Call Graph
The CALL GRAPH modal can be used to view the activity of your phone system over a length of time. Viewing this graph can be useful for call center forecasting.
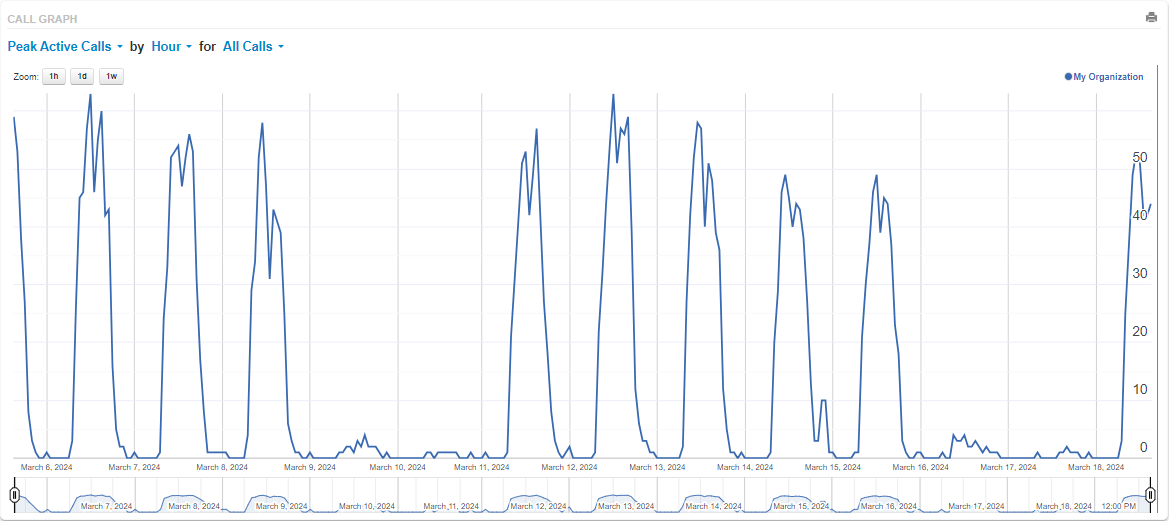
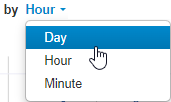
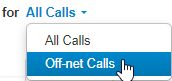
If needed, you can use the dropdowns to adjust the information shown in the graph.

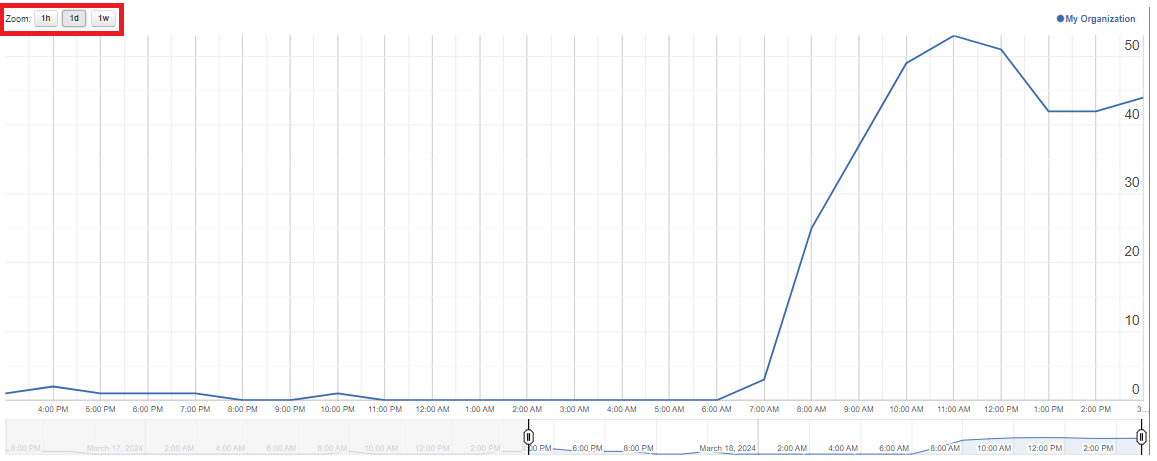
Using the Zoom buttons, you can update the graph to only show information for a certain timeframe.
Click the Print  button to print out a copy of this graph.
Users and Applications
If needed, you can reference the total number of users, devices, and components that make up your phone system.
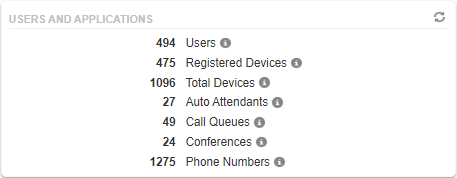
Being able to view this information can come in handy if you need to keep track of your inventory.
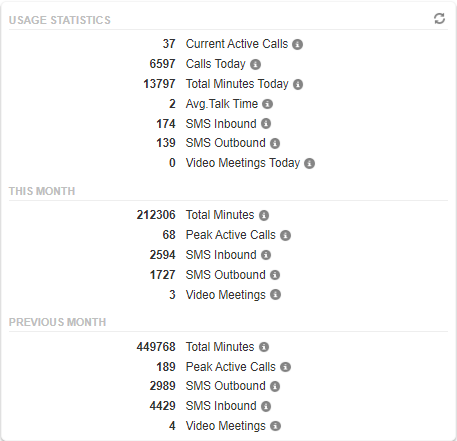
Usage Statistics
The USAGE STATISTICS modal displays a quick view of statistics that measure your phone system's activity.
User Management
On the Users page, you can view a list of the users on your account, edit their settings, and add Shared Contacts for all users to reference.

To adjust the data shown in the Users table, click the Columns button and select the information to include as a column for the table. 
Edit the Settings of Users
When you click on a user's name, you can view and adjust their settings. There are many different settings that can be adjusted for each user.
Profile Settings
As a Stratus admin, you can update any of your users' Profile information.
Basic Profile Information

| Field | Description |
|---|---|
| First Name and Last Name | Choose the first and last name to be shown in contacts for this user. |
| Login Name | Reference the login name that this user can use to log into the Stratus web portal. |
| Department | If needed, sort this user into a Department. This can be useful for organizing your users and allowing them to use group pickup features. |
| Site | If needed, sort this user into a Site. This can be useful if you have Site Managers that should be managing users of a certain location/site. |
| Overwrite with Site Defaults | If this user is assigned to a site, you can select whether or not their settings should be overwritten to match their site's default settings. |
| Timezone | Select your local time zone that will be used for the time shown on the user's SpectrumVoIP desk phone, |
| User's Scope | If needed, assign this user a scope that will determine what kind of information they can see and control. To have a user set up as an Office Manager, please contact our support team. |
| Record User's Calls | Select whether or not this user's calls should be recorded. If you are having trouble seeing this option or would like help enabling call recordings, please contact our support team. |
|
Directory Options |
• Announce in Audio Directory - Select this to have the user's name searchable in a dial-by-name directory. • List in Directory - Select this to have the user visible in the contacts of other users. This includes the Directory feature of other user's desk phones. |
Caller ID Information

| Field | Description |
|---|---|
| Area Code | This is the area code that the user may prefer for local 7-digit dialing. If this user dials the last 7 digits of a phone number, this area code will be used automatically. |
| Caller ID Name | This is the caller ID name shown when this user places an outbound call. |
| Caller ID | For this user's outbound calls, this is the phone number that recipients will see. |
| Emergency Caller ID | When 9-1-1 is dialed, the emergency dispatcher that handles the emergency call will see this phone number and the address information that our team has registered to it. |
Account Security Information

| Field | Description |
|---|---|
| Email Address(es) | This is the email address that will receive any email notifications for things like voicemail notifications, password resets, etc.. To add more email addresses, click the Add another email |
| MFA Methods: • Single Sign-On - Office365 • Multi-Factor Authentication - Google |
If Single Sign-On has been enabled for your business, users can link either their Office 365 or Google account to their Stratus account to make logging in more convenient. You can view the status of their accounts' connections to Stratus. To have single sign-on enabled for your business, please contact our support team. |
Update a User's Voicemail PIN
In the Change Voicemail PIN section, you can use the New PIN box to type a new, 4-digit PIN.

WARNING: Avoid using 1234 or 0000 as a PIN.
Doing so will prompt the system to change the password to a random series of numbers.
✔ Once any changes to their settings have been made, make sure to click the Save button.

Voicemail Settings
Each user that is created has their own voicemailbox that can be viewed and managed by the user themself or a Stratus admin user.
Inbox Settings
As a Stratus admin user, you can configure a user's inbox settings.

| Setting | Description |
|---|---|
| Enable Voicemail | Created users have their voicemailbox enabled by default. If needed, you can deselect this to disable this user's mailbox. |
| Inbox Options |
• Sort voicemail inbox by latest first - When enabled, have the mailbox sort messages by how recently they were received. • Announce voicemail received time - Have the user's mailbox announce when the voicemail was received before playing the message. • Announce incoming call ID - Have the user's mailbox announce the caller's Caller ID before playing the message. |
| Operator Forward | If needed, you can give callers that reach this user's mailbox the option to have their call forwarded elsewhere instead of leaving a message. This will allow users to press 0 to have their call forwarded. Users that use this feature commonly have calls forward to the extension number of a receptionist or operator. |
| Number of Messages | You can view how many messages are in the user's mailbox. If needed, you can click Clear messages to clear out the mailbox's messages. |
| Copy to extension(s) | If needed, you can have this user's voicemail messages copied into the mailbox of another user. To have messages copied to a user's mailbox, type the user's name or extension number. Click the Add another extension  icon to add more users to copy messages to. icon to add more users to copy messages to. |
| Voicemail Transcription | This option is disabled by default. Enabling voicemail transcriptions using Google's services costs $2.99/user per month. This user would be able to view these transcriptions in their Stratus web portal, the StratusHUB desktop app, and the Stratus mobile app. These transcriptions will also be readable in voicemail email notifications if the user has email notifications enabled. 
|
| Options | These optional options allow you to enable special notifications for certain conditions. To have these options shown, contact our support team. • Send email when mailbox is full - Have an email sent whenever the user's mailbox is full. • Send email after missed call - Have an email sent whenever the user misses a call. |
Manage Greetings
In the Greetings section, you can view, Listen to  , Download
  , and Manage
 the greeting that is played to callers that reach the user's mailbox.

Click the Manage  icon next to the Voicemail Greeting to view the Manage Greetings menu and the mailbox's greetings.

You can also Download , Edit  , and Delete
  greetings.
Create a Greeting
1. On the Manage Greetings menu, click the Add Greeting button. ![]()
2. Use one of the following New Greeting options to add in a greeting.
Text-to-Speech
You can use the text-to-speech tool to create a greeting without having to record one.

To create a greeting using text-to-speech…
1. In the New Greeting section, select Text-to-Speech.
2. In the Message box, type out the voicemail greeting.
3. Use the Voice dropdown to select the voice that should say the message.
4. Press the Play  icon to listen to the voice and the message to confirm that they sound correct.
Quick Tip: If the message does not sound correct, try…
• Spelling out any names phonetically.
• Typing out email addresses and phone numbers without any special characters.
(e.g., 4 6 9 4 2 9 2 5 0 0 and business at g mail dot com)
• Selecting a different voice to see if a certain voice pronounces the name better.
6. Click the Save button. ![]()
Upload
If you have a pre-recorded greeting or a downloaded backup of a greeting, you can upload the audio file to use as a user's voicemail greeting.

WARNING: The audio file should be a 16-bit WAV (8Khz, Mono, 16-Bit PCM) file.
Convert an Audio File Using G711.org
To convert the audio file, you can use a free site named g711.org. To do so…
1. Visit g711.org.
2. In the Source File section, click the Browse button.
3. Select the audio file to be converted.
4. In the Output Format section, ensure that the Standard Definition option is selected.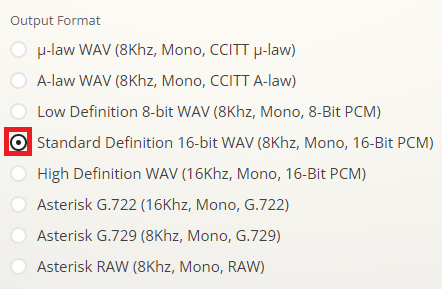
5.Click the Submit button.
✔ Doing so will pull up a new page with a link.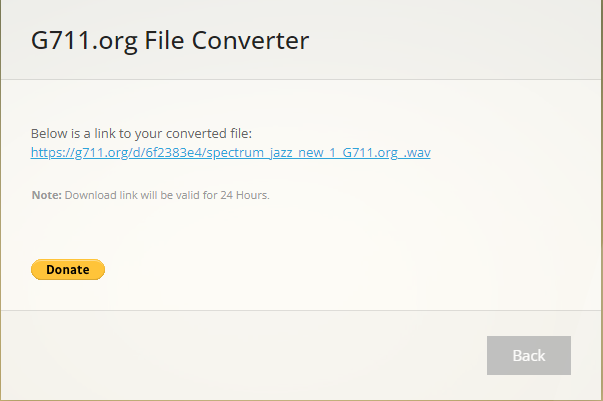
6. Right-click the link and select Save link as.
7. In the File name box, type a name for the converted audio file and then click the Save button.
DANGER: Not converting music files can cause catastrophic issues for your phone system.
Once the file has been selected on your PC, click the Upload button. ![]()
Record
One way to add a greeting for a voicemailbox is the call to record tool.

To have a call sent out that will record your greeting…
1. In the New Greeting section, select Record.
2. In the Greeting Name box, type in an optional name for the greeting.
3. In the Call me at box, type the n number of a phone to send the call to.
4. Click the Call button. ![]()
5. Follow the call's instructions to record the greeting.
Change the Active Greeting
When a user's mailbox has multiple greetings, you can use the Voicemail Greeting dropdown to select the greeting that should be used.

After selecting a different greeting, be sure to click the Save button at the bottom of the page. ![]()
The Greetings section also allows you to listen to, download, and update your Recorded Name.
The Recorded Name is played to callers when they search for a user using an auto attendant's Dial-by-Name Directory. If your company does not use a Dial-by-Name Directory, then the recorded name does not need to be updated.
Update a Recorded Name
If the Recorded Name for the user is not correct, you can update it. To do so…
1. Click the Manage  icon.
icon.
2. In the Manage Recorded Name menu, do one of the following:
Text-to-Speech
To avoid having to take the time to record a user's name, you can use the convenient Text-to-Speech tool.

To use this tool to create a user's recorded name…
1. In the New Recording section, select Text-to-Speech.
2. In the Message box, type out the user's name.
3. Use the Voice dropdown to select the voice that should say the user's name.
4. Press the Play icon to listen to the voice and the name to confirm they sound correct.
Quick Tip: If the name does not sound correct, try spelling the name out phonetically. You can also try selecting different voices to see if a certain voice pronounces the name better.
5. Click the Save button. ![]()
Upload
If you have a pre-recorded snippet of the user's name, you can upload the audio file to use as a user's recorded name.

WARNING: The audio file should be a 16-bit WAV (8Khz, Mono, 16-Bit PCM) file.
Convert an Audio File Using G711.org
To convert the audio file, you can use a free site named g711.org. To do so…
1. Visit g711.org.
2. In the Source File section, click the Browse button.
3. Select the audio file to be converted.
4. In the Output Format section, ensure that the Standard Definition option is selected.
5.Click the Submit button.
✔ Doing so will pull up a new page with a link.
6. Right-click the link and select Save link as.
7. In the File name box, type a name for the converted audio file and then click the Save button.
DANGER: Not converting music files can cause catastrophic issues for your phone system.
Once the file has been selected on your PC, click the Upload button. ![]()
Record

To have a call sent out that will help you record the user's name…
1. In the New Recording section, select Record.
2. In the Call me at box, type the number of a phone to send the call to.
4. Click the Call button. ![]()
5. Follow the call's instructions to record the greeting.
Mailbox Space
In the Data section of a user's voicemail settings, you can view how much space a user has in their mailbox.

By default, all created users have 10 MB of space in their mailboxes. The greeting and any faxes will take up a portion of this space.
You can click Clear data to completely clear out the mailbox.
To avoid deleting the mailbox's greeting, it is recommended to click Clear messages in the Inbox section instead.
Voicemail Notifications
In a user's voicemail settings, you can implement email notifications for voicemails left in their voicemailbox. There are two kinds of notifications you can implement: email voicemail notifications and persistent voicemail reminders.

Email Notifications for Voicemails
Email notifications can be set up to be sent out when this user's mailbox receives a voicemail.
Note: The email(s) that will receive these notifications is the email(s) set in the user's Profile settings.
To set up email notifications for this user's mailbox…
1. Select Receive an email for new voicemail to enable email notifications.
2. Use the Email Type dropdown to select what is sent in the email.
• Send with hyperlink - The email will have a hyperlink included that the user can click to listen to the email through the web portal.
• Send with attachment - The email will have an audio file attached so that the user can listen to the voicemail through the email itself.
3. Use the After Email Notification dropdown to select what should happen with the voicemail once the email notification is received.
• Leave as new - Have the voicemail left in the New folder of the voicemailbox when the email is sent.
• Move to saved - Move the voicemail to the Saved folder of the voicemailbox once the email is sent.
• Move to trash - Move the voicemail to the Trash folder of the voicemailbox once the email is sent.
Note: Voicemails moved to the Trash folder of a mailbox will stay there until the end of the day.
If a voicemail should not be deleted, the user can check the Trash folder of the voicemailbox for the message and manage that message as needed.

4. Make sure to click the Save button to save these changes. ![]()
Persistent Voicemail Reminders
Persistent voicemail reminders are notifications that are sent repeatedly according to a set interval until the mailbox's new message is listened to and moved.
✔ These kinds of notifications are useful for mailboxes used for essential, time-sensitive services, such as after hours, on-call, and emergency services.
Mailboxes that could benefit from this feature could include an emergency maintenance mailbox or a mailbox used by nursing staff.
To set up persistent voicemail reminders…
1. For the Voicemail Reminders option, select Email Notification.![]()
2. Type in the email address of the recipient for these reminders.![]()
3. Set how long the system should wait before sending subsequent notifications. 
4. Make sure to click the Save button to save these changes. ![]()
✔ The system will now send these reminders until the voicemail message in the voicemailbox is saved or deleted.
Answering Rules Settings
As a Stratus admin user, you have the ability to manage the answering rules of your users.
To view a user's answering rules…
- Navigate to the Users page.

- Use the search bar to find the user that needs their answering rules adjusted.

- Click the Edit
 icon next to the user and select Answering Rules.
On the Answering Rules tab for the user, you can view the different answering rules they have in place for routing their extension number's calls. Each user can have their own answering rules. These answering rules tell the system where calls should be routed for a user/location when a specific time frame is active.

Add an Answering Rule
Creating additional answering rules allows you to specify where calls should go for different scenarios and events (e.g., separate call routing for weekends).
To create an answering rule that routes your calls during a specific time frame…
1. Click the Add Rule button.
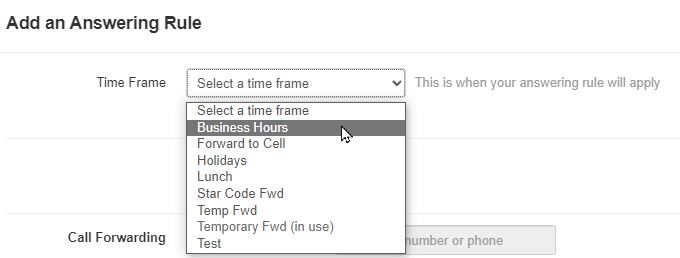
2. In the Add an Answering Rule menu, fill in the following options: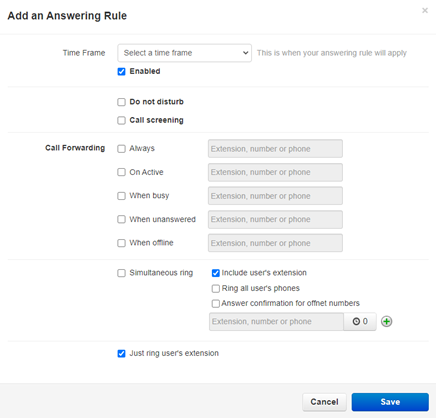
• Time Frame - Select an existing time frame. 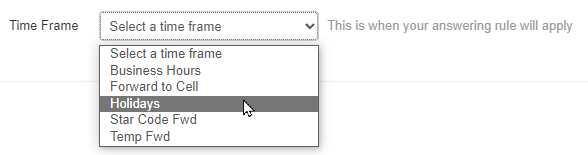
Quick Tip: A Time Frame is required in order for an answering rule to be created.
• Enabled - By default, this answering rule will be enabled. If this answering rule should not yet be active, uncheck the Enabled box to disable this rule.
• Do not disturb - Send all calls to your voicemail or busy forward when this answering rule is active.
• Call screening - Have callers say their name when they call to allow the call to be screened when answered.
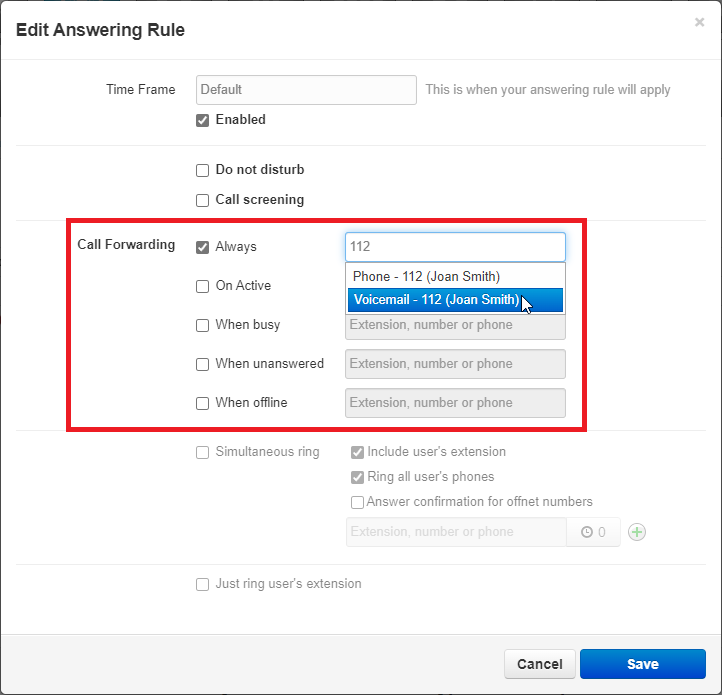
• Call Forwarding - Select when and where calls should be sent: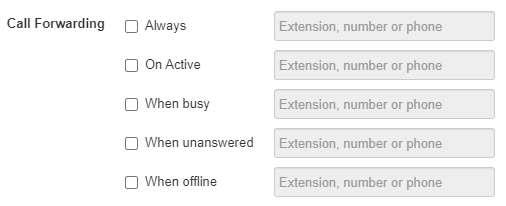
– Always - Immediately forward calls to the number specified in the text field. No other forward rules will be followed.
– On Active - Forward calls to the destination if the user's phone is already on a call.
– When busy - Forward calls to the destination if the reject button is pressed on an incoming call.
– When unanswered - Forward calls if the call is not answered after the specified ring timeout.
– When offline - Automatically forward calls to the number specified in the text field when no devices are registered. This means that no devices, physical or virtual, are registered to Stratus. (for example, during a power outage).
Destination Options for Forwarding
When the destination field is being filled with text, Stratus will show possible destinations based on the input.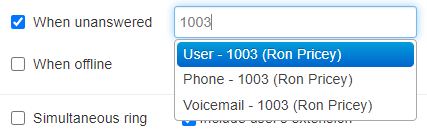
Possible destination types:
- User - Forward calls to the user at the specified extension and follow their answering rules.
- Phone - Bypass the answering rules and forward calls to the deviceassociated with the specified user.
ail - Forward calls to voicemail at the specified extension.
- Queue - Forward calls to a call queue associated with that extension.dant - Forward calls to the auto-attendant associated with this user.
- Off-Net Number - Forward calls to a 10-digit Phone Number, such as a cellphone or answering service.
• Simultaneous ring - Use this option if multiple phones you own should ring for this answering rule and fine-tune how these phones ring.
Simultaneous Ring Options
Use these following settings to fine tune how the answering rule will set the users devices to ring.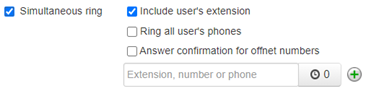
• Include user’s extension- Select this to ring the phone that uses your extension number.
• Ring all user’s phones - Ring all of your registered devices at the same time (i.e., mobile apps, softphones, and desk phones).
• Answer confirmation for Offnet Numbers - When conducting a simring to a cell/landline, this feature ensures that the answering party is a person instead of voicemail by requesting the answering agent to press 1 to accept the call.
• In the field for entering an extension, number, or phone, you can enter the extension or phone number of another telephone you want to ring.
• Click the Clock icon to specify a ring delay. A ring delay allows you to enter the amount of time before the call rings at the destination.
• To add additional phones to the simring, click the Add  icon.
icon.
• Just ring user's extension - Only ring the user's main phone that is registered to their main extension. .
.
3. Once the answering rule has been configured, click the Save button.
The Default Answering Rule
The Default answering rule is an answering rule that is created each time a user is created. By default, this rule is usually set to Simultaneously ring all of the user's registered devices.
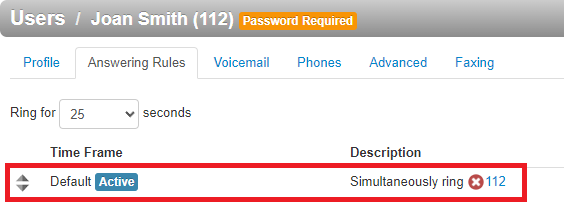
The Default answering rule acts as a “catch all” and stays active 24/7 unless there are answering rules above it that are active. Since this rule exists by default and is constantly active, it is usually used for routing After Hours calls, especially if there is a business hours answering rule that has been created.
Edit the Default Answering Rule
By clicking the Edit  icon next to the Default answering rule, you can adjust the destination for calls that are received while the Default answering rule is active.
This can be useful to do when you have added more answering rules for things such as your business hours or lunch.

The Active Answering Rule
You can have multiple answering rules, but only one rule can be active at a time. The active rule is the top-most rule with an active time frame. This can be seen with an Active tag next to the active answering rule.

Best practices dictate that you order answering rules according to how specific they are and their priority, with the highest priority time frames (for example, Temporary Forwards and Holidays) at the top. The default time frame can be used as a ‘catch all’ or ‘after hours’ timeframe if other timeframes are applied.
For example…
Assume today is Monday, July 4th. In this example, the Holidays and Open time frames could match the time and date conditions for July 4th. If Holidays is the first rule, however, it becomes the active rule. But if My Business Hours is the first rule, My Business Hours becomes the active rule.
Reprioritize Answering Rules
To adjust the order, or priority, of your answering rules…
1. In the Answering Rules page, find the rule you want to adjust the priority for.
2. On the left side of an answering rule, hover the mouse over the up/down arrows for that rule.
3. Click and drag the answering rule to where it should be in the list.
✔ A message should appear letting you know that the answering rules have been reprioritized before promptingThe Active Answering Rule

4. Click the Save button.
Edit an Answering Rule
Over time, the call routing needs for a user may change. As a Stratus admin, you can edit an answering rule to match a user's needed.
To edit an existing answering rule…
1. Click the Edit  icon next to the answering rule that needs to be adjusted.
2. In the Edit Answering Rule modal, update the answering rule's information as needed.
3. Once you are done, click the Save button.
Delete an Answering Rule
If needed, you can delete any unneeded answering rules for your users.
To delete an obsolete answering rule, simply click the Delete  icon next to the answering rule.

Allow and Block a User's Calls
The Allow / Block button allows you and your users to control whether or not they receive calls from certain phone numbers. This tool can also be used to control how potential spam calls are treated within your phone system.

Block Callers
If you are having issues with malicious, spam, and/or robo callers and you know their phone numbers, you can block those phone numbers from calling back in.
To do so…
1. In the BLOCKED NUMBERS section, type in the phone number and click the Add button. 
✓ Clicking Add will make that number appear in the BLOCKED NUMBERS list:

2. If needed, click Remove to delete that phone number from the list.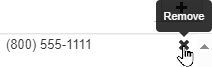
3. Add more phone numbers to the list if needed.
4. Select Block anonymous or unknown to block all unknown callers if necessary.![]()
5. Click the Done button to save the changes made to the block list. ![]()
Allow Callers
If you have previously blocked a phone number from calling and need to re-allow that number to call in, you can allow the phone number to be routed again.
To do so…
1. In the ALLOWED NUMBERS section, type in the phone number and click the Add button.
✓ Clicking Add will make that number appear in the BLOCKED NUMBERS list:

2. If needed, click Remove to delete that phone number from the list.
3. Add more phone numbers to the list as needed.
4. Click the Done button to save the changes made. ![]()
Mitigate Spam Calls
The SPAM CALLS section of the Allow / Block modal determines the treatment for STIR/SHAKEN calls that are identified as SPAM.

In the SPAM CALLS section, you can use the drop-down to select how calls marked as SPAM are treated.
These options include:
• Ring as normal - Have the call follow your inbound call routing like normal calls.
• Send to Voicemail - Forward the call to your voicemail.
• Drop Call - Allow the system to automatically drop the calls of any calls marked as SPAM.
• Screen Call - Prompts the caller to record their name.
How Can I Add More Users?
The option to add new users in the web portal is only available to our team. Only our team can add users or seats since the services that are provided to users for them to use their desktop phones, mobile apps, or desktop apps incur a cost. As with other billable changes, our team can determine how adding a user will affect your bill while also helping to implement this change for your team.
Submit a Request to Add More Users
In order for our team to add and configure any new users to meet your business' needs, our team will need to know more about the user, their needs, and their purpose.
Information Needed to Add a User
To make sure your new user(s) are created and configured to fit your needs, our team will need to know…
• The purpose for this user. Will this extension be for a user, an inbound routing user, or a voicemailbox?
• The first and last name to use for the new user.
• The er this user will need.
• An email address for a Welcome Email and any password resets to be sent to.
• If the user(s) will need specific permissions in the web portal.
• If the user(s) will need a phone registered to its extension.
Quick Tip: If you need to order new desk phones and equipment for your new users, visit our online store to view your options.
• If the user(s) will need DID (Direct Inward Dialing) numbers.
Note: Learn more about our process for ordering DID phone numbers by reading this article.
• The Department and/or Site of the new user.
• If the new user will need any special time routing or call forwarding, such as…
– They have active/business hours that differ from the main business.
– They answer calls on different devices depending on the day of the week.
– They will need to be able to forward calls to another device or user.
– They have a specific way calls should be handled if they are called during their after hours.
• Where the user will be in your business' routing. Will this user be present in…
– An Auto Attendant? If so, which auto attendant and for which option?
– A Call Queue? If so, which call queue and in what order?
– A special rule for call routing?
Once you have decided how you would like your users to be added, next you will need to communicate with our support team to get this change implemented.
Contact Your Project Manager
If you are a new customer that is still working with a dedicated Project Manager, you can email or call your Project Manager to inform them that you intend to add more user(s) to your account.
✔ In that email or call, tell your Project Manager your preferences for any new users so that they can ensure your users are added and configured to meet your needs.
If these new users will be needing any equipment, such as a desk phone or headset, please let your Project Manager know.
Call Our Technical Support Team
As a current customer, you can dial 4-3-5-7 (HELP) on a SpectrumVoIP phone/app or call (469) 429-2500 to work with a Technical Support specialist live on a call.
✔ Calling into Technical Support is recommended since you can actively communicate with the specialist as they add in and set up your new users.
If the new users will need new phones registered, then you will need to be on an active call with a technical support analyst so that they can register any new phones to these new users.
Create a Support Ticket
If you a current customer, you can easily submit a ticket to our Technical Support team to have a user created without having to call.
A support ticket can be created by…
• Clicking Contact Us on this support site and filling out the Submit a Support Ticket form.
• Emailing support@spectrumvoip.com.
✔ When you fill out the online form or email, it is recommended to include your preferences for the new users.
NOTE: If these new users will need desk phones registered to their extensions, then it is recommended to call into technical support so that a team member can register the phone remotely.
NOTE: If this new user will need a phone registered to its extension, it is recommended to call our technical support team since a remote desktop session may be necessary.
Note: Adding users is a billable change that will affect your monthly bill.
Empty extensions, such as inbound routing users, general voicemailboxes, etc., do not incur an extra charge to be added.
To add new users to your SpectrumVoIP Account, please contact our team.
IMPORTANT: Since adding a user will affect your bill, only SpectrumVoIP team members can add a new user for you.
To check how adding a user will affect your bill, reach out to our Billing (Option 2) or Technical Support (Option 4) teams by calling (469) 429-2500.
Quick Tip: As an alternative to creating a new Stratus user, you can recycle old users that you are not using anymore to avoid changing your bill.
Recycle an Obsolete Stratus User
If you have an old user that is not being used anymore, you can easily recycle the user to reuse that extension for a new user. This can help you avoid having to add a seat to your bill.
To recycle an old user to save some money…
- Navigate to the Users page and select the user needing a recycle.

- Visit the Advanced tab in the user's settings and click the Reset User button.

- In the Reset User modal, use the checkboxes to select what kind of information should be deleted or changed.

- Make sure to select Recycle User to input the new user's information.

- Click the Reset button.

- Click Reset again on the confirmation message that appears.

- In the Recycle User modal, use the boxes to type in the new user's information.

- To have the new user set up their voicemail PIN and the password for their web portal, use the Email box to type in the user's email and select Send Welcome Email.

- Click the Save button.

✔ You should see a confirmation message that states that the user has been successfully recycled.

If you selected Send Welcome Email, the new user will receive a Welcome Email to use to complete their Stratus account's setup.

Now you can configure the new user's profile, voicemail, and answering rules settings.
Delete a User
WARNING: It is recommended to contact our support team for help deleting users.
Deleting users impacts your monthly bill, so having our SpectrumVoIP support team handle this request can help ensure that you are saving money.
If you are needing to replace an old user with a new user, it is recommended to recycle users instead of deleting users and trying to have them re-added. Adding users can only be completed by SpectrumVoIP's team.
Quick Tip: If needed, our support team can remove the Delete button from the portal for admin users (e.g., Office Managers, Site Managers, Call Center Supervisors).
Doing this can help make sure that certain users don't have the ability to delete users.
To have this button removed for any users, contact our support team.
As a Stratus admin user, you have the ability to delete users using the Stratus web portal.
NOTE: When a user is deleted, their account's information, extension number, and voicemailbox will be deleted. Their SpectrumVoIP phones and apps will de-register themselves.
To delete an obsolete user…
- On the Users page, select the user(s) that need to be removed.

- Click the Delete button that appears.

- In the Bulk User Delete menu, read the warning and then click the Confirm button if this user(s) should be deleted completely.

✔ Once the user(s) is deleted, you should see this success message:

Now that this user is removed, their information, extension number, and voicemailbox are deleted. Their phone and apps will lose their registration.
If you did not mean to delete a user, please contact our support team.
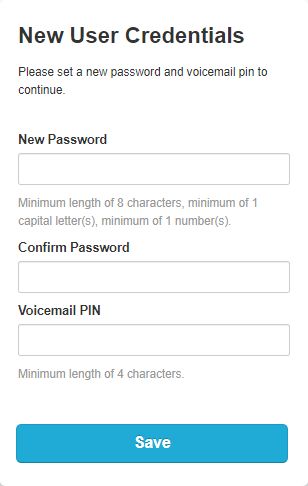
Send a Welcome Email to a New User
When there is a new user added, their account will usually start out without a password or voicemail PIN set. As a Stratus admin, you have the ability to send the new user a Welcome Email that allows the new user to finish setting up their account by creating a password and voicemail PIN.
For a Single User
To send a Welcome Email to a new Stratus user…
1. Navigate to the Users page.![]()
2. Click the name of the user that needs to receive a Welcome Email.![]()
3. In the Change Account Security section, ensure that the user has an email address set in their Stratus account.
4. Visit the Advanced tab of the user's settings.
5. In the User Setup section, double-check that the correct email address is showing for this user so that they receive the password reset email. 
6. In the User Setup section of the Advanced tab, click the Send Welcome Email button.
✔ Once the welcome email has been sent, you should see this success message:
The user should receive a Welcome Email that shows their extension number and Stratus login name.
When they click the Complete Setup button, they will be able set their Stratus password and their Voicemail PIN.
For Multiple Users
If needed, you can send out welcome emails to multiple users at once. This can be done using the Bulk Action tool.
To do this…
1. Navigate to the Users page.
2. Select the users that need their passwords reset.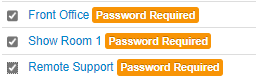
3. Click the Bulk Action button that appears.
4. In the Bulk User Actions menu, select Send Welcome Email.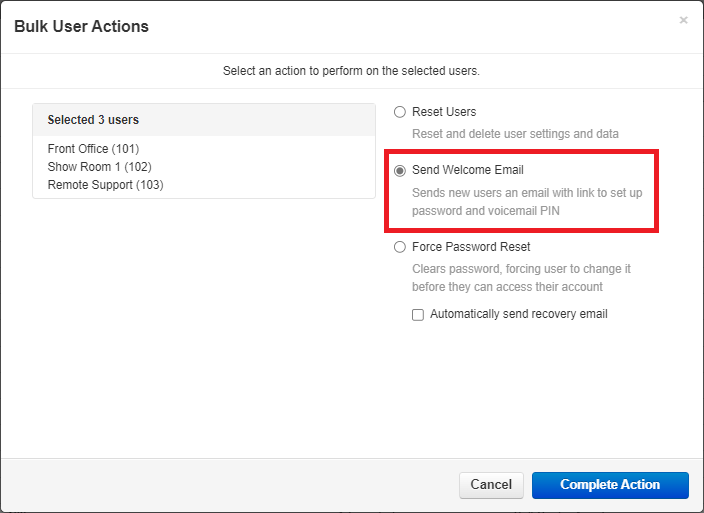
5. Click the Complete Action button.
Once the users' passwords are reset, you will see a success message that notes how many welcome emails were sent out:
If this does not match how many people should have been emailed, make sure that the users that did not receive an email have an email address set in their Stratus account's Profile settings.
Reset a User's Password
At some point, a user may need to have their password reset so that they can access the Stratus web portal. As a Stratus admin, you have the power to reset a user's password with ease.
For a Single User
To clear out a user's password and have a recovery email sent out…
1. Navigate to the Users page.![]()
2. Click the name of the user that needs their password reset.
3. In the Change Account Security section, ensure that the user has an email address set in their Stratus account.
4. Visit the Advanced tab of the user's settings.
5. In the User Setup section, double-check that the correct email address is showing for this user so that they receive the password reset email.
6. In the Account Security section of the Advanced tab, select Automatically send recovery email after password reset.
7. Click the Force Password Reset button.
✔ Once the user's password has been cleared, you should see this success message:
The user should receive an email that prompts them to reset their password.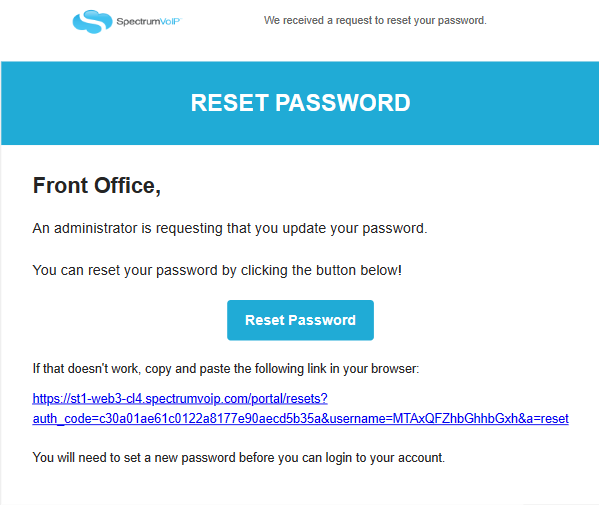
For Multiple Users
If needed, you can reset passwords for multiple users at once. This can be done using the Bulk Action tool.
To do this…
1. Navigate to the Users page.
2. Select the users that need their passwords reset.
3. Click the Bulk Action button that appears.
4. In the Bulk User Actions menu, select Force Password Reset.
Note: Make sure that Automatically send recovery email is also selected so that these users will receive a password reset email.

5. Click the Complete Action button.
Once the users' passwords are reset, you will see a success message that notes how many password reset emails were sent out:
If this does not match how many people had their passwords reset, make sure that the users that did not receive an email have an email address set in their Stratus account's Profile settings.
Shared Contacts

Access Shared Contacts
- Navigate to the Users/Agents page of your Stratus web portal.

- Click the Shared Contacts button.

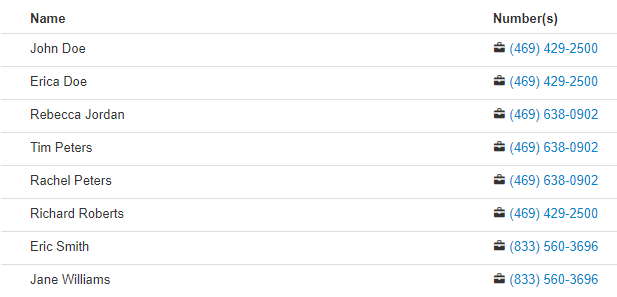
✓ Doing so will pull up the Shared Contacts page.

While viewing these shared contacts, you can edit or remove them using the Edit and Delete icons.
NOTE: Shared Contacts can only be edited or deleted by Office Managers, Site Managers, and Call Center Supervisors (unless your account has been edited to allow other user scopes to as well).
Add a Shared Contact
On the Shared Contacts page, you can add more contacts for all users to reference and use to contact important people and organizations.
- In the Shared Contacts page, click the Add Shared Contact button.

- In the Add Shared Contact menu, fill in the following information:

- First Name, Last Name - Type the name of the person or company featured in the contact.
- Work number, Mobile number, Home number - Type in the contact numbers of the person/organization.
- Fax number - If the contact has a fax number, you can include to make it easier to reference.
- Email - Type the contacts email address if needed.
- Click the Save button.

✓ Additional shared contacts can be added quickly by using the Save and add another option.

Import Multiple Shared Contacts
When needing to add in multiple contacts, it may not be practical to use the Add Shared Contact menu. As an alternative, you can fill in a spreadsheet and then import that spreadsheet to add in multiple contacts at once.
Export and Import Contacts
Step 1: Create Your Own Template
To make sure your contacts are imported correctly, it is best practice to export a spreadsheet to use as a template. To do so…
Click the Export button.![]()
In the Export Contacts menu, do the following:
Contacts to export - Select All. If there are other groups of contacts to select from, you can select a specific group of contacts to export.
Export format - If necessary, select a specific format for the spreadsheet.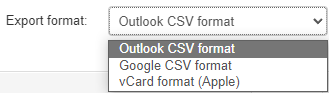
Click the Export button. ![]()
✓ Doing this will download a formatted spreadsheet that you can use to fill in the information for more people to add as contacts.

Open the downloaded spreadsheet.
Quick Tip: You can expand the columns in the spreadsheet to more clearly see what is put in.
Use the columns of the spreadsheet to fill in the information for the contacts.
Click the Save icon  once you are done.
Step 2: Import Your Updated Spreadsheet
Once you have filled in the information for your contacts using the spreadsheet. To do this…
Click the Import button. ![]()
In the Import Contacts menu, click the Browse button to select the spreadsheet from your PC.
Click the Import button. ![]()
✓ After the system finishes importing, you should see a confirmation message
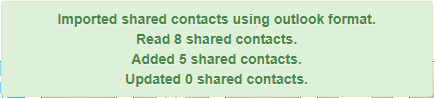
and your Shared Contacts page should show the new contacts.
Call Routing and Forwarding
Many businesses and organizations have special scenarios where they need calls routed to destinations that differ from their normal routing. These special routing scenarios could be lunches, meetings, holidays, inclement weather closings, and more.
Call forwarding can be set up by doing the following:
- Schedule routing/forwarding by creating a Time Frame.
- Set where calls should be routed during a time frame by adding Answering Rules.
Time Frames - Schedule Routing
To tell the system these dates and times that calls would be routed differently, time frames are created on the Time Frames page of the Stratus web portal. There are two types of time frames that can be created: Domain and Owned time frames.
Domain Time Frames
Domain time frames are time frames that can be used by any user to create answering rules for call routing.

When a Domain time frame is created, it becomes selectable for all users when they are creating their answering rules for their own routing. These time frames can also be used by an Office Manager to create an answering rule that routes calls for the whole business.
Scope: Only Office Managers can create and edit shared time frames.
To create a shared, Domain time frame for any user to use…
- Navigate to the Time Frames page.

- Click Domain or click the Edit
 icon to pull up a list of the time frames for your whole business.
Quick Tip: Alternatively, you can click the Add
 icon to quickly navigate to the Add a Domain Time Frame menu.
 - Click the Add Time Frame button.

- In the Add a Domain Time Frame menu, fill in the following information:

-
Name - Type in a unique name for this time frame.

-
When - Select the type of time frame to be created.

Use the Module below to explore the selectable options for When:Always
If the time frame should be active until it is disabled, select Always.
✔ This option is commonly used for call forwarding that will be enabled for an undetermined length of time, such a forwarding for emergencies or an outage.
Days of the Week
Select Days and Times
Select Days of the Week if the time frame will be active on a recurring basis (same time and day every week).

✔ This option is commonly used for scheduling Business Hours and Lunch.
To add a break in the time that the time frame is active on a certain day, click the Add range
 icon.
icon.
Click Copy to All to have this time range added to the other selected days.

Set a Custom Recurrence
By default, a Days of the Week time frame will be set to recur every week.

For some schedules, it may be important that this time frame have a break before it occurs again.
✔ This can be essential for companies that have teams that trade off schedules. This is commonly seen with on-call and after hours teams.
To set this time frame to recur at a different frequency…

Specific Dates
Select Specific Dates to schedule routing during special date(s) and times that may or may not recur, such as Meetings, Conferences, etc.
In the Specific dates section, select the date(s) and times the time frame will be active for and click the Add button.


If the date(s) will be recurring, use the Recurrence dropdown to select when this time frame should automatically be active in the future.

Quick Tip: If you have set this time frame to recur, you can use the Ends option to set a date that this time frame will stop following the Recurrence option.

Holidays
With the Holidays option, you can select commonly celebrated holidays from different regions that you would like to forward or reject calls for.

Use the search bar to find and select a holiday.
Use the dropdown filters to look for holidays observed in specific regions.

Select the range of time that this time frame will be active for, such as your business hours.

To remove a holiday, click the Delete
 icon.
icon.
If needed, use the Recurrence dropdown to select whether or not these holidays will be observed yearly.

Quick Tip: If you set these holidays to recur, you can use the Ends option to set a date that this time frame should stop following the Recurrence option.

Custom
Create custom time routing that combines days of the week, specific dates, and holidays all together to suit any time frame need.
✔ Custom time frames can be useful for events like Holidays or schedules for users that are not scheduled on a very regular basis.
For the holidays, a custom time frame may be used if a company has multi-day long breaks for holidays or early close days for some holidays or days before holidays.

-
Name - Type in a unique name for this time frame.
- Click the Save button.

- To add more time frames, repeat steps 3-5.
✔ You should now have a list of time frames that can be used to create answering rules by you or other users.

Basic users will be able to view and use these time frames for answering rules, but they cannot edit these time frames.

Now the Domain time frames can be selected when you and other users are creating answering rules.
Note: To learn how you can use these time frames to create Answering Rules to route calls, check out this article.
Bulk Toggle Shared Time Frames
On the Time Frames page, you can use the Bulk Toggle feature to enable/disable time frames. These time frames are used by answering rules to tell the system when calls should be routed according to what is set in the answering rule. Once a time frame has been used in an answering rule for a user, the Bulk Toggle feature can be utilized.
To enable/disable the answering rules of multiple users…
- Click the Bulk Toggle
 icon next to the time frame that needs to be disabled/enabled for multiple users.
- In the Bulk Toggle Timeframe menu, select the users that need this time frame disabled/enabled.

- Click either the Enable or Disable button.

✔ Once one of these buttons has been clicked, you should see a confirmation message that the Answering Rules for these users were updated.

Now any call routing or forwarding set up through the answering rules using those time frames will be enabled/disabled, depending on the button that was clicked.
Owned Time Frames
Owned time frames are time frames that are created for a specific user. A user that owns a time frame can edit that time frame and create an answering rule for themself.
Scope: As an Office Manager you can create owned time frames for any user.
Site Managers can add owned time frames for their site's users.
Basic users can create and edit time frames that only they own using their basic version of the web portal.
To add in owned time frames for a specific user…
- Navigate to the Time Frames page.
- Use the search bar to find and select the user that should own the time frame.

- Click the Add Time Frame button.

- In the Add a Time Frame menu, fill in the following information:

-
Name - Type in a unique name for this time frame.

-
When - Select the type of time frame to be created.

Use the Module below to review the selectable options for When:Always
If the time frame should be active until it is disabled, select Always.
✔ This option is commonly used for call forwarding that will be enabled for an undetermined length of time, such a forwarding for work leave, emergencies, or an outage.
Days of the Week
Select Days and Times
Select Days of the Week if the time frame will be active on a recurring basis (same time and day every week).
✔ This option is commonly used for scheduling Business Hours and Lunch.
To add a break in the time that the time frame is active on a certain day, click the Add range
icon.Click Copy to All to have this time range added to the other selected days.
Set a Custom Recurrence
By default, a Days of the Week time frame will be set to recur every week.
For some schedules, it may be important that this time frame have a break before it occurs again.
✔ This can be essential for companies that have teams that trade off schedules. This is commonly seen with on-call and after hours teams.
To set this time frame to recur at a different frequency…
Specific Dates
Select Specific Dates to schedule routing during special date(s) and times that may or may not recur, such as Meetings, Conferences, etc.
In the Specific dates section, select the date(s) and times the time frame will be active for and click the Add button.
If the date(s) will be recurring, use the Recurrence dropdown to select when this time frame should automatically be active in the future.
Quick Tip: If you have set this time frame to recur, you can use the Ends option to set a date that this time frame will stop following the Recurrence option.
Holidays
With the Holidays option, you can select commonly celebrated holidays from different regions that you would like to forward or reject calls for.
Use the search bar to find and select a holiday.Use the dropdown filters to look for holidays observed in specific regions.
Select the range of time that this time frame will be active for, such as your business hours.
To remove a holiday, click the Delete
icon.If needed, use the Recurrence dropdown to select whether or not these holidays will be observed yearly.
Quick Tip: If you set these holidays to recur, you can use the Ends option to set a date that this time frame should stop following the Recurrence option.
Custom
Create custom time routing that combines days of the week, specific dates, and holidays all together to suit any time frame need.

-
Name - Type in a unique name for this time frame.
- Click the Save button.

- To add more time frames, repeat steps 3-5.
✔ You should now have a list of owned and Domain time frames.

You or that user can now select that owned time frame while creating an answering rule.

Note: To learn how you can use these time frames to create Answering Rules to route calls, check out this article.
Answering Rules - Route and Forward Calls
Once Time Frames have been created, call routing and forwarding can be set up using Answering Rules. Each user and your different locations can have their own answering rules. These answering rules tell the system where calls should be routed for a user/location when a specific time frame is active.
Users with Office Manager access are able to adjust other user’s answering rules on their account. To view and manage a specific user's Answering Rules…
- Navigate to the Users page.
- Use the search bar to find the user that needs their answering rules adjusted.
- Click the Edit icon next to the user and select Answering Rules.
On the Answering Rules page, you can…
- Create and edit answering rules.
- Adjust how long calls will ring.
- Allow/block phone numbers from contacting them.
Basic Users can configure their own answering rules on the Answering Rules page of their version of the Stratus web portal.

Quick Tip: When no answering rules are in effect, calls will ring the user’s extension by default. This means that answering rules do not technically need to be set up for each user individually in order for their phone(s) to ring.
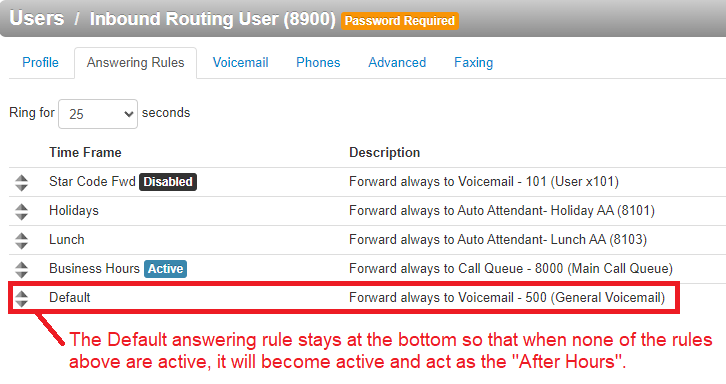
The Inbound Routing User - Your Business' Routing
In your Account, you may notice a special type of user named “Inbound Routing User”. A Routing User is an empty extension that acts as a virtual switchboard operator. An Inbound Routing User will send phone calls to certain destinations depending on the time of day.

Usually, the inbound routing user can be found on the Users page as “Inbound Routing User” with the extension number of 8900.
Organizations will commonly have a routing user that routes calls differently for their business hours, after hours, and holidays. Some may have separate routing users for their different sites/locations.

The Default Answering Rule
The Default answering rule is an answering rule that is created each time a user is created. By default, this rule is usually set to Simultaneously ring all of the user's registered devices.
The Default answering rule acts as a “catch all” and stays active 24/7 unless there are answering rules above it that are active. Since this rule exists by default and is constantly active, it is usually used by routing user to route After Hours calls, especially if there is a business hours answering rule that has been created.

By clicking the Edit icon next to the Default answering rule, you can adjust the destination for calls that are received while the Default answering rule is active.
This can be useful to do when you have added more answering rules for things such as your business hours or lunch. 
Add an Answering Rule
Creating additional answering rules allows you to specify where calls should go for different scenarios and events (e.g., separate call routing for weekends).
To create an answering rule that routes your calls during a specific time frame…
- Click the Add Rule button.

- In the Add an Answering Rule menu, input the following:

-
Time Frame - Select an existing time frame.

Note: A Time Frame is required in order for an answering rule to be created.
-
Enabled - If this answering rule should not yet be active, uncheck the Enabled box to disable this rule.
-
Do not disturb - If necessary, select Do not disturb to send all calls to your voicemail when this answering rule is active.
-
Call screening - If needed, select Call screening to have callers say their name when they call to allow the call to be screened when answered.
-
Call Forwarding - If calls should be forwarded elsewhere by this answering rule, use the Call Forwarding section to select when and where calls should be sent:

Call Forwarding Options
Use the table below to learn more about the different checkboxes available in the Call Forwarding section:
Option Description Always Forward calls to the number specified in the text field. No other forward rules will be followed On Active forward calls to the destination if the user's phone is already on a call. When busy Forward calls to the destination if the reject button is pressed on an incoming call. When unanswered Forward calls to the number specified in the text field if the call is not answered after the specified ring timeout. When offline Automatically forward calls to the number specified in the text field when no devices are registered. This can be helpful if all of a user's devices are offline due to an internet or power outage. Destination Options for Forwarding
When the destination field is being filled with text, Stratus will show possible destinations based on the input.

Possible destination types:
• User - Forward calls to the user at the specified extension and follow their answering rules.
• Phone - Bypass the user's answering rules and forward calls to the device associated with the specified user.
• Voicemail - Forward calls to voicemail at the specified extension.
• Call Queue - Forward calls to a call queue associated with that extension.
dant - Forward calls to the auto-attendant associated with this user.
• Off-Net Number - Forward calls to a 10-digit Phone Number, such as a cellphone or answering service. -
Simultaneous ring - If multiple phones you own should ring for this answering rule, use the Simultaneous ring checkbox and its other options to fine-tune how these phones ring:

Simultaneous Ring Options
Use the table below to learn more about how you can fine-tune the simultaneous ring feature to fit your needs:
Option Description Include user’s extension Ring the phone that uses the user's main extension number. Ring all user’s phones Ring all of the user's phones (i.e., mobile apps, softphones, and desk phones) at the same time. Answer confirmation for offnet numbers Request that the person answering press 1 to accept the call to ensure that the answering party is a person instead of voicemail. Extension, number or phone Type the extension number or phone number of another device to ring. Ring Delay (sec)  icon
iconSet a how long (in seconds) the system should wait before calling the device set in the Extension, number or phone box. Add  icon
iconClick to add additional phones to the simring. - Just Ring - To only ring the user's main phone, select Just ring user’s extension.
-
Time Frame - Select an existing time frame.
- Once the answering rule has been configured, click the Save button.

The Active Answering Rule
You can have multiple answering rules, but only one rule can be active at a time. The active rule is the top-most rule with an active time frame. This can be seen with an Active tag next to the active answering rule.

Best practices dictate that you order answering rules according to how specific they are and their priority, with the highest priority time frames (for example, Temporary Forwards and Holidays) at the top. The default time frame can be used as a ‘catch all’ or ‘after hours’ timeframe if other timeframes are applied.
For example… A company has “Holidays” and “Business Hours” answering rules. For the 4th of July, the company's “Holidays” and “Business Hours” time frames could match the time and date conditions for July 4th.
If the “Holidays” answering rule is above the “Business Hours” rule, it will become the active rule.
If the “Business Hours” rule is above the “Holidays” rule, the Business Hours rule would become the active rule since it has priority.
Reprioritize Answering Rules
To adjust the order, or priority, of your answering rules…
1. In the Answering Rules page, find the rule you want to adjust the priority for.
2. On the left side of an answering rule, hover the mouse over the up/down arrows for that rule.
3. Click and drag the answering rule to where it should be in the list.
✔ A message should appear letting you know that the answering rules have been reprioritized before prompting you to click Save like so:

4. Click the Save button. ![]()
Ring Time Adjustment
The Ring Time can be adjusted using the drop-down menu. This is the amount of time that a user's phone(s) will ring for on an incoming call.

NOTE: The Ring Time does not affect the ring time of calls that reach you through a call queue.
This can be adjusted in the Call Queue's settings by a Call Center Supervisor, Site Manager, or Office Manager.
Ring Time Options
• 5 second intervals from 5 to 90 seconds
• 30 second intervals from 90 to 300 seconds
• 1200 seconds
• Unlimited
Block Phone Numbers
As a Stratus admin user, you can block and allow calls from different phone numbers for your individual users and the whole business.
Blocking phone numbers can be done in two places:
-
The Call History page using the Block
 icon and the Blocked Numbers menu.
 - The Allow / Block menu that you can access while viewing a user's Answering Rules.
Block Numbers in the Call History Page
With the Stratus v42 update, you can use the Block ![]() icon and the Blocked Numbers menu on the Call History page to block phone numbers from calling your business and your users. Use the module below to explore the different ways you can block numbers from the Call History page.
icon and the Blocked Numbers menu on the Call History page to block phone numbers from calling your business and your users. Use the module below to explore the different ways you can block numbers from the Call History page.
Block a Recent Caller
If a user has recently spoken to someone that you need to block, you can block their phone number using the Block ![]() icon found on their call log.
icon found on their call log.
1. Filter and scroll to find the call of the person that needs to be blocked and click the Block ![]() icon.
icon.
2. On the confirmation message, click the Yes button.
✔ Users will now see a Blocked number icon next to the phone number in their own Call History page.
For any future calls users receive from the blocked number, the call will automatically be rejected, and a Blocked tag will appear in the Duration column for that call.![]()
Block Multiple Numbers
With the Stratus v42 update, there is now a new Blocked Numbers tool that can be used to block malicious phone numbers.
1. Click the Blocked Numbers button. ![]()
2. In the Blocked Numbers menu, type the phone number that needs to be blocked. 
3. Click the Add button to add this phone number to your Blocked Numbers list. ![]()

✔ You should see a confirmation message that the phone number was added to the list.![]()
You should also see the phone number listed alongside any other blocked numbers. 
4. Repeat steps 2 and 3 for additional phone numbers that need to be blocked.
✔ Now if any users receive calls from the phone numbers you have blocked, the calls will automatically be rejected, and a Blocked tag will appear in the Duration column for those calls.
![]()
Import a Spreadsheet
If you have a list of phone numbers that should be blocked, you can download and fill in a spreadsheet of those numbers. This spreadsheet can be imported so that the list of phone numbers gets added all at once.
1. Click the Blocked Numbers button. ![]()
2. In the Blocked Numbers menu, click the Import button. ![]()
3. In the Import From File menu, click the Download Template button. 
✔ You should see a .CSV spreadsheet download through your browser.

4. Open the downloaded template spreadsheet.
5. Type a phone number into the cells of column A.
6. When you have typed in your phone numbers, save the spreadsheet by pressing CTRL + S or clicking the Save icon.
7. Back in the Import From File menu, click the Browse button and select the updated template.
8. Click the Upload button. ![]()

✔ You should see a confirmation message that tells you how many blocked phone numbers were imported. It will also state if any of the phone numbers were duplicates.![]()
You should also see the phone numbers from the spreadsheet listed in the Blocked Numbers menu.
Now if any of your users receive any calls from the phone numbers you have blocked, the calls will automatically be rejected, and a Blocked tag will appear in the Duration column for those calls![]()
Unblock a Phone Number
If you have added a phone number to your Call History's Blocked Number list, you can remove it at any time. Removing a phone number from the Blocked Number list will unblock that caller so that you and your users can start receiving calls from that phone number again.
To unblock a blocked number…
- On the Call History page, click the Blocked Numbers button.

- In the Blocked Numbers menu, click the Delete icon next to the phone number that needs to be unblocked.

Quick Tip: Alternatively, you can click the Unblock
 icon next to the log of a recently received call from a blocked phone number.
✔ You should see a confirmation message that the phone number has been removed from the Blocked Numbers list.

- Repeat step 2 for each phone number that needs to be unblocked.
The Allow / Block Tool of Answering Rules
In the Answering Rules of your Inbound Routing Users and regular users, you can click the Allow / Block button to control whether or not the user receives calls from certain phone numbers. This tool can also be used to control how potential spam calls are treated within your phone system.
Block Callers
If you are having issues with malicious, spam, and/or robo callers and you know their phone numbers, you can block those phone numbers from calling back in.
To do so…
1. In the BLOCKED NUMBERS section, type in the phone number and click the Add button.
✓ Clicking Add will make that number appear in the BLOCKED NUMBERS list:
2. If needed, click Remove to delete that phone number from the list.
3. Add more phone numbers to the list if needed.
4. Select Block anonymous or unknown to block all unknown callers if necessary.![]()
5. Click the Done button to save the changes made to the block list. ![]()
Allow Callers
If you have previously blocked a phone number from calling and need to re-allow that number to call in, you can allow the phone number to be routed again.
To do so…
1. In the ALLOWED NUMBERS section, type in the phone number and click the Add button.
✓ Clicking Add will make that number appear in the BLOCKED NUMBERS list:
2. If needed, click Remove to delete that phone number from the list.
3. Add more phone numbers to the list as needed.
4. Click the Done button to save the changes made. ![]()
Mitigate Spam Calls
The SPAM CALLS section of the Allow / Block modal determines the treatment for STIR/SHAKEN calls that are identified as SPAM.
In the SPAM CALLS section, you can use the drop-down to select how calls marked as SPAM are treated.
These options include:
• Ring as normal - Have the call follow your inbound call routing like normal calls.
• Send to Voicemail - Forward the call to your voicemail.
• Drop Call - Allow the system to automatically drop the calls of any calls marked as SPAM.
• Screen Call - Prompts the caller to record their name.
Auto Attendants
Instead of relying on an operator to answer and route callers, an Auto Attendant can be implemented to allow callers to listen to a prompt and select where their call should be routed using the dial pad menu of their phones. Using an auto attendant is also useful for giving callers a message during times outside of the set hours of operation.

As a site manager or office manager, you can create an auto attendant to help automate your calls. To do so…
- Navigate to the Auto Attendants page.

- Click the Add Attendant button.

- In the Add an Auto Attendant modal, fill in the following information:

- Name - Type in a descriptive name for the auto attendant.
-
Extension - Type in an extension number that is not in use.
Quick Tip: Extension numbers in the 8100s are recommended for auto attendants. It is also good practice to keep your Auto Attendants in sequential order by organizing them in number ranges.
For example, if you have an Auto Attendant already created that is extension 8100, then the next New Auto Attendant would be created as 8101, then 8102, and so on.
- Time Frame - Select default (all the time).
- Click the Add button.

✔ Clicking Add will pop up a new screen for configuring the new auto attendant's prompt and dial pad menu options.

Add a Greeting/Prompt
Depending on how you would like callers to interact with the auto attendant, you can pick between using an intro greeting, menu prompt, or a combination of both.
Intro Greeting
The Intro Greeting will play the selected audio without any interruptions from callers pressing keys on the dial pad menu.
This greeting plays only once before the Menu prompt is played.
WARNING: Using an Intro Greeting by itself is not recommended since it is not read when a user has the menu repeat the greeting.
Menu Prompt
The Menu Prompt functions similarly to the Intro Greeting with the exception that the Menu Prompt can be interrupted when the caller presses a key on their dial pad.
• If there is an Intro Greeting in use, the Menu Prompt will play after the Intro greeting.
• If the auto attendant repeats its greeting, the Menu Prompt will be played without the Intro Greeting.
NOTE: Since the Intro Greeting are not repeated, it is recommended to If cause a Menu Prompt if only one message should be played.
Quick Tip: If callers should hear an un-skippable message followed by a second message that they can skip, an Intro Greeting with an added Menu Prompt is a good idea.
In this case, the intro greeting is usually treated like a notice/warning that plays before the menu prompt. The Menu Prompt usually lists out the options available to the caller.
If callers should only hear one, skippable message, using only a Menu Prompt is recommended.
To get to the menu to manage the audio for the greetings, click on the  or
or  button (depending on which greeting you would like to use).
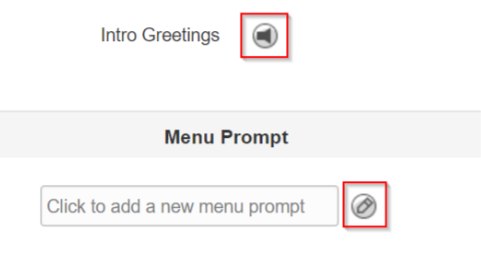
Doing so will pull up a menu for adding in audio. Depending on which greeting you select, the menu you see will look different.
Add a Menu Prompt
The Menu Prompt's edit button will pull up a Manage Audio menu for only adding in an audio file. 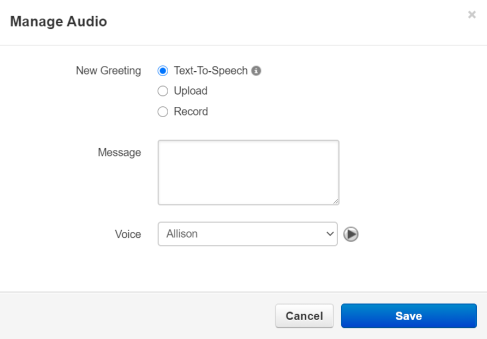
Add an Intro Greeting
The Intro Greetings button will pull up a Manage Greetings menu that holds a section for adding a New Greeting and another section for selecting the Time Frame for that particular intro greeting to be played.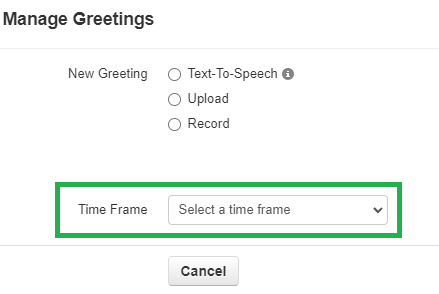
After adding in an intro greeting, more greetings can be added for different time frames:
Dial Pad Menu Options
When setting up an Auto Attendant, you can configure certain options for the caller to follow when they use the Dial Pad Menu.
To add these options,
-
Click a number to designate where you want the caller to go when pressing that number on the dial pad of their phone.

-
Select an application to apply to that number in the Dial Pad Menu.

Available Dial Pad Menu Applications
User
This menu option will take the caller to the extension entered.
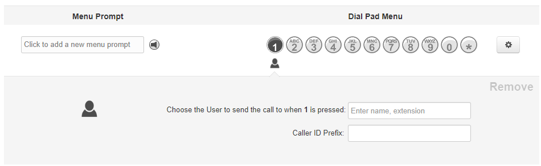
You can search the internal user by name or the extension number.
The Caller ID Prefix will add text to the front of the caller ID.
Conference
This option will take the caller to a specified Conference Bridge.
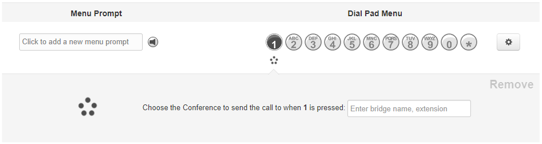
To add this option, type in the name or the extension number of the Conference Bridge. Click Save to completely add in this option.
Call Queue
This will menu option will take the caller to a Call Queue specified in the field below.
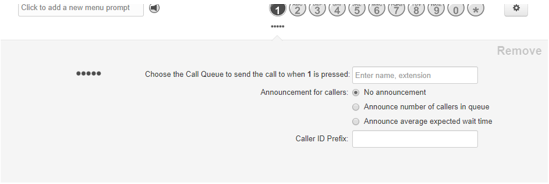
Select a call queue by typing in the name or the extension of the particular call queue.
Using the extra options, users can add in an announcement message of how many callers are in the queue, or how long the expected wait time is for callers.
The Caller ID Prefix will add text to the front of the caller ID.
• This option can be handy for labeling calls originating from certain phone numbers on the account.
• This option is also commonly used for labeling calls with the name of the department the call is going to.Directory
This menu option will take the caller to the Dial-by-Name Directory.
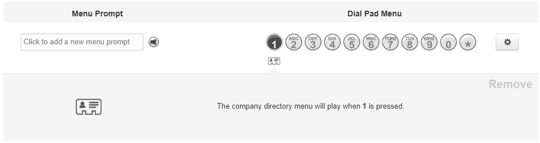
From the dial-by-name directory, callers will be able to look up a user using the first 3 letters of either their first or last name.
Note: By default, the dial-by-name directory searches users by last name.
To adjust the directory to search by first name, please contact our technical support team by calling (469) 429-2500 or emailing support@spectrumvoip.com.
Voicemail
This menu option will take the caller to the specified User's Voicemail to leave a message.
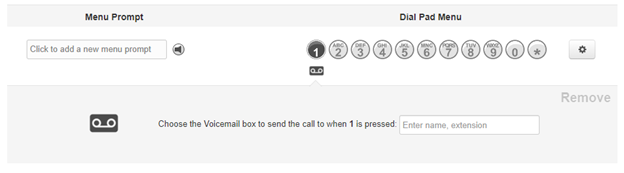
To select a specific user's voicemail, type in the name or the extension of a specific voicemail box.
Voicemail Management
This will take the caller to a directory-like menu where they can access a specific voicemailbox.
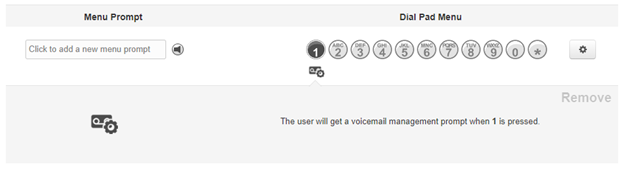
The Voicemail Management prompt will ask for the extension number of the mailbox and that extension's voicemail PIN.
External Number
This option will take the caller to an external 10-digit phone number.
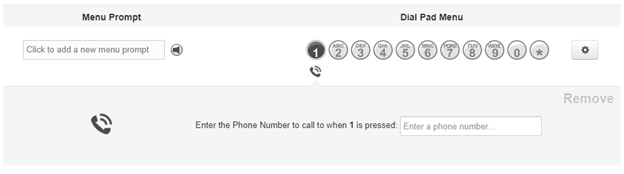
Type in the phone number you want the system to dial when pressing this option.
Play a Message
This will take the caller to recorded message.
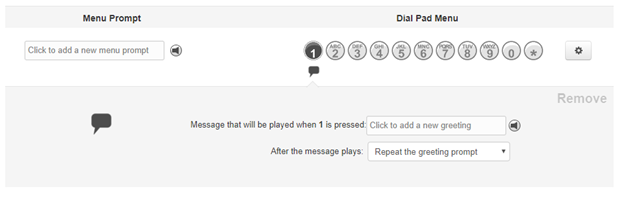
You will need to provide the message that the system will play the caller. In order to add in this audio…
1) Click the Manage Audio icon.
✔ Clicking this icon will pull up the Manage Audio menu.
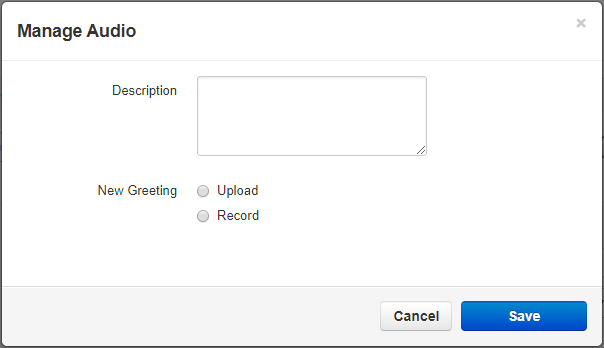
2) In the Description box, type a name for the greeting.
3) Add in the audio file by either uploading an audio file (in a WAV file, mono channel, and 8000 Hz format) or recording a greeting.
• Upload: Click the Browse button and select a formatted audio file from your PC. Click the Save button.DANGER: The audio file needs to be in a WAV file, mono channel, and 8000 Hz format to be properly read in the phone system.
To convert your audio file, use this handy website:
• Record: Type in an extension number or a phone number to send a call to. Follow the phone call's prompts to record the message.
4) Click Save to add the message.
5) Use the After the message plays drop-down to select the caller's next destination.
– Select Repeat the greeting prompt from the drop-down to route the call back to the main menu.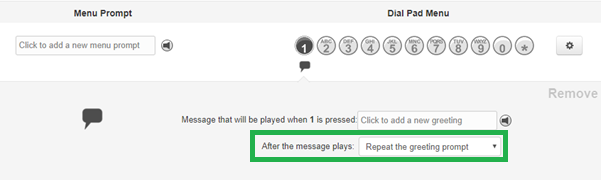
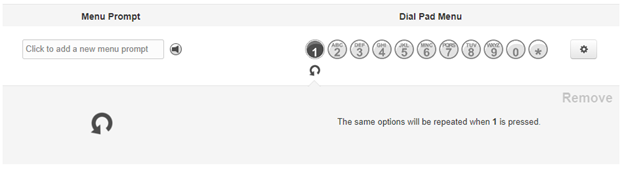
Repeat Prompt
Using this option will replay the main greeting.
Add Tier
This menu option will give callers another menu to route the calls without creating another auto attendant.
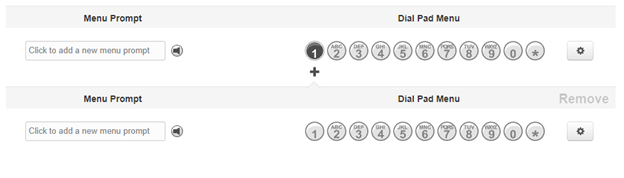
Note: The max number of tiers you can have is 1; however, each Dial Pad Menu option can have its own extra tier.
- Click the Save button.
Quick Tip: It is recommended to save often to avoid losing any progress while working in the Auto Attendant menu.
Extra Options
While setting up an Auto Attendant, there are extra settings that can be adjusted to fine-tune how the Auto Attendant acts.

Click the Options icon  on the right to pull up the Options menu where basic and speech keyword settings can be adjusted.
Basic Options
There are several, basic settings that can be adjusted to customize an auto attendant. Each of these settings affects how the auto attendant will handle a call under certain circumstances.

Dial by Extension
The Dial by Extension feature allow callers in an auto attendant to dial the extension number of an employee to skip past using the options.
Quick Tip: Disabling Dial by Extension ensures that callers can only reach an employee by following the auto attendant's options.
This setting is enabled by default and can be easily switched by clearing the checkbox.
If no key is pressed
If the caller does not select an option before the timeout expires, you can route the call to repeat the greeting, go to an option that is already set, or hang up the call.
If unassigned key is pressed
Using this option, you can route callers that press an unassigned key to either hear a repeated greeting, go to an option that is already set, or hang up the call.
Timeout before first key press
This option determines how long the auto attendant will wait before recognizing any key presses.
Note: By default, the system will wait 3 seconds before recognizing keys pressed.
Timeout after the last key press
Unlike the first key press, this option determines how long the auto attendant will wait after the last key press to register another key press.
Note: By default, the system will wait 3 seconds before registering another key press.
Maximum key presses to collect
You can use this option to set a limit for how many keys can be pressed.
Speech Keywords
Speech Keywords are used by the Auto Attendant to trigger routing whenever it hears a certain word or phrase spoken by the caller. Each dial pad option can have multiple keywords/phrases implemented.
Whenever you add a dial pad menu option, an entry will populate in the Speech Keywords section of the Options modal:

These options can be clicked to show a field for entering in a word or phrase:
Using the Add a keyword or phrase box, type in what you would like the system to listen for to route calls to this selected option.
Click the Done button to save these changes. 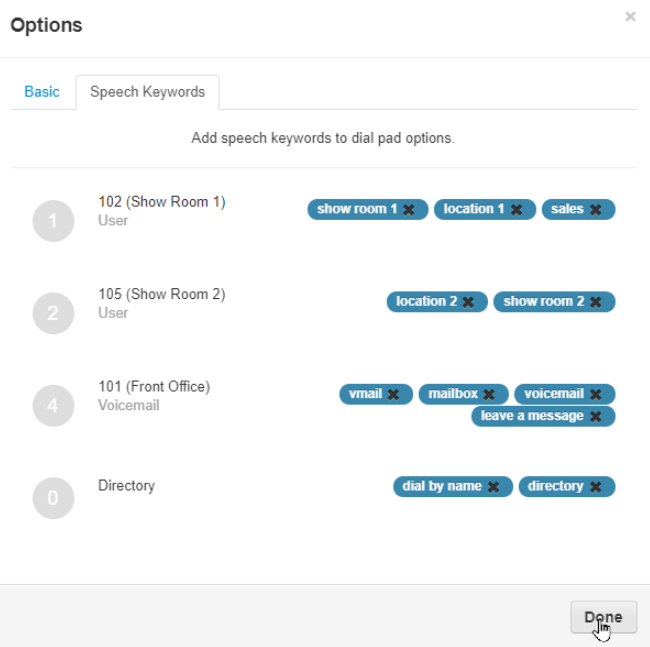
Call Queues
A Call Queue, also known as a hunt group, is a function that dispatches calls to multiple agents. These call queues can ring agents simultaneously or in a specific order. There are different types of call queues that can be used to ensure agents are receiving and handling calls as intended.
Once a call queue reaches its Queue Ring Timeout (the set amount of a time a call will ring all agents, the call is marked as unanswered. Unanswered calls can be set to either stay in the queue, go to the queue's own voicemail, or forward to a different destination using its If Unanswered setting. Callbacks can be set up for call queues if needed.

On the Call Queues page, you can view your created call queues, add more call queues, and edit existing call queues and their agents.
Create a Call Queue
Your organization can have as many call queues as needed for dispatching calls. Many companies will have separate call queues for different purposes or departments. To create a new call queue…
- Navigate to the Call Queues page.

- Click the Add Call Queue button.

- Complete the fields in the Basic tab.

Basic Settings
Setting Description Name Enter a unique, identifiable name for this call queue. Extension Select an extension number for the queue that is not currently in use.
Quick Tip: Call queues usually have extension numbers in the 8000s range for dial planning purposes.
Type Determines how calls are distributed. Choices are:
• Round robin - Dispatches callers to the agent that has been idle for the longest.
• Tiered Round robin - Dispatches callers to the agent that has been idle for the longest period of time starting with the highest tier group. When all agents in one group have been attempted, the call will move on to ringing the agents in the next tier group.
• Ring All - Dispatches callers to all available agents at the same time.
• Linear Hunt - Dispatches callers to available agents in a predefined order, which can be set while editing an agent's settings.
• Linear Cascade - Routes callers to groups of available agents in a predefined order. The order is defined when editing the queue’s agents (see “ Working with Agents” section. Just keep scrolling down.). Then complete the remaining fields in the window.
• Call Park - Active calls that are parked by an agent or user are forwarded to this queue to wait on hold for another user to retrieve and handle their call.
Phone Number If this queue should have a direct phone number, select a phone number that you own that is not currently in use. Record Calls Select whether calls will be recorded (Yes) or not recorded (No) for this call queue.
NOTE: Selecting this feature after the queue has been in use will not retroactively obtain call recordings.
Statistics Select whether statistics will be recorded (Yes) or not recorded (No) for this call queue. This will allow for statistical reports to be run in the Call Center section of the web portal.
NOTE: If a call queue is missing from the Call Center page, then this setting may need to be enabled.
Selecting this feature after the queue has been in use will Not retroactively obtain call queue data.
Message to Agent Create a message that will be played to an agent accepting a call from this call queue (i.e., “Here's a call from the emergency support queue.”).
You can configure this setting after adding the call queue. - Do one of the following:
- If you are creating a Park, click Save to complete this procedure.
- Otherwise, click Next to display the Pre-Queue Options tab and proceed to the next step.
- Complete the fields in the Pre Queue Options tab.

Pre Queue Options
Setting Description Require agents Select whether to require (Yes) or not require (No) agents for this call queue.
Quick Tip: This setting is usually enabled for the following reasons:
• If you want a caller to be forwarded elsewhere if agents are not immediately available when they enter the queue, enable this setting and type the destination for the call in the Forward if unavailable box.
• If callbacks are enabled, enabling this setting can have callers prompted to set up a callback if all agents are busy on calls.
• If a call queue is set with an Offline Failover rule, enabling this setting will ensure callers are forwarded if all agents are showing as offline.Require intro MOH When this setting is enabled, the call queue will be required to play its Introduction message to each caller before they are officially queued.
Quick Tip: This setting is usually enabled to have queues play important messages to callers for compliance reasons, such as a recording warning.
Max Expected Wait Use the slider to specify the maximum expected wait time, in seconds.
If the estimated wait time exceeds this time, the call will be forwarded according to the Forward if unavailable setting.Max Queue Length Use the slider to specify the maximum number of people that the system will allow to wait in this call queue.
If this limit is met, the call will be forwarded according to the Forward if unavailable setting.Allow Callback option This setting allows callers to record their number, hang up, keep their spot in line, then get called when an agent is available.
Select whether the callback option is available (Yes) or not available (No) to users in this call queue.
In order to fully enable this option, the Ring Timeout must be set to a limited amount of time with the Forward if unanswered option set to “Stay in Queue”.Forward if unavailable This setting specifies where to forward callers if any of the pre-queue options will not allow queueing (for example, expected wait is too high). Enter where the call forwards if queueing is not available. - Click the Next button.

- Complete the fields in the In Queue Options tab.

In Queue Options
Setting Description Queue Ring Timeout Use the slider to specify the maximum number of seconds that the call remains in the queue before being counted as unanswered. Agent Ring Timeout This setting is only usable for Round Robin, Tiered Round-Robin, Linear Hunt, and Linear Cascade queues.
Use the slider to specify the maximum number of seconds that the queue will ring an agent before moving on to the next agent.
This value should be less than or equal to the Queue Ring Timeout value.Logout agent on missed call Select whether or not an agent will be logged out of the queue if they miss a call. Enable voicemail This setting enabled the voicemailbox of the queue itself.
This will allow…
• The Forward if unanswered setting to be set to Send to voicemail, which will forward callers to the queue's own mailbox.
• Option 2 of the callback menu to be used by callers to leave a message with the queue's mailbox instead of requesting a callback or returning to the queue.Forward if unanswered Enter the extension, phone, or number where callers are forwarded if agents fail to answer before the Queue Ring Timeout is reached.
To use callbacks, this option must be set to “Stay in Queue”. - To set where unanswered calls should route, set the If unanswered dropdown to Forward to Destination and type in the extension number, name, or 10-digit phone number of the destination.
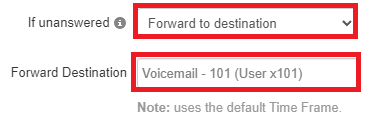
Quick Tip: This option is used most commonly to have unanswered calls forwarded to a specific user's mailbox, an answering service's phone number, a busy auto attendant, or a different call queue, such as an overflow queue.
- Click the Add button to apply these details.

Manage Agents
The Call Queues page allows you to add, edit, and delete agents for call queues.
To view and edit the agents in a queue, navigate to the Call Queues page, hover over the call queue, and click the Edit Agents ![]() icon.
icon.
Add an Agent
1. Click the Edit Agents ![]() icon next to the queue that needs its agents adjusted.
icon next to the queue that needs its agents adjusted.
2. Click the Add Agent button. ![]()
3. In the Edit Agents menu, input the following:
• Add Agent(s) by - Use the dropdown to select whether to either add an agent by their User or by their specific Phone.
– Add by User - Adding an agent by their User will ensure the ll queue follows their answering rules.
• Forwards will be followed.
• The user's other devices will ring if set in a rule.
– Add by Phone - Adding an agent by their phone will have the call queue ignore their answering rules and ring just the device selected.
• If needed, select more of the user's devices to ensure their other phones ring as well.
• Agent Extension - Type and select the ortension number(s) of the agent(s) to be added.
• Status - Use the dropdown to set the agent(s) to be Online or Offline in the queue.
4. Adjust the remaining settings for the agent(s) as needed.
Agent Settings
| Setting | Description |
|---|---|
| Wrap up time | Use the slider to specify the amount of time the agent is allocated to complete paperwork after finishing a call and before a new call is dispatched. |
| Max Simultaneous calls | Use the slider to specify the maximum number of calls an agent can take at one time. This will almost always be 1. |
| Order in Linear Hunt | Sets the dispatch order. If a call is dispatching, it will go to the available agent with the lowest order. |
| Queue priority for agent | Sets weighting for an agent that is servicing multiple queues. If you have an agent servicing two queues and both queues have a person waiting, for example, the agent will get the call from the queue whose priority is highest (lowest number). |
| Request Confirmation | Enables or disables request confirmation. Choices are: · Enabled = Requires the agent to confirm that they want to receive a call each time a call is dispatched to them in the queue. · Disabled = Agent does not have to confirm the call. |
| Auto Answer | Enables or disables auto answer. This feature can only be used in Linear Hunt and Round Robin queues. Choices are: · Enabled = Agent's phone answers automatically (not all phones support this feature). · Disabled = Agent's phone will not answer automatically. |
5. When the agent is ready to be added, click the Save Agent button. ![]()
6. Once all agents have been added, click the Done button. ![]()
Edit an Agent
While viewing a queue's agents, you can edit the settings of an agent. To do so…
1. Click the Edit Agents ![]() icon next to the queue that needs its agents adjusted.
icon next to the queue that needs its agents adjusted.
2. Hover over an agent and click the Edit Agent ![]() icon.
icon.
3. Edit the Settings for the agents as needed.
Agent Settings
| Setting | Description |
|---|---|
| Wrap up time | Use the slider to specify the amount of time the agent is allocated to complete paperwork after finishing a call and before a new call is dispatched. |
| Max Simultaneous calls | Use the slider to specify the maximum number of calls an agent can take at one time. This will almost always be 1. |
| Order in Linear Hunt | Sets the dispatch order. If a call is dispatching, it will go to the available agent with the lowest order. |
| Queue priority for agent | Sets weighting for an agent that is servicing multiple queues. If you have an agent servicing two queues and both queues have a person waiting, for example, the agent will get the call from the queue whose priority is highest (lowest number). |
| Request Confirmation | Enables or disables request confirmation. Choices are: · Enabled = Requires the agent to confirm that they want to receive a call each time a call is dispatched to them in the queue. · Disabled = Agent does not have to confirm the call. |
| Auto Answer | Enables or disables auto answer. This feature can only be used in Linear Hunt and Round Robin queues. Choices are: · Enabled = Agent's phone answers automatically (not all phones support this feature). · Disabled = Agent's phone will not answer automatically. |
4. Click the Save Agent button when adjustments are complete. ![]()
Remove an Agent
If you have an agent that is no longer needed in a call queue, you can easily remove them. To do so…
1. Hover over an agent and click the Remove Agent ![]() icon.
icon.
2. Repeat this process for additional agents needing to be removed.
3. Click the Done button. ![]()
Convert Agents
It is highly recommended to have agents in a queue added as either Users or Phones. If you have agents added by User and by Phone, you can click the Convert Agents button to set your queue's agents to all be added by User. This can help prevent any unusual dispatch issues for calls.
To convert your agents to Users…
1. Click the Convert Agents button. ![]()
2. In the confirmation message that appears, click the Convert button.
3. Wait for the agents to fully convert. ![]()
✔ Agents added by phone will convert to Users.

If these agents have answering rules, the call queue will follow any answering rules that have been created for them.
NOTE: If you are having issues converting the phones to users, check to make sure the phones that are not converting do not have “#NAME” in their user information as it will not work. You will need to update that user's profile and replace “#NAME” with anything you want without special characters.
Check an Agent's Status
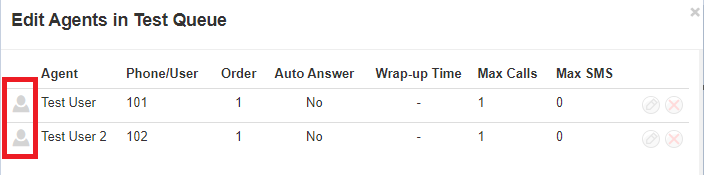
The color-coded status (person icon) will change color depending on the User's status:
-
Green
 = Available
-
Gray
 = Offline
-
Red
 = Busy on a call
If an agent is showing as Offline but should be Online, or vice versa…
- Click the Edit Agent
 icon.
icon. - Use the Status dropdown to select the agent's status.

- Click the Save Agent button.
- If needed, repeat this process for any other agents.
- Click the Done button.
Call Center Management
The Call Center page can be accessed by clicking the Call Center tab on the tab bar.![]()
Scope: Call Center Supervisors, Site Managers, and Office Managers can generate and reference call center reports.
Some features may not be available to all users depending on their user scope permissions.
The Stats Grid
On the Call Center page of the Stratus Web Portal, a Stats Grid can be viewed for a quick summary of your call center's performance. This grid displays certain statistics. Some of these statistics shown may be color-coded as a way to show if this particular statistic is meeting any set thresholds.

The colors in the grid indicate the following:
- Green - value is within an acceptable range.
- Yellow - value is within the range of your lower threshold.
- Red - value meets or exceeds your upper threshold.
- White - no thresholds are configured for the statistic.
Adjust the Stats Grid
1. Click GRID SETTINGS to adjust the stats shown on the grid and its color warnings. 
2. In the Grid Settings menu, enable or disable certain stats from being shown in the grid.
3. Use the Lower Threshold and Upper Threshold boxes to set the limits for these stats to determine when and what color warnings will show. 
Quick Tip: You can leave these boxes blank to disallow color warnings.
4. Click the Save button. ![]()
Set Your Service Level Threshold
In some Call Centers, it may be necessary to establish a Service Level Agreement (SLA) that determines how quickly calls should be answered by agents to meet set expectations and standards.
In reports that are viewed in the Call Center page of the Stratus Web Portal, the percentage of how many calls are meeting the Service Level Agreement can be referenced as the Service Level (SL) statistic. The Abandon Rate (AR) will be deducted from the service level percentage. For example, if you have 100% of calls hitting Service Level, but you have an Abandon Rate of 2.1%, your Service Level would be 97.9%.
To adjust the Service Level Agreement that will determine how the Service Level statistic is measured…
- Navigate to the Call Center page.

- On the Call Center page, click the Settings button.

- On the General tab, use the Service Level Agreement slider to specify the amount of time (in seconds) that a call should be answered to meet your standards.

This value will be used to calculate the Service Level Percentage statistic.Note: By default, the Service Level Agreement is set as 60 seconds.
- Click the Save button.

✔ Now the Service Level (SL) statistic will more accurately represent how many handled calls are answered within the set Service Level Agreement.
This statistic can be viewed in the Stats Grid:

Or the Queue Stats Report:

Custom Statuses for Agents
If your agents are supposed to be setting their status for reporting purposes, custom statuses can be created to allow your agents to more accurately report why they are unavailable for calls at certain times.
To add new custom statuses…
- Click the Settings button.
- Go to the Custom Statuses tab.

- In the Add a new agent status box, type the name of a status for your agents to use and click Add.

✔ Now you should have a list of statuses, which your agents can now view while using their Call center page or the StratusHUB desktop app.
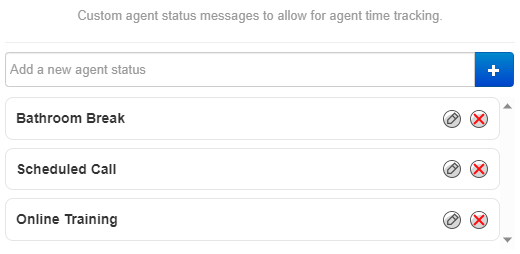
Your agents can now select these statuses when they are making themselves unavailable for calls.
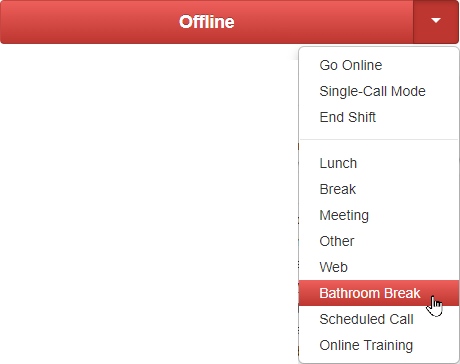
Monitor Calls
By utilizing the Join Call (Barge), Whisper, and Listen Only features, Call Center Supervisors and Managers are able to monitor and manage the calls of their agents.
Scope: These audio monitoring features are only available to users with a scope of a Call Center Supervisor or higher.
Basic Users are not able to monitor calls.
As a Call Center Supervisor
To monitor a call as a Call Center Supervisor…
1. Visit the Call Center page.![]()
2. On the Call Center page, use the AGENTS menu to find the agent's extension number and their call.

3. Click the Listen in  icon next to the Agent's extension number.
✔ You should see a message that states “Monitoring the Call” while the Audio Monitoring tool loads.![]()
After a short delay, an Audio Monitoring box will appear. Use the Join Call and Whisper buttons to interact with the call's participants as needed.
As an Office Manager or Site Manager
To start the connection as any user with an Office Manager or Site Manager…
1. On the Home tab, use the ACTIVE CALLS menu to find the active call to listen to.
2. Click the Listen in icon  to the right of the call.
✔ After a short delay, an Audio Monitoring box will appear.

Audio Monitoring Features
When listening to a call using the Audio Monitoring feature, administrators can use the Join Call or Whisper to buttons to interact with the call.

NOTE: Join Call (Barge) / Listen Only are available on all calls (i.e., on-net to on-net, and on-net to offnet).
Whisper only works for a call by an agent/employee (on-net) connected to a call that is offnet.
Note: Since audio monitoring sessions start in Listen Only by default, only the Join Call and Whisper To buttons will be visible.
After switching to either Barge or Whisper mode, a Listen Only button will appear in the other buttons' place.
Join Call (Barge)
The Join Call (Barge) feature allows a listener to join into the call, rather than just listen (as is the case with Listen Only). Barge allows both parties of the call to hear the user joining the call.
To barge into a call, click the Join Call button on the Audio Monitoring pop-up.
✔ You should now be able to hear and speak to both calling parties.
Whisper
The Whisper feature allows the whisperer to speak only to the agent (on-net user) on a call. The Caller (off-net) is not able to hear the whisperer.
Warning: The whisper option is only available on Calls where one party is an on-net user, and the other party is an off-net user. This can be either an inbound or outbound call.
To whisper to the agent of the call, press the Whisper To button on the Audio Monitor pop-up.
✔ You should now be able to speak to the agent without the caller hearing.
Listen Only
The Listen Only feature allows the listener to hear both sides of a call but not be heard by either of the other parties.
To use Listen Only after using either Join Call or Whisper, click the Listen Only button on the Audio Monitoring pop-up.
Call Center Reports
The Portal can generate custom reports about call queues. These reports provide a graphical overview of call center statistics over a given period of time. The reports can cover the entire call center, queues, or individual agents. This granularity enables call center supervisors to monitor their call center.
To view your call center reports…
- On the Call Center page, click the Reports button.

- Use the tabs to select what type of report you want to view.

Types of Call Center Reports
The Reports page of Call Center can show you several different reports that can be used to monitor how your queues and agents are handling calls.
Queue Stats Report
The Queue Stats report allows supervisors to view specific attributes on a queue-by-queue basis based on user-configurable attributes.

Add or Remove Stats from the Table
The Table Settings button can be used to select the statistics that will be showing in the table.
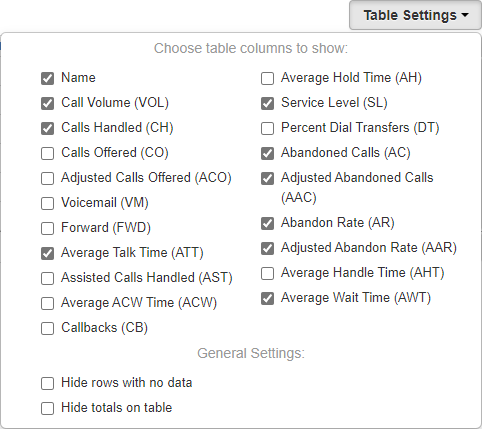
Statistic Description Call Volume (VOL) Total number of calls originating through a Call Queue.
Includes calls answered/retrieved by agents, abandoned calls, calls forwarded to a queue's forwarding destination for unanswered calls, and calls connected to an agent's voicemail.
• Call Volume (VOL) = Calls Offered (CO) + Forward (FWD) + Abandoned Calls (AC)Calls Handled (CH) Number of calls originating from a call queue that are answered/retrieved by an agent and handled through ending or transferring the call. This also includes calls that were connected to an agent's voicemail.
Excludes abandoned calls and calls forwarded to a queue's forwarding destination for unanswered calls.
• Calls Handled (CH) = Calls Offered (CO) - Abandoned Calls (AC) - Forward (FWD)
Calls Offered (CO) Total number of calls that reached the queue to be dispatched to agents.
Includes abandoned calls and assisted calls.Adjusted Calls Offered (ACO) Total number of calls that reached the queue. This statistic is adjusted to exclude calls that were abandoned in less than 10 seconds.
• Adjusted Calls Offered (ACO) = Calls Offered (CO) - Adjusted Abandoned Calls (AAC)Voicemail (VM) Number of calls handled by the automated voicemail system.
Only triggered if the caller leaves an audible voicemail at a traditional or system/functional extension.
Forward (FWD) Number of calls forwarded to a queue's forwarding destination for unanswered calls, such as an agent's voicemail, another queue, or an offnet phone number for handling.
Must have a voicemail, queue, or offnet (external) phone number set as FWD Destination in the “In Queue Options” for this to be triggered.
Avg Talk Time (ATT) Average number of minutes spent by agent talking per call on calls originating through a Call Queue.
Excludes hold time.Avg After Call Work (ACW) Average time an agent spends between the end of a call and submitting call disposition. Avg Hold Time (AH) Average time a caller spends on hold with an agent. Excludes waiting time in the Call Queue. Service Level (SL) Percentage of calls answered originating through the queue within a set amount of time. The default is 60 seconds, but other time windows are available.
The Abandon Rate (AR) will be deducted from the service level percentage. For example, if you have 100% of calls hitting Service Level, but you have an Abandon Rate of 2.1%, your Service Level would be 97.9%.Dial Transfers (DT) Percentage of calls that landed in the queue and were offered to an agent. Abandoned Calls (AC) Number of calls that abandoned the queue before being offered to an agent.
Only triggered if the caller disconnects while the queue is ringing the agents; not during any voicemail greeting or automated system voice-over message within the call flow.
Adjusted Abandon Calls (AAC) Adjusted number of calls that abandoned the queue.
Excludes calls abandoned in less than 10 seconds.
(Abandoned Calls) - (Number of calls abandoned in less than 10 seconds)Abandon Rate (AR) Percentage of calls offered that were abandoned.
Abandoned Calls (AC) / Calls Offered (CO).Adjusted Abandon Rate (AAR) Percentage of calls offered that were abandoned by the incoming caller after ringing for 10+ seconds.
Adjusted Abandoned Calls (AAC) / Adjusted Calls Offered (ACO).Avg Handle Time (AHT) Average time an agent spent on a call.
Includes Talk Time (TT), Hold Time (AH), and Disposition Time (ACW)Avg Wait Time (AWT) Average time calls are waiting in the queue before an agent answers. This can be thought of as the Average Answer Speed. Change the Stat Shown in the Graph
The line graph shown in the Report page will display one stat at a time. The stat shown can be adjusted.
To pick a different stat to be shown in the line graph, click Call Volume and select the stat that should be shown.
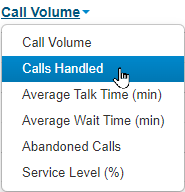
Color Code the Graph
You can click the checkboxes in the first column for Call Queue statistics to color-code the graph to better visualize the activity for each queue.
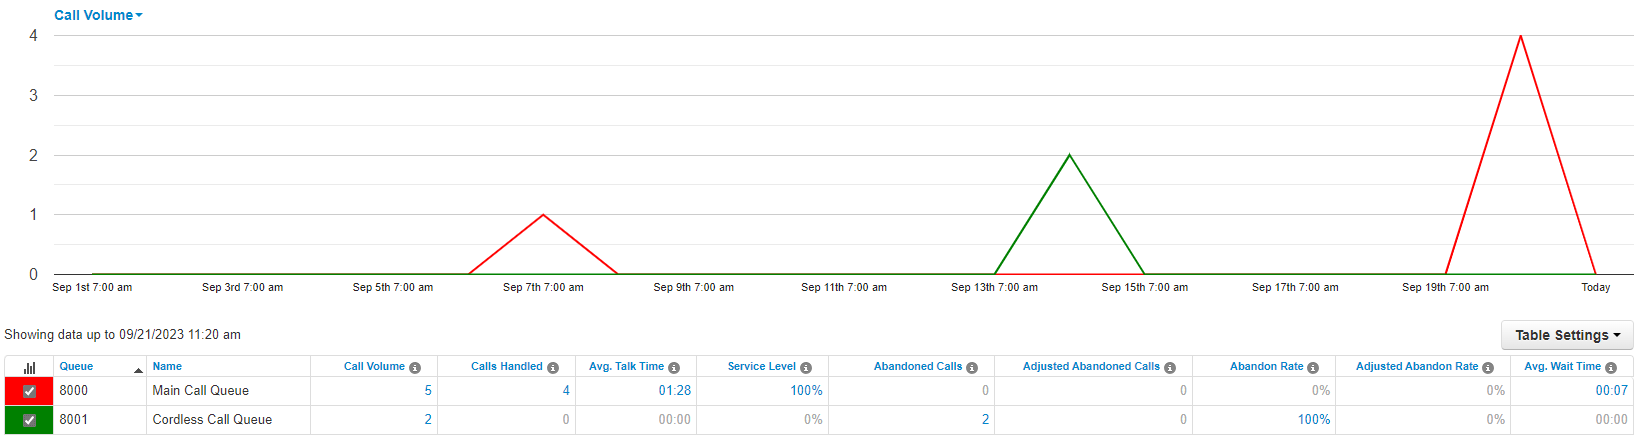
Quick Tip: Clicking the Graph
 icon will toggle all of the checkboxes on/off.
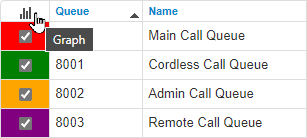
Agent Stats Report
The Agent Stats report shows statistics for each agent in your queues.

Filter Agent Data
To make sorting through your agents' data easier, you can filter the agents shown in the table and graph.
There are two ways that you can filter your agents:
1. Use the Department drop-down to only show agents in a certain Department.
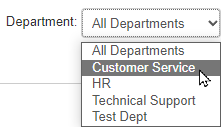
2. Use the Queue drop-down to only show agents in a certain Call Queue.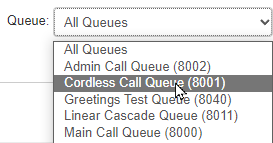
Add or Remove Stats from the Table
The Table Settings button can be used to select the statistics that will be showing in the table.
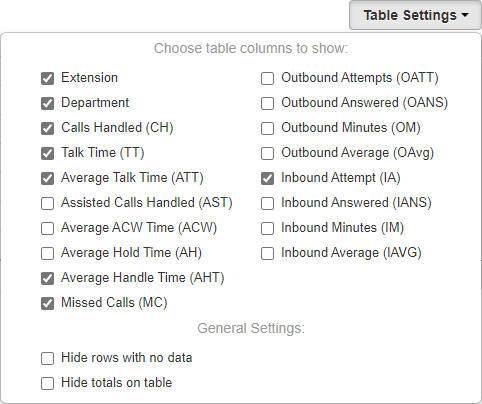
Statistic Description Calls Handled (CH) Number of calls an agent answers from a queue and then handles through transferring, parking, or the call ending (by the caller or agent).
This includes calls that go to an agent's voicemail and forwards.Avg Talk Time (ATT) Average number of minutes spent by agent talking per call on calls originating through a Call Queue.
Excludes hold time and wait time.Avg After Call Work (ACW) Average time an agent spends between the end of a call and submitting a call disposition. Avg Hold Time (AH) Average time a caller spends on hold with an agent. Excludes waiting time in the Call Queue. Avg Handle Time (AHT) Average time an agent spent on a call.
Includes Talk Time (TT), Hold Time (AH), and Disposition Time (ACW)Calls Assisted (AST) Number of calls answered and passed onto a different agent for further handling.
Agents who handled the queued call but were not the final handler will be given an assist count.Outbound Attempt (OATT) Number of outbound call attempts by agent.
Excludes on-net calls and conference calls.Outbound Answered (OANS) Number of outbound calls by agent answered by a remote party.
Includes calls answered by voicemail.
Excludes on-net calls and conference calls.Outbound Minutes (OM) Number of minutes spent by agent on outbound calls.
Excludes call center calls, on-net calls, and conference calls.Outbound Average (OAvg) Average length of time spent by agent on outbound calls.
Excludes call center calls, on-net calls, and conference calls.Inbound Answered (IANS) Counts any call that an agent picks up that originated through a queue.
This includes calls that were previously handled by another agent, such as parked calls.
Excludes on-net calls and conference calls.Inbound Calls Today (IA) Number of calls that were dispatched to an agent from a queue. Calls that were dispatched and abandoned or not answered will be counted. This includes calls that were previously handled by another agent, such as parked calls.
Excludes on-net calls and conference calls.Inbound Minutes (IM) Number of minutes spent by an agent on inbound calls from a call queue.
Excludes on-net calls and conference calls.Inbound Average (IAVG) Average length of time spent by an agent on inbound calls.
Includes call center calls.
Excludes on-net calls and conference calls.Missed Call (MC) Number of calls originating through a call queue offered to an agent but not answered.
This includes multiple attempts if a call loops through all agents but excludes unanswered simultaneous ring calls.Change the Stat Shown in the Graph
The line graph shown in the Report page will display one stat at a time. The stat shown can be adjusted.
To pick a different stat to be shown in the line graph, click Call Volume and select the stat that should be shown.

Color Code the Graph
You can click the checkboxes in the first column for Call Queue statistics to color-code the graph to better visualize the activity for each queue.

Quick Tip: Clicking the Graph
icon will toggle all of the checkboxes on/off.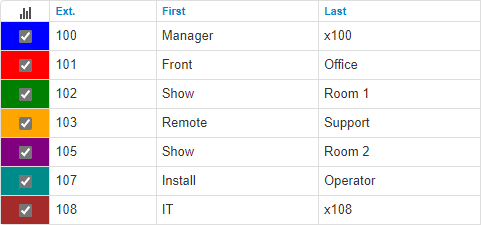
Agent Availability Report
The Agent Availability report shows a breakdown of how long each agent in a queue has been on different statuses.

Show Specific Statuses
The Table Settings button can be used to select the default and custom statuses that will be showing in the table and graph.

Filter Agent Data by Department
If needed, the agents shown in the Agent Availability report can be filtered to help declutter and simplify your view of the table and graph.
Use the Department drop-down to view the availability data of agents in specific Departments.
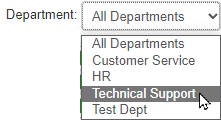
Dialed Number Stats Report
The Dialed Number (DNIS) Stats report shows information based on the Dialed Number Identification Service (DNIS). DNIS is a telephone service that informs the receiver about a call that the caller dialed. DNIS is a common feature utilized by 800 and 900 services.

If you have multiple 800 or 900 numbers to the same destination, the DNIS tells you which number was called and how it was dialed.
 .
.Adjust Dialed Numbers Shown
You can click the checkboxes in the first column for Call Queue statistics to hide/show specific numbers dialed in the graph.
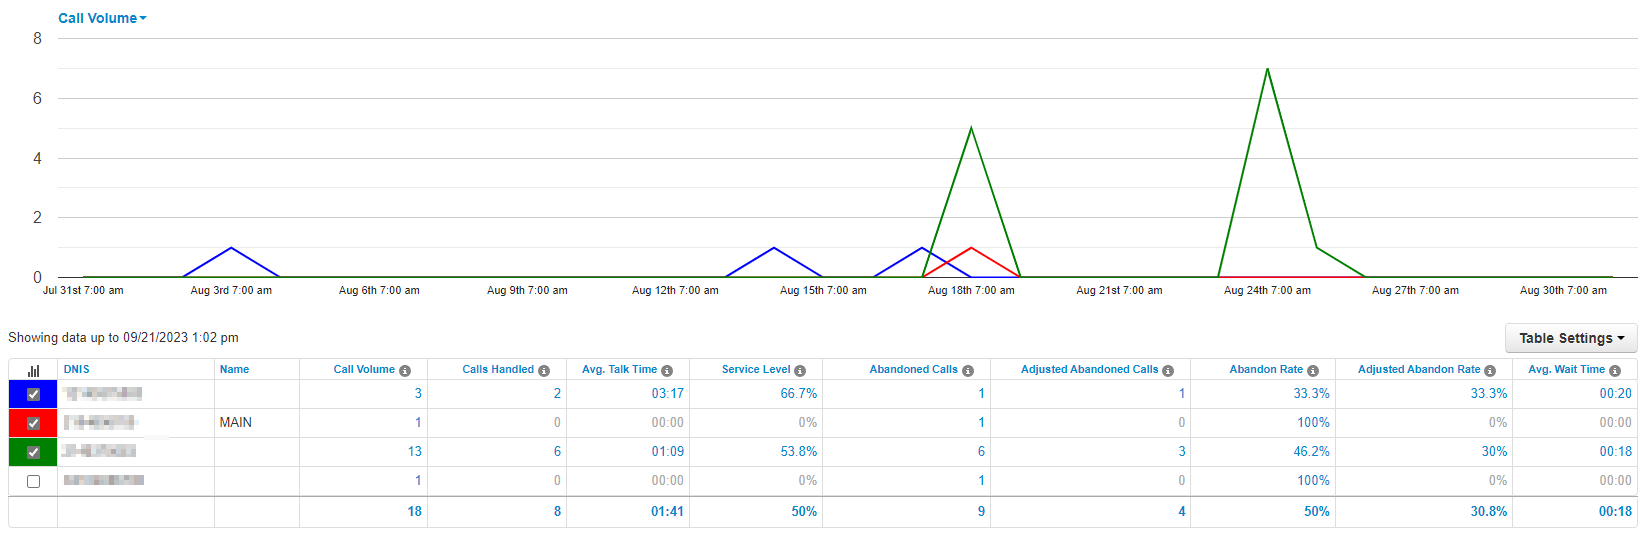
Quick Tip: Clicking the Graph
icon will toggle all of the checkboxes on/off.
Add or Remove Stats from the Table
The Table Settings button can be used to select the statistics that will be showing in the table.

Statistic Description Call Volume (VOL) Total number of calls originating through this phone number that is dispatched to one or more queues.
Includes calls answered/retrieved by agents, abandoned calls, calls forwarded to a queue's forwarding destination for unanswered calls, and calls connected to an agent's voicemail.
• Call Volume (VOL) = Calls Offered (CO) + Forward (FWD) + Abandoned Calls (AC)Calls Handled (CH) Number of calls originating from a call queue that are answered/retrieved by an agent and handled through ending or transferring the call. This also includes calls that were connected to an agent's voicemail.
Excludes abandoned calls and calls forwarded to a queue's forwarding destination for unanswered calls.
• Calls Handled (CH) = Calls Offered (CO) - Abandoned Calls (AC) - Forward (FWD)
Calls Offered (CO) Total number of calls that reached the queue to be dispatched to agents.
Includes abandoned calls and assisted calls.Adjusted Calls Offered (ACO) Total number of calls that reached the queue. This statistic is adjusted to exclude calls that were abandoned in less than 10 seconds.
• Adjusted Calls Offered (ACO) = Calls Offered (CO) - Adjusted Abandoned Calls (AAC)Voicemail (VM) Number of calls handled by the automated voicemail system. Forward (FWD) Number of calls forwarded to a queue's forwarding destination for unanswered calls, such as an agent's voicemail, another queue, or an offnet phone number for handling. Avg Talk Time (ATT) Average number of minutes spent by agent talking per call on calls originating through a Call Queue.
Excludes hold time.Avg After Call Work (ACW) Average time an agent spends between the end of a call and submitting call disposition. Avg Hold Time (AH) Average time a caller spends on hold with an agent.
Excludes waiting time in the Call Queue.% Service Level (SL) Percentage of calls answered originating through the queue within a set amount of time. The default is 60 seconds, but other time windows are available.
The Abandon Rate (AR) will be deducted from the service level percentage. For example, if you have 100% of calls hitting Service Level, but you have an Abandon Rate of 2.1%, your Service Level would be 97.9%.% Dial Transfers (DT) Percentage of calls that landed in the queue and were offered to an agent. Abandoned Calls (AC) Number of calls that abandoned the queue before being offered to an agent. Adjusted Abandon Calls (AAC) Adjusted number of calls that abandoned the queue.
Excludes calls abandoned in less than 10 seconds.
(Abandoned Calls) - (Number of calls abandoned in less than 10 seconds)Abandon Rate (AR) Percentage of calls offered that were abandoned.
(Abandoned Calls AC) / (Calls Offered CO).Adjusted Abandon Rate (AAR) Percentage of calls offered that were abandoned by the incoming caller after ringing for 10+ seconds.
(Adjusted Abandoned Calls AAC) / (Adjusted Calls Offered ACO).Avg Handle Time (AHT) Average time an agent spent on a call.
Includes Talk Time (TT), Hold Time (AH), and Disposition Time (ACW)Avg Wait Time (AWT) Average time calls are waiting in the queue before an agent answers. This can be thought of as the Average Answer Speed. Change the Stat Shown in the Graph
The line graph shown in the Report page will display one stat at a time. The stat shown can be adjusted.
To pick a different stat to be shown in the line graph, click Call Volume and select the stat that should be shown.
Filter DNIS Data by Queue
Use the Queue drop-down to only show the stats for numbers that direct callers to a certain Call Queue.
Abandoned Calls Report
The Abandoned Calls report shows a graph and data about calls that have been recorded as abandoned.

Note: Time is measured along the x-axis and the number of calls abandoned is measured along the y-axis.
Each abandoned call and the information about these calls are shown in the table. The data shown includes…
• Date and time of the abandoned call.
• The From Name of the caller.
• The phone number of the caller (From)
• The on number and name of the Queue the abandoned call originated from.
• The number dialed by the caller of the abandoned call.
• How long (in seconds) the caller waited before abandoning the call.These abandoned calls are usually the result of callers hanging up before their call is answered, or from their call dropping due to technical issues. Most abandoned calls occur in the first 10 seconds (2 rings) of a call.
Filter Abandoned Calls by Queue
Use the Queue drop-down to only abandoned calls recorded for a certain Call Queue.
- Select the date range and times for calls and their statistics.

Schedule Emailed Reports
If needed, you can have reports of your call center statistics automatically sent to your email. This can be helpful for record-keeping.
To schedule emails for your call center reports…
1. Click the Email Reports button. ![]()
2. On the Basic tab of the Email Reports menu select the Types of reports that should be included in the emailed report. 
3. In the Frequency section, select when you would like to receive reports by email.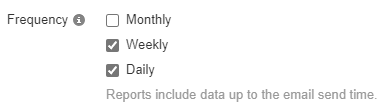
4. Use the drop-downs that appear to further specify when the reports should be sent.
• A daily report will require the supervisor to set a time.
• A weekly report will require the supervisor to set a day of the week and time.
• A monthly report will require a day of the month and send the previous month's data on that day. Set this to "1" to receive a report of the full previous calendar month.
Note: The Send Time will be followed for Monthly, Weekly, and Daily reports.
5. In the Advanced tab that appears, use the Statistics sections for each type of report to select the stats that should be shown for each report. 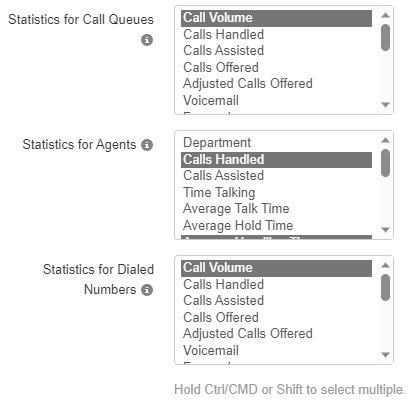
6. Use the Extra Email Addresses section to type the email addresses of people that should receive the reports. 
Note: Up to 4 different email addresses can be added.
7. If you would like a CSV spreadsheet of raw data including all available statistics attached to the email, select Attach CSV data to email.
8. Click the Save button. The email reports will then be scheduled. ![]()
Inventory Management
Your Phone Numbers
As an Office Manager or Site Manager, you have the power to view and modify phone numbers through the Inventory page of the Stratus web portal.
On the Inventory page, you can view and edit your phone numbers and their destinations.

Export a Spreadsheet of Your Phone Numbers
If needed, you have the option to download a spreadsheet of your phone numbers and their destinations. This spreadsheet can be printed out and shared with users for use as a reference.
To export a spreadsheet of your phone numbers…
1. Click the Export button. ![]()
2. Wait for the spreadsheet to download.
3. In your Downloads, open the downloaded spreadsheet.
✔ Now you can use and print this list of phone numbers as a reference.
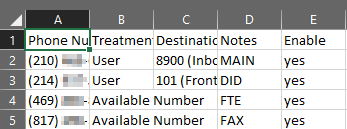
Edit the Destination of a Phone Number
As a Stratus admin, you have the ability to view and edit your phone numbers and their destinations.
To modify the destination for one of your phone numbers…
- Click the Edit
 icon next to a phone number.
✔ Doing so will pull up the Edit menu.

- In the Edit menu, use the Treatment drop-down to select the type of destination the phone number should direct calls to.

Types of Treatments for Phone Numbers
Treatment Description User Route callers directly to an internal user's extension number.
– Phone numbers that point directly to users are called Direct Inward Dialing (DID) numbers.
– The most common destination for phone numbers is the 8900 Inbound Routing User.Conference Assign a phone number to a conference bridge to allow users to directly call into a conference. Call Queue Assign a phone number to a call queue to have callers directly sent to it. Voicemail Route calls directly to a general voicemailbox, or a user's own voicemailbox. Auto Attendant Assign a phone number to an auto attendant that will read a message to a user and allow them to choose how their call is handled. PSTN Number Forward calls to another telephone number, such as an answering service. Fax Server This option is for fax numbers that utilize StratusFAX. Note: To learn more about call routing, check out this guide.
- If there is a second box that appears, type the exact destination.
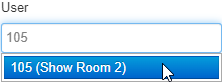
Quick Tip: Depending on what Treatment was selected, the name of this box may differ and require different information.
For example, selecting PSTN Number as the Treatment will have a second box appear where you would type the phone number to forward calls to.
- If needed, type a word in the Caller ID Prefix box that will be prepended to the front of a caller's Caller ID
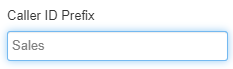
Quick Tip: Adding a prefix to the caller IDs of people that call this number can be useful if you have agents handling calls from multiple phone numbers that have different purposes.
- If needed, use the Notes box to add a brief description of the phone number's purpose or owner.
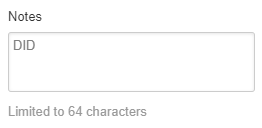
- Once you are done, click the Save button.

- Place a test call to the phone number to ensure calls are being routed correctly.
Your Phone Hardware
To access Phone Manager to make changes…
- Visit the Inventory page of Stratus.

- Click the Phone Hardware tab to view your phones.

On the Phone Hardware page, you can view your phones, their registration status, and the users they are assigned to.

View a Phone's Registration Status
| Status | Icon | Description |
|---|---|---|
| Unregistered |  |
The phone's extension is currently unregistered. This could be due to the phone being turned off or registration issues. |
| Registered |  |
The phone is turned on and registered with our server. |
To view more information about a phone's registration status, hover over the status icon.

Edit a Phone's Buttons
Open the Phone Manager Tool
Access the Phone Manager Launcher
To customize the layout of these phones, click on the Phone Manager button OR click on the arrow to the right to access the dropdown options.

Clicking the Phone Manager button will show you two different ways to edit phones: Edit Phone Configurations and Edit Configuration Template.

1. Edit Phone Configuration: Search for a specific phone to edit its button configuration.
Enter a MAC address or the extension number of the phone you want to edit.
2. Edit Configuration Template: Choose a phone model's template from the drop-down to view and adjust it.
Access Phone Manager for a Specific Phone
When a device is listed in the Inventory with an active device profile, you can click the MAC address to access Phone Manager.

Alternatively, you can click the Phone Manager  button to go to a particular device’s editor page.
While you are in the Phone Manager page for a phone, you can edit a phone's button layout and change the source for its Directory.

Customize a Phone's Buttons
To edit a phone's button configuration…
1. On an empty line key spot, use the Select a Feature drop-down select a feature for that line key.
Line Key Feature Options
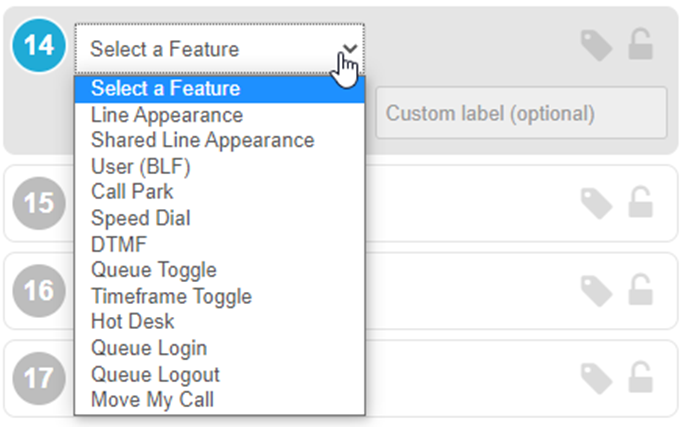
| Feature | Description |
|---|---|
| Line Appearance | Adds a line registration to the device and acts as a channel of communication that allows for multiple calls to be handled at once. Some features, such as transfers and conferences, require at least two line appearance keys. |
| Shared Line Appearance | Adds a shared line registration that can be shared by multiple devices. |
| User (BLF) | Press this key to quickly call or transfer a call to a coworker. The light allows you to see the presence status of another extension. |
| Speed Dial | Press this key to quickly call or transfer a call to a specific destination. This key can be used to contact external telephone numbers and other internal users. |
| Call Park | Allows you to park and retrieve an active call, based on your Call Park Queues and Dial Translations. |
| DTMF | Use mid-call DTMF features such as star codes. Note: This feature is not supported by Cisco and Poly IP devices. |
| Queue Toggle | Quickly toggle your queue availability status between Available and Unavailable. Note: Indicator lights may not work on some devices. |
| Timeframe Toggle | Toggle a specific time frame on and off for your user. This timeframe must be on the Answering Rules of the user of the phone. Indicator lights may activate on applicable devices. |
| Hot Desk | This version of Hot Desking is not recommended. If you would like to utilize a hot desk set up, please reach out to SpectrumVoIP’s Technical Support team. |
| Queue Login | Log into all call queues that you are assigned to. |
| Queue Logout | Log out of all call queues that you are assigned to. |
| Move My Call | Move a call that is currently active for your user to this device, such as from the SpectrumVoIP Mobile App, the StratusHUB desktop app, or the Stratus Web Phone. |
2. If needed, click the Lock icon to lock a line key to prevent it from being edited by Basic Users.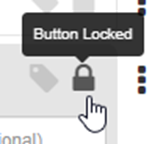
3. Add a Custom Label to change the name displayed by a line key.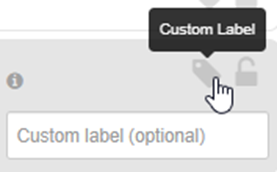
4. Use Phone Manager's additional options to do the following: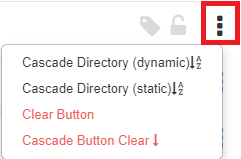
• Cascade Directory (dynamic)- Auto fills the button being assigned, and all subsequent buttons, with dynamic BLFs which update whenever the phone resyncs.
• Cascade Directory (static) - Auto fills the button being assigned, and all subsequent buttons, with static BLFs for the current directory entries.
• Clear Button - Deletes the button assignment and resets it to initial state.
• Cascade Button Clear - Deletes the button assignments for all subsequent buttons.
5. Reorder line keys by dragging the button ID circle and dropping it onto another spot.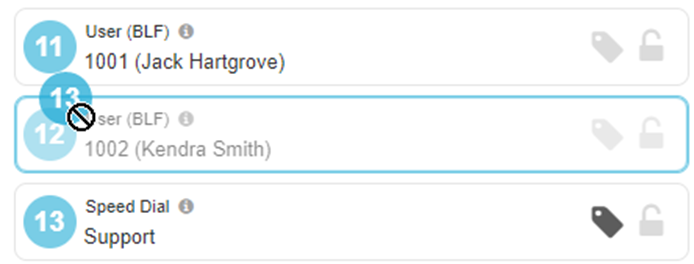
6. Zoom in or out when viewing the phone image. Click Reset to return the phone image to its default view.
7. Once done configuring the template, click either…
• Save - Save the change and have the phone apply any updates during its nightly update.
• Save as new template - Save the phone as a template to be applied to other phones.
• Save and resync - Save the phone and have the phone reboot itself to apply changes.
Update a Phone's Directory
1. Click the Directory button. or
or 
✔ Doing so will open up the Phone Manager Directory modal.
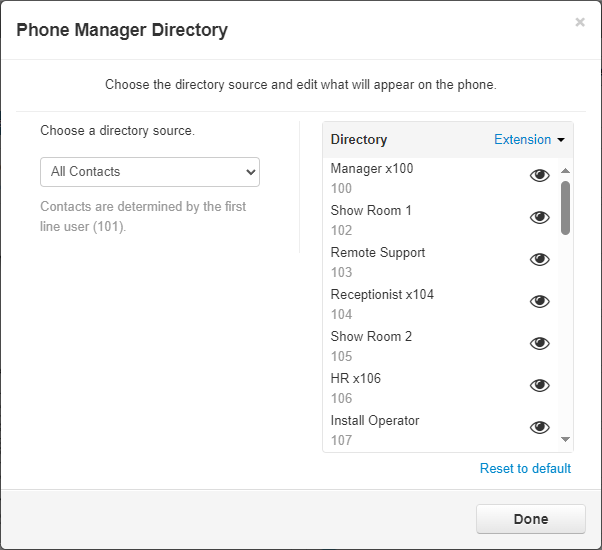
2. In the Choose a directory source section, select where the phone's Directory should pull contacts from.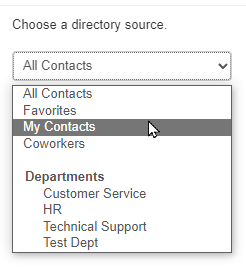
3. In the Directory section, click on to select if the Directory should sort contacts by Extension, Last Name, or First Name.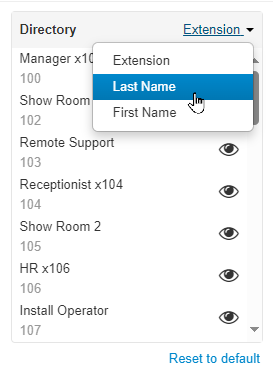
Quick Tip: Updating this will change how any BLFs that are added using the Cascade Directory (static) and Cascade Directory (dynamic) options are sorted.
4. Click the Eye icon next to a contact to hide that user from the phone's Directory.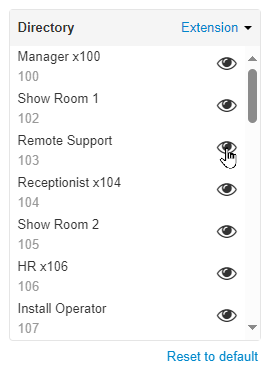
Quick Tip: Click the Eye icon again to show that contact in the phone's Directory.
To remove all of the changes you have made to the Directory, click Reset to default.
5. Click the Done button once you are done with your changes.
Manage Templates
When there are a large number of phones in your Inventory, it may not be practical to edit the phones' configurations one-by-one. To make editing multiple phones easier, Configuration Templates can be used.
To view and edit a configuration template…
- #0E68CA
✔ Doing so will pull up the Phone Manager Configuration Templates menu.

Add a New Template

1. In the Template Name box, type in an identifiable name for the new template.
2. In the Description box, type any notes about the template.
3. Use the Model dropdown to select the phone model this template will be for.
DANGER: The Model type of the template will need to match the model of the phones using this template.
Be sure to keep this in mind when creating a new Template for existing devices. The template will not be a selectable option if the Model of the phone does not match the model of the template.
4. Click the Add button. ![]()
Copy a Template

1. Click the Search icon  and type the name of an existing template or phone model.
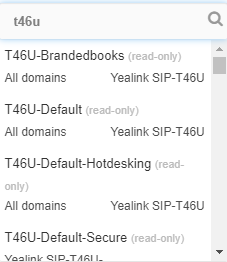
2. Select a template from the list. 
3. Click the Copy button to create a version of this template that you can edit. 
✔ Clicking Copy will pull up Phone Manager with the template's configurations displayed. 
4. Click the Edit icon  next to the template's name to rename the template to make the template easier to find later.
5. Click the second Edit icon to adjust the description of the template.
6. Customize this template to match what is needed for phones using this template.
7. Click the Save button.
Customize a Template
When looking at a newly added or copied template, there are several ways you can personalize the template using the Phone Manager tool.
You can…
1. Click the Directory button and use the Directory Source drop-down to select what contacts should be shown. or 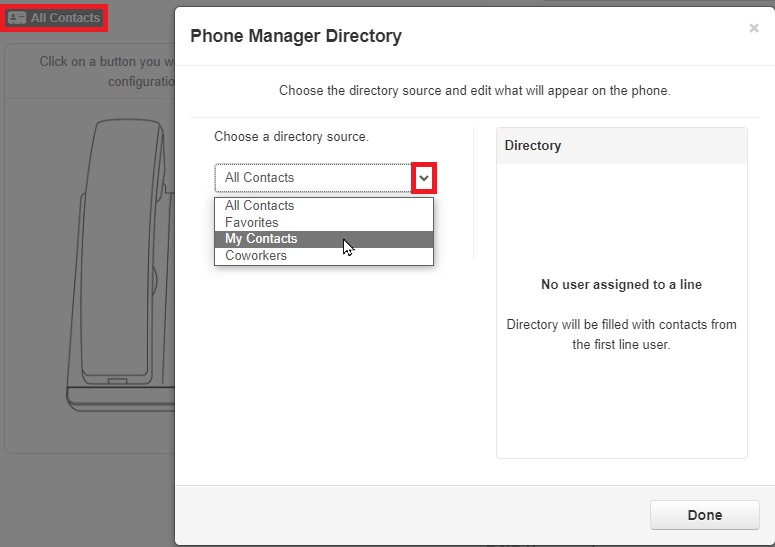
2. Add Features to your line keys to match your preferences.
Line Key Feature Options
| Feature | Description |
|---|---|
| Line Appearance | Adds a line registration to the device and acts as a channel of communication that allows for multiple calls to be handled at once. Some features, such as transfers and conferences, require at least two line appearance keys. |
| Shared Line Appearance | Adds a shared line registration that can be shared by multiple devices. |
| User (BLF) | Press this key to quickly call or transfer a call to a coworker. The light allows you to see the presence status of another extension. |
| Speed Dial | Press this key to quickly call or transfer a call to a specific destination. This key can be used to contact external telephone numbers and other internal users. |
| Call Park | Allows you to park and retrieve an active call, based on your Call Park Queues and Dial Translations. |
| DTMF | Use mid-call DTMF features such as star codes. Note: This feature is not supported by Cisco and Poly IP devices. |
| Queue Toggle | Quickly toggle your queue availability status between Available and Unavailable. Note: Indicator lights may not work on some devices. |
| Timeframe Toggle | Toggle a specific time frame on and off for your user. This timeframe must be on the Answering Rules of the user of the phone. Indicator lights may activate on applicable devices. |
| Hot Desk | This version of Hot Desking is not recommended. If you would like to utilize a hot desk set up, please reach out to SpectrumVoIP’s Technical Support team. |
| Queue Login | Log into all call queues that you are assigned to. |
| Queue Logout | Log out of all call queues that you are assigned to. |
| Move My Call | Move a call that is currently active for your user to this device, such as from the SpectrumVoIP Mobile App, the StratusHUB desktop app, or the Stratus Web Phone. |
3. Lock line keys to prevent users from editing certain buttons while viewing their own phones.
4. Add a Custom Label to name a line key.
5. Use Phone Manager's additional options.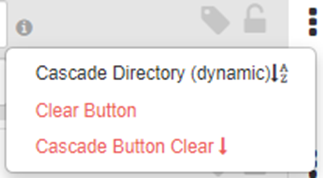
• Cascade Directory (static) - Auto fills the button being assigned, and all subsequent buttons, with static BLFs for the current directory entries.
• Cascade Directory (dynamic)- Auto fills the button being assigned, and all subsequent buttons, with dynamic BLFs which update whenever the phone resyncs.
• Clear Button - Deletes the button assignment and resets it to initial state.
• Cascade button clear - Deletes the button assignments for all subsequent buttons.
6. Reorder line keys by dragging the button ID circle and dropping it onto another spot.
7. Zoom in or out when viewing the phone image. Click Reset to return the phone image to its default view.
8. Once done configuring the template, click Save (for new templates) or Save as new template (for copied templates).
Apply a Template
After a template has been made, it can be applied to phones on the account. This can be done to a single phone or multiple phones at a time.
Apply a Template to a Single Device
1. In the Phone Manager tab, click the Phone Manager icon next to the phone needing the change.
2. Click the Templates button and select a template from the dropdown.
3. Click the Apply Template button. ![]()
✔ You should see the buttons appear on the Phone Manager screen.
4. Click Save and Resync to apply the template to the device.
Quick Tip: Alternatively, you can click the Save button to apply the changes in the portal and have the phone update later during its nightly update.
Apply a Template to Multiple Devices
Once you have created/edited a template, you can apply it to multiple phones.
To apply a template…
1. In the Phone Hardware tab, click the check boxes to select the devices you wish to apply the template to.
2. Click the Phone Manager drop-down arrow and select Apply a template to selected Devices.
✔ The Bulk Edit Phone Manger Templates menu will appear.
3. In the Configuration Templates section, search for and select the template.
4. Select Apply and Resync to apply the changes to both the portal and the phones.
Quick Tip: Alternatively, you can click the Apply button to apply the changes in the portal and have the phones update later during their nightly update.
Call History
On the Call History page, you can view all of the calls your users have been handling.

To adjust the different columns of information that you can view in the Call History table, click the Columns button to select the different columns to show/hide.
In the Call History page's chart, you can reference different columns that contain different details and data from each call.
| Column Name | Description |
|---|---|
| From Name | This is the FROM name provided by the caller's carrier. |
| From | This is the phone number provided by the caller's carrier. |
| Dialed | The phone number, extension number, or series of digits dialed to place a call. |
| To |
The destination the call connected to.
|
| Date | The date the call was placed. |
| Duration | The time elapsed (minutes:seconds) during a call. |
| Disposition | If you have had Technical Support add selectable Dispositions for your account, you can view the Disposition that a user has assigned to that call log using the Notes |
| Topics |
If call recording with transcription has been enabled for a user, call queue, or your whole account, their recorded calls will be analyzed to find the three biggest discussion topics.
|
|
Quick Links
or
|
• Block / Unblock - Block or unblock a phone number that has called you. • Download - If call recording has been enabled, download the call's recording to your PC. • Listen - If the call was recorded, open an audio player on screen to listen to the recording. If you have call recording transcriptions enabled, this icon will pull up the Call Transcript menu. • Call Flow - View a step-by-step list of the different functions and users a call connected to before the call was ended. This toll will also show information about calls that ended unexpectedly. • Add Notes - Add notes about the purpose and outcome of a call. If you have had Dispositions added to your account, you can also select and mark a call log with a Disposition and Reason. |

Note: Users with the scope of Basic User will only be able to view their own call history.
Office Managers will be able to view only their own call history under their account while also being able to view the entire Domain's Call History by first clicking on the Manage Organization link at the top of the web page.
Filter the Call History
Using the Filters button, you can filter your call history and view only the events of interest to you.
-
In the Call History page, click the Filters button.
✔ Doing so will make the Call History Filters modal appear.

- Complete the fields using this table:
| Setting | Description |
|---|---|
| Date Range |
Select the From and To dates for the events you want to view. The maximum From-To range is 31 days. The furthest back you can search within the Stratus Web Portal's Call History is 6 months. To view call data records from beyond 6 months, you can access the CDR Archives. |
| User | Enter the name or extension you want to view. |
| Caller Number | Enter the caller number you want to view |
| Dialed Number | Enter the dialed number you want to view |
| Call Type | Enter the type of call you want to view. Choices are: • Inbound • Outbound • Missed |
-
Click the Filter button.

✔ The Call History page will update to only show entries that match your criteria.
If no events match your criteria, a message will inform you that there are no matches to your
filter.
Block Phone Numbers
With the Stratus v42 update, you can use the Block ![]() icon and the Blocked Numbers menu on the Call History page to block phone numbers from calling your business and your users. Use the module below to explore the different ways you can block numbers from the Call History page.
icon and the Blocked Numbers menu on the Call History page to block phone numbers from calling your business and your users. Use the module below to explore the different ways you can block numbers from the Call History page.
Block a Recent Caller
If a user has recently spoken to someone that you need to block, you can block their phone number using the Block ![]() icon found on their call log.
icon found on their call log.
1. Filter and scroll to find the call of the person that needs to be blocked and click the Block ![]() icon.
icon.
2. On the confirmation message, click the Yes button.
✔ Users will now see a Blocked number icon next to the phone number in their own Call History page.
For any future calls users receive from the blocked number, the call will automatically be rejected, and a Blocked tag will appear in the Duration column for that call.![]()
Block Multiple Numbers
With the Stratus v42 update, there is now a new Blocked Numbers tool that can be used to block malicious phone numbers.
1. Click the Blocked Numbers button. ![]()
2. In the Blocked Numbers menu, type the phone number that needs to be blocked.
3. Click the Add button to add this phone number to your Blocked Numbers list. ![]()
✔ You should see a confirmation message that the phone number was added to the list.![]()
You should also see the phone number listed alongside any other blocked numbers.
4. Repeat steps 2 and 3 for additional phone numbers that need to be blocked.
✔ Now if any users receive calls from the phone numbers you have blocked, the calls will automatically be rejected, and a Blocked tag will appear in the Duration column for those calls.
![]()
Import a Spreadsheet
If you have a list of phone numbers that should be blocked, you can download and fill in a spreadsheet of those numbers. This spreadsheet can be imported so that the list of phone numbers gets added all at once.
1. Click the Blocked Numbers button. ![]()
2. In the Blocked Numbers menu, click the Import button. ![]()
3. In the Import From File menu, click the Download Template button.
✔ You should see a .CSV spreadsheet download through your browser.
4. Open the downloaded template spreadsheet.
5. Type a phone number into the cells of column A.
6. When you have typed in your phone numbers, save the spreadsheet by pressing CTRL + S or clicking the Save icon.
7. Back in the Import From File menu, click the Browse button and select the updated template.
8. Click the Upload button. ![]()
✔ You should see a confirmation message that tells you how many blocked phone numbers were imported. It will also state if any of the phone numbers were duplicates.![]()
You should also see the phone numbers from the spreadsheet listed in the Blocked Numbers menu.
Now if any of your users receive any calls from the phone numbers you have blocked, the calls will automatically be rejected, and a Blocked tag will appear in the Duration column for those calls![]()
Unblock a Phone Number
If you have added a phone number to your Call History's Blocked Number list, you can remove it at any time. Removing a phone number from the Blocked Number list will unblock that caller so that you and your users can start receiving calls from that phone number again.
To allow a previously blocked number to call your organization…
- On the Call History page, click the Blocked Numbers button.
- In the Blocked Numbers menu, click the Delete icon next to the phone number that needs to be unblocked.
Quick Tip: Alternatively, you can click the Unblock
icon next to the log of a recently received call from a blocked phone number. ✔ You should see a confirmation message that the phone number has been removed from the Blocked Numbers list.
- Repeat step 2 for each phone number that needs to be unblocked.
Export Your Call History
You can export the call history as a spreadsheet in a CSV format. From there, you can open the information in Microsoft Excel or other spreadsheet software for further manipulation.
To download a spreadsheet of the call logs shown in the table, click the Export button.
Doing so will download a .CSV spreadsheet that you can view, edit, and store as needed.

Schedule Call History Exports
To schedule a call history export…
- In the Call History page, click the Scheduled Exports button.

✔ Doing so will pull up the Scheduled Exports page where previously created export tasks can be edited or downloaded.

- In the Scheduled Exports page, click the New Export button.

✔ The Schedule New Export modal will appear.
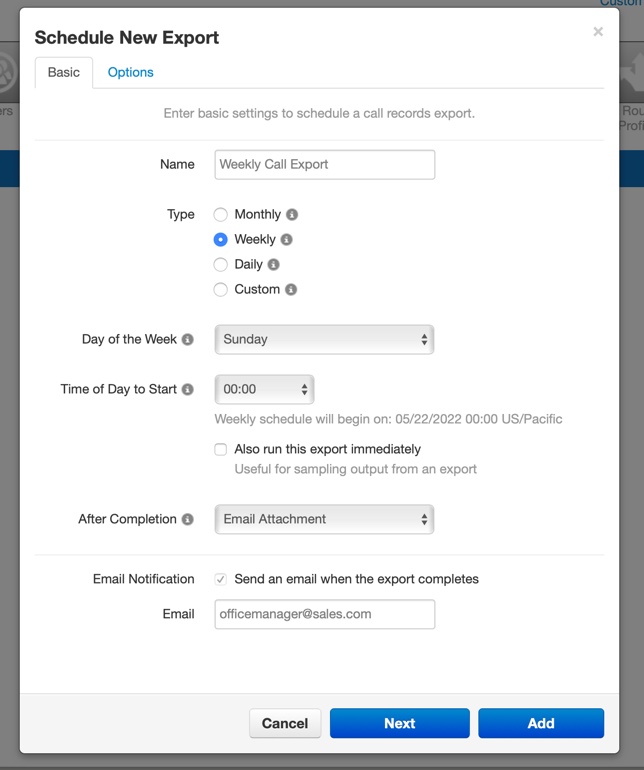
- Fill in the following field values:

| Field | Description |
|---|---|
| Name |
Type a descriptive, identifiable name for this export of call logs. The name can be no more than 64 characters long. No special characters other than a hyphen, space, or underscore. |
| Type |
• Monthly will send a report on the first of every month. • Weekly will send a report for the last 7 days, including the current day. For instance, select "weekly" and then "Sunday" to receive data from the previous work week (Monday - Sunday). • Daily will send a report at the same time every day. • Customize opens a wide range of capture periods. |
| After Completion |
After scheduling the export, choose where the data should be exported to. You can choose from the following options: • Do Nothing - Download the data to the portal. • Email Attachment - Have an email with an attached spreadsheet of the call logs sent to the email address entered in the Email box below. • Upload via FTP If you have a server that supports FTP (File Transfer Protocol) uploads, type the server's information to have these call logs uploaded directly to that server. • Upload via SFTP - If you have a server that supports SFTP (Secure File Transfer Protocol) uploads, type the server's information to have these call logs uploaded directly to that server. |
| Email Notification |
This option will send an email notification to the email address entered in the Email box when an export is ready to be reviewed/downloaded. If you have selected Email Attachment for the After Completion option, then the email will include an attached spreadsheet of the call logs. This option will be automatically enabled if the After Completion option is set as Email Attachment. |
- Visit the Options tab to configure how and what data should be shown in the export.

Formatted Export Examples
Basic Export
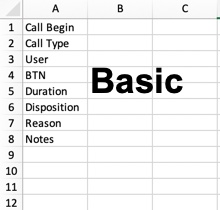

Advanced Export

Standard Export
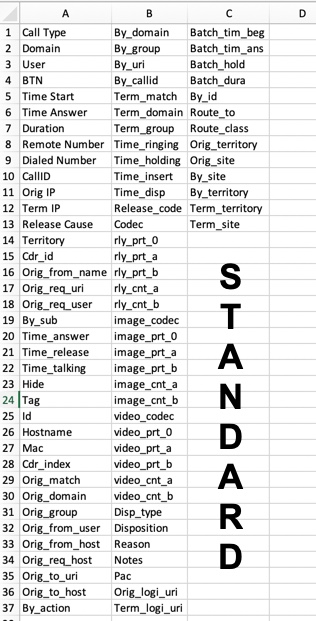
✔ Once you have added a Scheduled Export, it will be listed alongside any others that have been added.

These listings will include columns that show the format of the spreadsheet that will be shown/sent, the period of time that will be recorded for the exports, and the date the next export will be available.
Each scheduled export will have icons that can be used to edit the settings of the export, download the export's spreadsheet, and delete the scheduled export completely.
![]()
CDR Archives
The CDR Achieves allow you to view call data reports past 6 months.
To access these data reports, click the CDR Archives button.![]()
A list of call history data will appear. Each report can be downloaded as a CSV spreadsheet.

Call Recordings
Using the Stratus web portal and our products, you and your users can record calls. To be able to record calls, call recordings have to be enabled.
Enable Call Recording
Call recording can be enabled for your whole business, a specific user, or a call queue through the Stratus web portal.
WARNING: Some countries and states impose laws and regulations on recording calls.
We recommend requesting consent from call participants before recording any call. It may also be a good idea to have a message set up for your organization that warns callers that their call may be recorded.
Please consult with the regulatory experts in your company before using this feature. To implement any warnings for your callers, contact our technical support team.
For All Users
If you would like for every call for all of your users to be recorded, our technical support team can enable this for you.
To have call recording enabled for your whole business, please contact our technical support team.
For a Call Queue
As a Stratus admin user (i.e., Office Manager, Site Manager, or Call Center Supervisor), you can set your call queues to record all calls that come through them.
To do this…
1. Navigate to the Call Queues page.
2. Click the Edit Queue  icon next to the call queue that should record calls.
3. On the Basic tab, use the Record Calls drop-down to select Yes.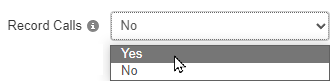
4. Click the Save button.
✔ Now every call that goes through this call queue will be recorded.
WARNING: This will only enable call recordings for calls originating through that specific call queue.
Recorded direct calls to users will need to be enabled through the user's Profile settings.
For a Specific User
WARNING: In order to see the Record User's Call option, a member of our team will need to make changes to your portal.
To have this feature shown, please contact our technical support team.
If you have had our team show the Record User's Calls option, you can enable a user or yourself to have calls recorded using the user's Profile settings.
1. Navigate to the Users page.
2. Click the name of the user that needs call recording enabled.
3. In the Profile tab of their settings, use the Record User's Calls drop-down to select Yes.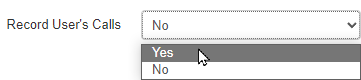
4. Click the Save button.
Recording Warnings
Since recording consent laws differ for different states and countries, it is imperative that your users obtain consent to record calls at the beginning of each call.
One way of obtaining consent is immediately telling a caller that their call will be recorded. Callers that do not consent can then let your agent know before following any protocols your team has in place for this scenario.
Another way to obtain consent is having a recording warning play that warns callers that their call will be recorded. Callers that do not consent can either tell the agent they speak to or hang up the call.
For a Call Queue
Step 1: Adjust the Call Queue's Settings
In order for your callers to hear the recording warning when it is created, your call queue will need to be set to have an introduction message played before it rings any agents.
To set a call queue to play any intro messages before routing any callers…
1. Navigate to the Call Queues page.![]()
2. Click the Edit Queue icon next to the call queue that will play a recording warning.
3. Switch to the Pre Queue Options tab.
4. Use the Require into MOH drop-down to select Yes.
5. Click the Save button. ![]()
Step 2: Create the Recording Warning
Now that the call queue that records calls has been set to play intro messages, an introduction message can be created for the call queue that will warn callers that their call will be recorded.
To create a custom recording warning message to have played for callers as soon as they enter a call queue…
1. Across from the call queue needing this change, click the Edit MOH  icon.
icon.
2. Do one of the following to add an Introduction message:
• If there are not any existing messages, click the Add Introduction button.
• If messages have already been added, click the Add Intro Message ![]() icon.
icon.
4. Use either of these options to add in a recording warning message:
– Text-to-Speech: Use the text-to-speech option to type in a message that warns callers that their call will be recorded and select an automated voice that will read out what is typed.
Once the message has been typed out, click the Save button.
– Upload: Using the upload option, you can upload a converted audio file and give the message a name.
WARNING: The audio file should be a 16-bit WAV (8Khz, Mono, 16-Bit PCM) file.
DANGER: Not converting the music file can cause catastrophic issues for your phone system.
Convert an Audio File Using G711.org
To convert the audio file, you can use a free site named g711.org. To do so…
1. Visit g711.org.
2. In the Source File section, click the Browse button.
3. Select the audio file to be converted.
4. In the Output Format section, ensure that the Standard Definition option is selected.
5.Click the Submit button.
✔ Doing so will pull up a new page with a link.
6. Right-click the link and select Save link as.
7. In the File name box, type a name for the converted audio file and then click the Save button.
Once the file has been selected on your PC, click the Upload button.
– Record: The record option allows you to type in a phone number or extension number for the phone system to send a call. 
Click the Call button to send a call to the number. When the call is answered, it will record whatever is said to it.
✔ You should now see the new recording warning message with the name “Introduction” listed, along with any other created messages.
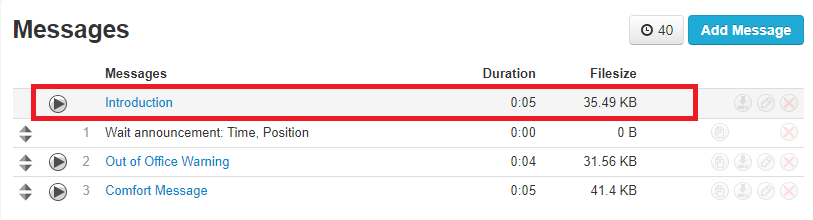
Now callers will hear a warning that their call will be recorded as they wait for their call to be answered.
WARNING: It is still recommended to have agents at the beginning of each call tell their callers that their call may/will be recorded.
For a Specific User
As a Stratus admin, you have the ability to add messages to a user's music on hold. One of these messages that can be added is a Recording Warning that lets callers know that their call is being recorded.
To add a recording warning for callers to hear when a specific user places them on hold…
1. Navigate to the Music on Hold page.![]()
2. Use the search bar to find and select a user that needs a recording warning.
3. Do one of the following to add an Introduction message:
• If there are not any existing messages, click the Add Introduction button.
• If messages have already been added, click the Add Intro Message ![]() icon.
icon.
4. Use either of these options to add in a recording warning message:
– Text-to-Speech: Use the text-to-speech option to type in a message that warns callers that their call will be recorded and select an automated voice that will read out what is typed.
Once the message has been typed out, click the Save button.
– Upload: Using the upload option, you can upload a converted audio file and give the message a name.
WARNING: The audio file should be a 16-bit WAV (8Khz, Mono, 16-Bit PCM) file.
DANGER: Not converting the music file can cause catastrophic issues for your phone system.
Convert an Audio File Using G711.org
To convert the audio file, you can use a free site named g711.org. To do so…
1. Visit g711.org.
2. In the Source File section, click the Browse button.
3. Select the audio file to be converted.
4. In the Output Format section, ensure that the Standard Definition option is selected.
5.Click the Submit button.
✔ Doing so will pull up a new page with a link.
6. Right-click the link and select Save link as.
7. In the File name box, type a name for the converted audio file and then click the Save button.
Once the file has been selected on your PC, click the Upload button.
– Record: The record option allows you to type in a phone number or extension number for the phone system to send a call.
Click the Call button to send a call to the number. When the call is answered, it will record whatever is said to it.
✔ You should now see the new recording warning message with the name “Introduction” listed, along with any other created messages.

Now callers will hear a recording warning play when they are placed on hold by this user.
WARNING: It is still recommended to have this user tell callers that their call may/will be recorded at the beginning of each call.
For Your Whole Business
As a Stratus admin, you have the ability to add messages to the domain's music on hold. One of these messages that can be added is a Recording Warning that lets callers know that their call is being recorded.
To add a recording warning for callers to hear when any user places them on hold…
1. Navigate to the Music on Hold page.![]()
2. Click the Domain option.
3. Do one of the following to add an Introduction message:
• If there are not any existing messages, click the Add Introduction button.
• If messages have already been added, click the Add Intro Message ![]() icon.
icon.
4. Use either of these options to add in a recording warning message:
– Text-to-Speech: Use the text-to-speech option to type in a message that warns callers that their call will be recorded and select an automated voice that will read out what is typed.
Once the message has been typed out, click the Save button.
– Upload: Using the upload option, you can upload a converted audio file and give the message a name.
WARNING: The audio file should be a 16-bit WAV (8Khz, Mono, 16-Bit PCM) file.
DANGER: Not converting the music file can cause catastrophic issues for your phone system.
Convert an Audio File Using G711.org
To convert the audio file, you can use a free site named g711.org. To do so…
1. Visit g711.org.
2. In the Source File section, click the Browse button.
3. Select the audio file to be converted.
4. In the Output Format section, ensure that the Standard Definition option is selected.
5.Click the Submit button.
✔ Doing so will pull up a new page with a link.
6. Right-click the link and select Save link as.
7. In the File name box, type a name for the converted audio file and then click the Save button.
Once the file has been selected on your PC, click the Upload button.
– Record: The record option allows you to type in a phone number or extension number for the phone system to send a call.
Click the Call button to send a call to the number. When the call is answered, it will record whatever is said to it.
✔ You should now see the new recording warning message with the name “Introduction” listed, along with any other created messages.
Now callers will hear a recording warning play when they are placed on hold by any user in your domain.
WARNING: It is still recommended to have users tell callers that their call may/will be recorded at the beginning of their calls.
For Yourself
As a basic Stratus user, you have the ability to add and edit the messages that are played when you place callers on hold.
To add in a recording warning for your callers to hear when you place them on hold…
1. Navigate to your Music on Hold page.![]()
2. Do one of the following to add an Introduction message:
• If there are not any existing messages, click the Add Introduction button.
• If messages have already been added, click the Add Intro Message ![]() icon.
icon.
3. Use either of these options to add in a recording warning message:
– Text-to-Speech: Use the text-to-speech option to type in a message that warns callers that their call will be recorded and select an automated voice that will read out what is typed.
Once the message has been typed out, click the Save button.
– Upload: Using the upload option, you can upload a converted audio file and give the message a name.
WARNING: The audio file should be a 16-bit WAV (8Khz, Mono, 16-Bit PCM) file.
DANGER: Not converting the music file can cause catastrophic issues for your phone system.
Convert an Audio File Using G711.org
To convert the audio file, you can use a free site named g711.org. To do so…
1. Visit g711.org.
2. In the Source File section, click the Browse button.
3. Select the audio file to be converted.
4. In the Output Format section, ensure that the Standard Definition option is selected.
5.Click the Submit button.
✔ Doing so will pull up a new page with a link.
6. Right-click the link and select Save link as.
7. In the File name box, type a name for the converted audio file and then click the Save button.
Once the file has been selected on your PC, click the Upload button.
– Record: The record option allows you to type in a phone number or extension number for the phone system to send a call.
Click the Call button to send a call to the number. When the call is answered, it will record whatever is said to it.
✔ You should now see the new recording warning message with the name “Introduction” listed, along with any other created messages.
Now callers will hear a recording warning play when they are placed on hold.
WARNING: It is still recommended to tell callers that their call may/will be recorded at the beginning of a call!
Record Calls
Now that call recordings have been enabled, your users/agents can record their calls as needed.
Calls can be recorded by users on their desk phones, in the Stratus web portal, on their SpectrumVoIP Desktop App, and on their Stratus Mobile App.
REMINDER: Some countries and states impose laws and regulations on recording calls.
We recommend requesting consent from call participants before recording any call. It may also be a good idea to have a message set up for your organization that warns callers that their call may be recorded.
Please consult with the regulatory experts in your company before using this feature.
Note: To learn more about our policies regarding using the call recording features of our products, please read this article.
Dial a Code
Feature codes can be dialed to start and stop recordings of calls.
| Feature Code | Action | Example |
|---|---|---|
| *98 | START Recording Call | Dial *98 during an active call to start recording. It is recommended to get consent from a caller before recording a call. |
| *99 | STOP Recording Call | Dial *99 to stop recording an active call. |
Stratus Call Popups
While you are on an active call in the web portal, you can click the Record  button to toggle the recording of this call on and off.

StratusHUB
The SpectrumVoIP Desktop App will have buttons available that you can use to control how a call is recorded during an active call.
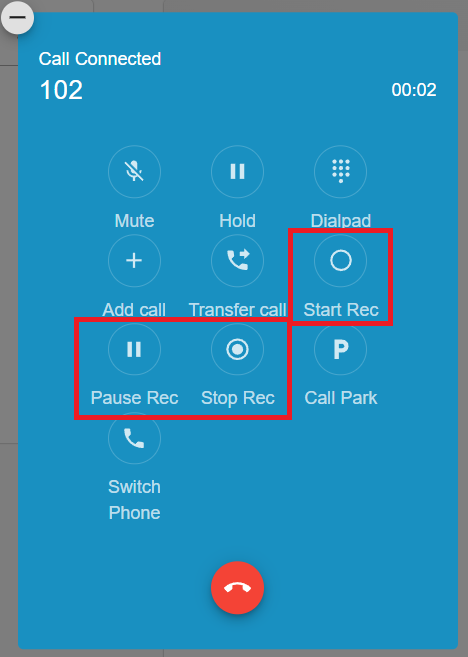
Start Recording a Call
Click Start Rec to start recording a call.
When clicked, a REC notice  will appear above the duration of the call.
Pause and Resume a Recording
Click Pause Rec to pause your recording of the call.
The REC notice will update to show a pause symbol:
Click Resume Rec to continue recording the call.
Stop Recording a Call
Click Stop Rec to stop recording a call.
The REC notice  will disappear:
Stratus Mobile App
To start recording an active call on your Stratus mobile app, tap the record  button on the call screen.
Touch the record icon again to stop the recording.
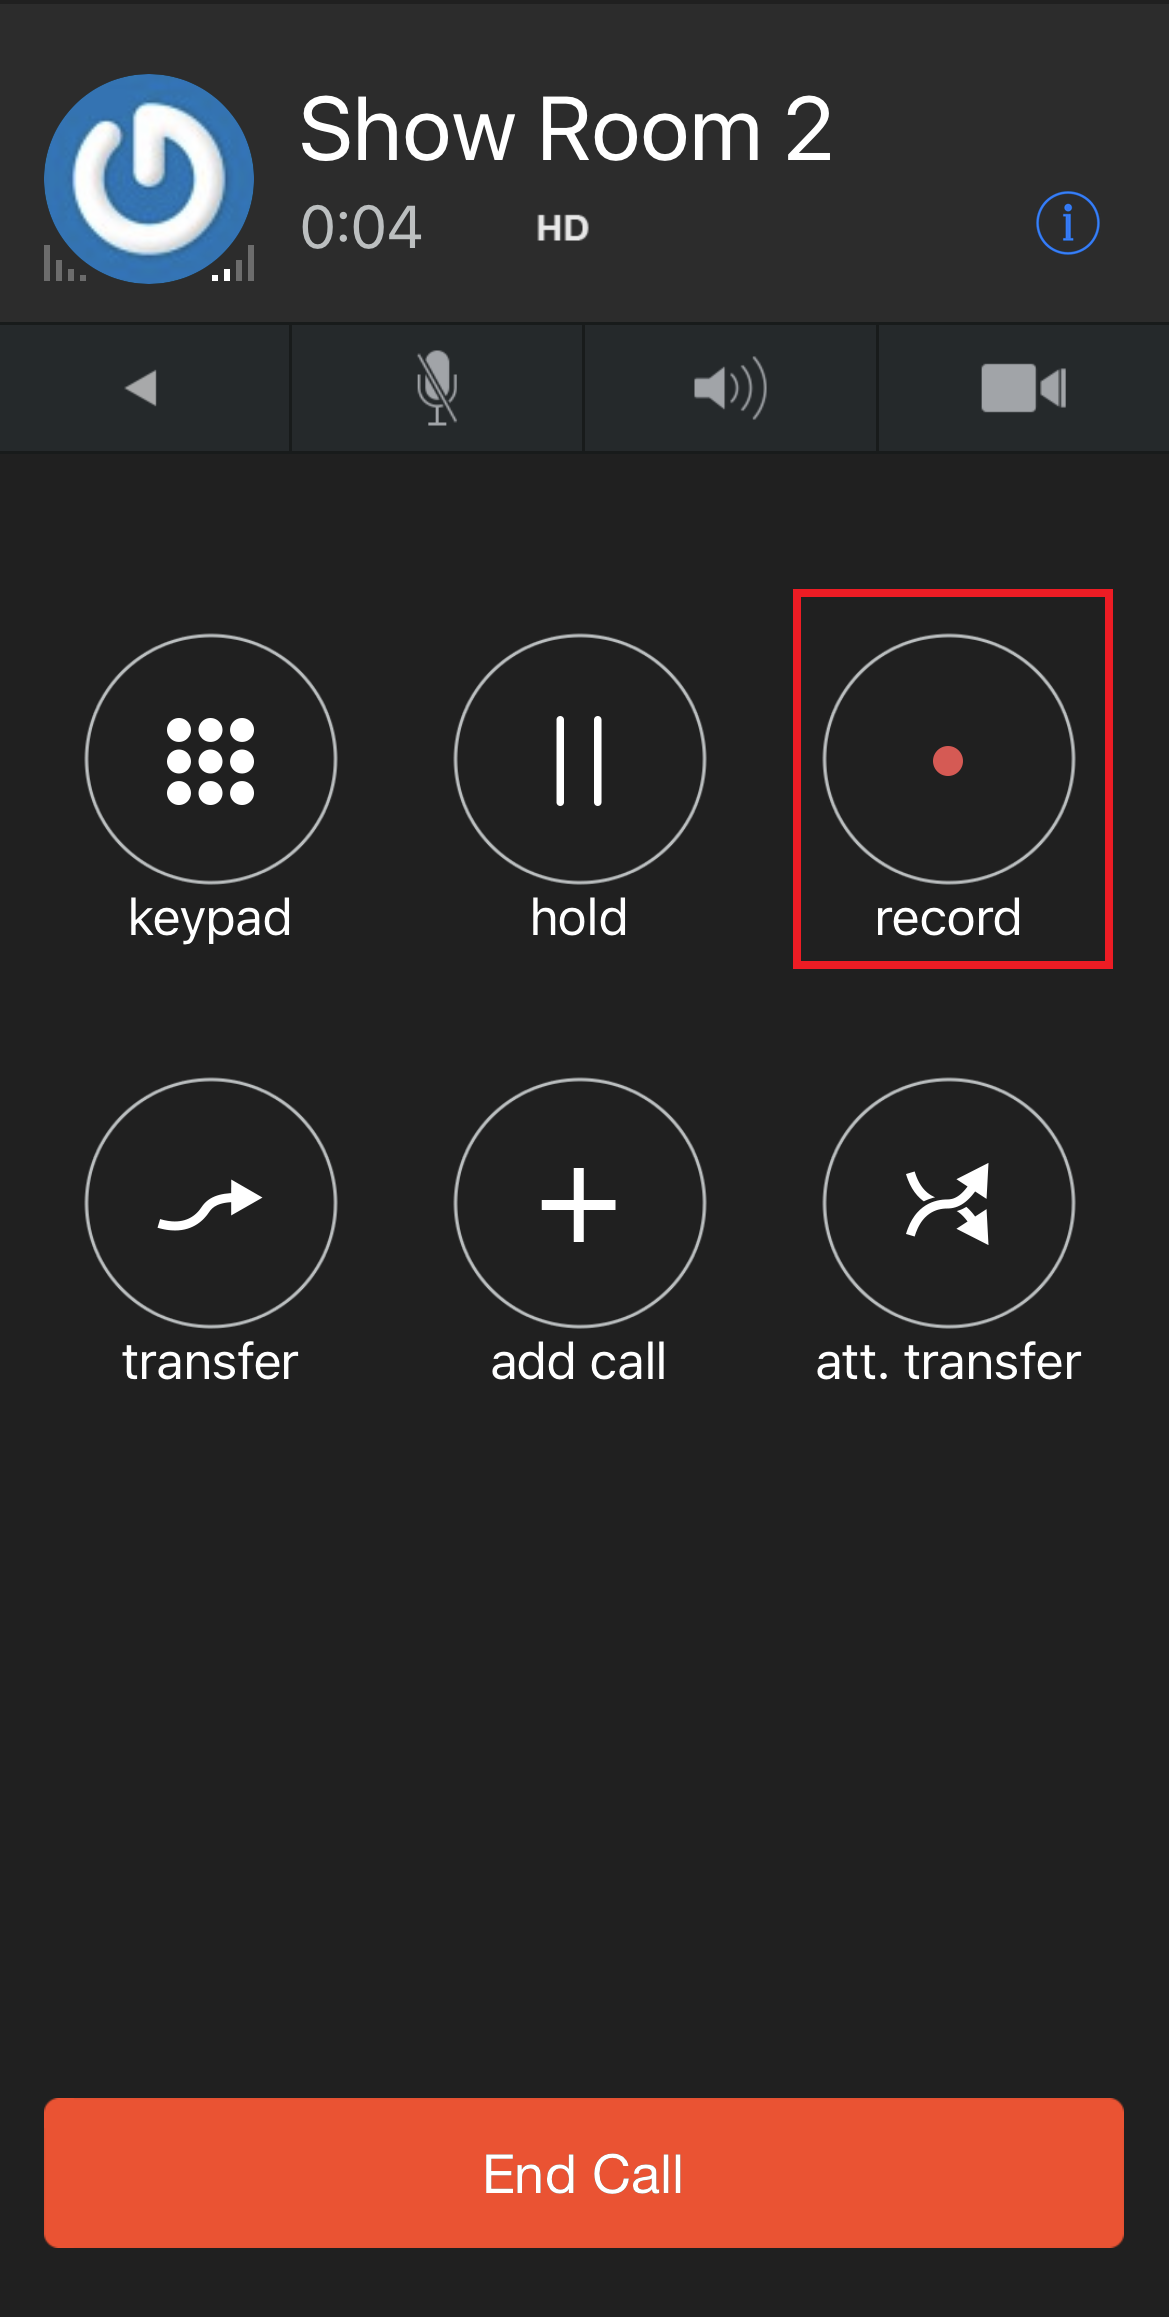
Lock Recordings to Prevent Deletion
When an auto-delete recording duration is set, the recordings are deleted once expired. However, by enabling Prevent auto-delete you can lock some important recordings to exclude them from being deleted.
To lock the recording from being deleted:
1. Touch the History  tab.
tab.
2. Touch the Information  icon beside the name or phone number you want to retrieve the recording.
3. On that recording entry, touch Settings  → Prevent Deletion.
✔ A lock (1) will display on the entry to indicate it is excluded from being deleted.
Quick Tip: To unlock the recording, tap Settings (2) → Allow Deletion (3).
Access Call Recordings
If a user has recorded a call, that call recording can be pulled and downloaded for record keeping purposes.
These call recordings can be accessed through the Call History page of the Stratus web portal, the SpectrumVoIP Desktop App, and the Stratus Mobile App.
The Stratus Web Portal
IMPORTANT: If call recordings are enabled, SpectrumVoIP will host the recordings in the web portal for 30 days. After that time has passed, the call recording will no longer be available to listen to or download. This time can be extended at an additional cost.
If you would like to extend your call storage time for your account, you can speak with our Billing team by calling (469) 429-2500 and selecting Option 2 or emailing billing@spectrumvoip.com.
Another alternative is to have all call recordings pushed to a virtual drive as seen in this guide.
If you would like to push call recordings to cloud storage or a virtual drive, contact our technical support team by calling (469) 429-2500 and selecting Option 4, emailing support@spectrumvoip.com, or sending in a ticket using our knowledge base or our support website.
Quick Tip: It is possible to have call recordings pushed to a virtual drive.
To learn more about pushing call recordings to a virtual storage medium, check out this guide.
You can also contact our support team to implement this change.
1. Navigate to the Call History page. ![]()
NOTE: Your call history view may differ depending on your User Scope.
For example, users set as Office Mangers will be able to view all call recordings on the domain, while users set as Basic User will only be able to view their own calls.
2. The Call History can be filtered by different parameters such as phone number, user, or date/time. Click the Filter button to filter what calls are shown. 
3. In the right-hand menu of the call history listing, there will be a recording icon to listen to the call and a download icon to download the recording. Your selection of buttons may differ depending on your user scope. 
– If a Call does not have a recording, the icon will be grayed out and will display No Recording when hovering over it; as shown below.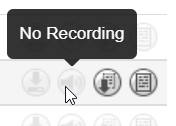
Note: If you see No Recording when call recordings should be enabled, please contact our technical support team to ensure your account has call recordings enabled.
– If a call has a recording that is still being processed, you might see Pending Conversation; as shown below. For these, simply wait for the call to be processed and it will eventually become available to play and download. 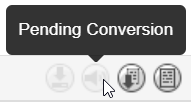
Quick Tip: Call recordings can take 30 minutes or longer to show in the Call History page.
It is recommended to wait an hour and then refresh or visit the Call History page again.
4. When a recording is available, the icons will be active and hovering over it will display Download or Listen; as shown below.
– Clicking the Download ![]() icon will save the audio file to your computer:
icon will save the audio file to your computer: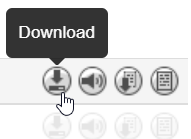
– Clicking the Listen ![]() icon allows you to play the recording.
icon allows you to play the recording. 
If recording transcriptons have been enabled, the Listen icon will pull up the
– There are also options available (volume control and playback speed) for adjusting how the music is played back.
The StratusHUB Desktop App
When you have a call that was recorded, you can listen to and download that call using the desktop app.
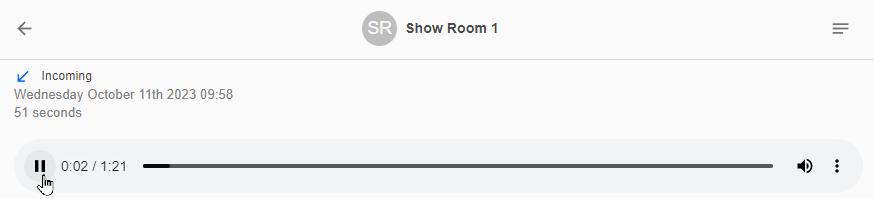
To download the call's recording…
1. Select the call that was recorded.
2. Click the Options icon.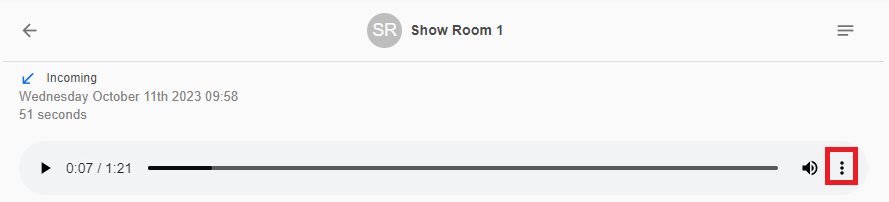
3. Select Download to download an audio file of the call to your PC.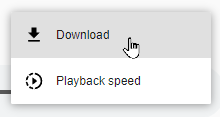
✔ You should see the call's audio file downloaded to your PC.
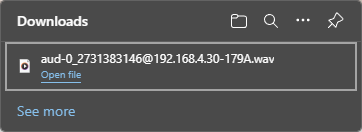
The Stratus Mobile App
Once the calls are recorded, you can retrieve them in the History tab.
To access a call recording:
1. Touch the History tab.
2. Touch the Information icon beside the name or phone number you want to retrieve the recording.
Quick Tip: The Recording  icon shows that the call log has recording(s).
3.Touch the Play Record  (1) button to listen to the recording.
4. Touch the Pause  button to pause the recording.
5. To manage the recording, touch the Settings (2) icon on that recording entry.
✔ A list of recording settings will display:
– Delete - Deletes the recording.
– Send By Email - Sends the recording to someone else using email.
– Share - Sends the recording to someone else using other applications.
– Prevent Deletion - Keeps the recording from being deleted by the auto-delete duration setting.
Music on Hold
If you have produced songs or have the right to use certain songs, you can add those music files into the music on hold for your domain, users, or call queues.
DANGER: Using copywritten songs and songs that you do not have permission to use can put you at risk legally.
Add Music
To add music files into the Music on Hold of a user or a call queue…
- Navigate to the Music on Hold page.

- Go to the Music on Hold page for your whole account (Domain), a specific call queue, or a specific user by doing one of the following:
For Your Whole Business
When your Stratus account is created, the system creates a new user named “Domain User”. This user houses all default greeting files and images for the domain.

"Domain User" Music on Hold Page Layout - Music and Messages panels with notes about the each panel's buttons and features. There is also an Enable Music on Hold toggle that can turn on or off the MoH for your whole organization.
Quick Tip: When there have not been any changes made to your domain's MoH, the Domain User's MoH page may look empty:

Whenever a domain has not had music on hold added, the domain will use our Jazz music by default. The music can be changed to either Country, Piano, Soft Rock, or Hip Hop.
To review these genres, check out this article.To have the genre of music played by your account changed, feel free to contact our technical support team.
For a Call Queue
Call queues can have music and messages that are different than what is being used by users. Each call queues has its own dedicated Music on Hold page for adding music and messages.

Queue Music on Hold Page Layout - Music and Messages panels with notes about the each panel's buttons and features. A call queue's Music on Hold page is accessible by either…
1. Clicking the name or Edit icon
 of a call queue in the MoH Inventory table.
2. Clicking the Edit MOH icon
 for a particular call queue on the Call Queues page.
Quick Tip: To filter for call queues in your Music on Hold page, you can use the Type dropdown to select Queue.
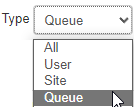
If you are not able to see the queue you need to adjust, deselect Hide Users Without Music on Hold.
• Clicking the Edit MOH icon
for a particular call queue on the Call Queues page.
For a User
Each individual user can have their own music and messages play when they place a caller on hold.
To view a user's music on hold, click the user's name or the Edit
icon next to the user.
Quick Tip: If you are not able to see any users listed on the Music on Hold page, deselect Hide Users Without Music on Hold.

- Click the Add Music button.

- Take a moment to confirm that the music file you would like to add is in a proper format for the phone system.
WARNING: The audio file should be a 16-bit WAV (8Khz, Mono, 16-Bit PCM) file.
Convert an Audio File Using G711.org
To convert the audio file, you can use a free site named g711.org. To do so…
1. Visit g711.org.
2. In the Source File section, click the Browse button.
3. Select the audio file to be converted.
4. In the Output Format section, ensure that the Standard Definition option is selected.
5.Click the Submit button.
✔ Doing so will pull up a new page with a link.
6. Right-click the link and select Save link as.
7. In the File name box, type a name for the converted audio file and then click the Save button.
DANGER: Not converting the music file can cause catastrophic issues for your phone system.
- In the Add Music menu, click the Browse button and select the formatted WAV audio file.

- In the Song Name box, give the song an identifiable name.
- Click the Upload button.

Create a Message
To add in a message for callers to listen to while waiting on hold for you…
- Click the Add Message button.

- In the Add Message menu, use one of the following options to add audio for the Message:
Text-to-Speech
Use the text-to-speech option to type out a message and select an automated voice that will read out what is typed.
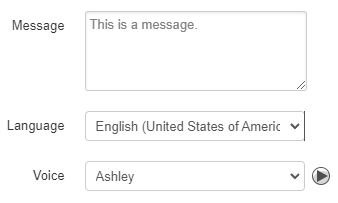
Once the message has been typed out, click the Save button.
Upload
Using the upload option, you can upload a converted audio file and give the message a name.

WARNING: The audio file should be a 16-bit WAV (8Khz, Mono, 16-Bit PCM) file.
Convert an Audio File Using G711.org
To convert the audio file, you can use a free site named g711.org. To do so…
1. Visit g711.org.
2. In the Source File section, click the Browse button.
3. Select the audio file to be converted.
4. In the Output Format section, ensure that the Standard Definition option is selected.
5.Click the Submit button.
✔ Doing so will pull up a new page with a link.
6. Right-click the link and select Save link as.
7. In the File name box, type a name for the converted audio file and then click the Save button.
DANGER: Not converting music files can cause catastrophic issues for your phone system.
Once the file has been selected on your PC, click the Upload button.
Record
The record option allows you to type in the phone number or extension number for the phone system to send a call.

Click the Call button to send a call to the number. When the call is answered, it will record whatever is said to it.
✔ You should now see the new Message added into the Messages section.

Play an Introduction Greeting
Similarly to a regular message, an Introduction Message can be added in. The introduction message is played before any of the music or messages play. This kind of message is useful for notices or warnings, such as that the call may be recorded.
To add in an Introduction Message…
- Do one of the following:
- If there are not any existing messages, click the Add Introduction button.
- If messages have already been added, click the Add Intro Message
 icon.
icon.
- If the Domain User has messages added that this user will need to use, click the Copy and modify messages from the organization hyperlink.

- If there are not any existing messages, click the Add Introduction button.
- Use either of these options to add in an Introduction Message:
-
Text-to-Speech: Use the text-to-speech option to type in a message and select an automated voice that will read out what is typed. Once the message has been typed out, click the Save button.

-
Upload: Using the upload option, you can upload a converted audio file and give the intro message a name. Once the file has been selected on your PC, click the Upload button.

-
Record: The record option allows you to type in the phone number or extension number for the phone system to send a call. Click the Call button to send a call to the number. When the call is answered, it will record whatever is said to it.

-
Text-to-Speech: Use the text-to-speech option to type in a message and select an automated voice that will read out what is typed. Once the message has been typed out, click the Save button.
✔ You should now see the new Introduction Message listed at the top of the Messages panel.

Manage Your Music and Messages
On the Music on Hold page, you can do the following to manage and adjust your music and messages:
Re-Order Music and Messages
Once messages and music have been added in, the lists of music and messages can be re-ordered to prioritize when those songs/messages should play.

✔ Once the music or messages have been re-ordered, click the Save button that appears in the warning banner.
Rename a Song or Message
To rename a song or message, click the Edit Name icon  next to it.

Delete a Song or Message
To delete a song or message, click the Delete icon  next to it.

Copy Existing Music or Messages
Copy an existing message or song by clicking on the Copy  icon .

✔ Clicking Copy will add the same message/song to the bottom of the list with "Copy" appended to the name.
Randomize Music
The Randomize Music feature randomly orders the music when a user is calling in and is put on hold.
It can be enabled by selecting the Randomize music checkbox.
Add Time Between Messages
The Time Between Messages feature sets the time between the end of one message and the start of the next one. Within each of these breaks, the music will resume.
This can be adjusted with a slider in increments of 5 seconds. The default value for the time between messages is 30 seconds, but this value can range from 15 to 120 seconds.
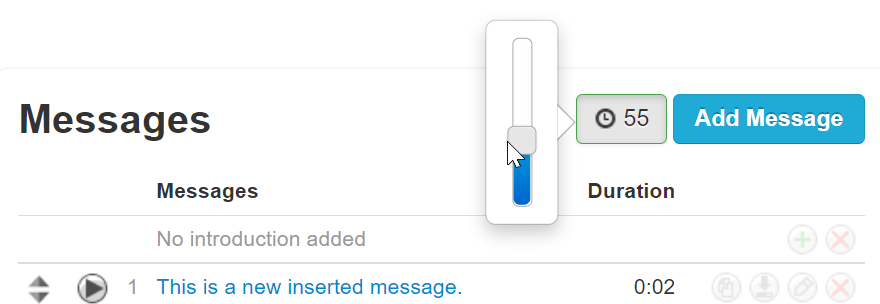
Conference Bridges
A Conference Bridge is a form of remote meeting hosted by a phone system that goes beyond what the three-way call feature can offer for desk phones. To host a conference for more than 3 people, a Conference Bridge can be called to allow multiple callers to connect and speak at the same time.
There are a few ways to implement a conference bridge, like creating a special user and DID for only that conference bridge. Auto Attendants are also a great tool for connecting callers to a specific conference bridge.
Create a Conference Bridge
To add in a new conference bridge to use to host large conference calls…
- Navigate to the Conferences page.

- Click the Add Conference button.

- Use the Add a Conference menu to customize the new conference bridge and then click Save.

| Setting | Description |
|---|---|
| Name | Create a unique name to identify the conference bridge with. |
| Type | Select the type of conference bridge to create. • Dedicated conference bridge - Can be accessed by any user; however, its settings can only be updated by an Office Manager.  • Owned conference bridge - Allows a designated user (owner) to be the only user to access and change the settings of their conference bridge in Stratus. 
|
| Extension |
A unique extension number that can be dialed to reach the conference bridge. Quick Tip: It is recommended to choose extension numbers in the 6000s for dedicated conference bridges. The extension numbers of owned conference bridges are usually set as 6+EXT (e.g., 6100 for the conference bridge of user 100). DANGER: Do NOT pick an extension number that is already in use. |
| Direct Phone Number |
Select an Available Number from your inventory that will directly connect to the conference bridge. ✔ If set, anyone will be able to call that 10-digit number to directly reach the conference bridge. |
| Leader and Participant PINs |
The PIN options are not required but can be used to limit who can and cannot enter the call (Participant PIN) or to invoke special mid-conference actions (Leader PIN). NOTE: In order to use a PIN, both the Leader and Participant PINs need to be set. Furthermore, if the Require a Leader to start option is selected, a Leader PIN and Participant PIN will be required. |
| Max Participants | How many callers are allowed to join a conference at a time. |
| Minimum participants to start |
How many people need to be present before the conference call begins. Note: Until the minimum is reached, all participants will hear music on hold. |
| Options | Further configure the conference bridge using these options: • Require a leader to start - Only allow the meeting to begin when a leader has joined the conference and entered their Leader PIN. • Announce participant arrivals/departures - Play a “ding” sound when a participant joins or leaves the conference. • Prompt all participants for their name - Prompt users to record their names before entering the conference. |
Join a Conference
As a Stratus user, there are several different ways you can join an active conference that had been created through a conference bridge. This can be done by…
- Calling the extension number of the conference bridge from a SpectrumVoIP device.
- Calling a dedicated conference number.
- Calling into a conference auto attendant that routes your call to the conference bridge.
From an Internal Phone
To join a conference from a phone in the system, call the extension number associated with the conference bridge.
Note: If a Participant PIN has been set, you will be prompted to enter it before being able to join the conference.
From an Outside Source
To join a conference from an outside source, such as a cell phone or phone that is not on the account, you will need a number to call into.
One option is setting a phone number you own to route calls directly to a conference bridge or an auto attendant that allows callers to select a conference bridge to own.
Dedicated Conference Number
A dedicated Conference Number allows outside sources to call in directly to a conference bridge that is hosting a conference call. As an Office Manager in Stratus, you can route a phone number directly to a conference bridge.
To route a phone number to a conference bridge to allow callers to easily join conference calls…
1. Navigate to the Inventory page.![]()
2. Click the phone number that you would like to designate for your conference.
3. Use the Treatment drop-down to select Conference.
4. In the Conference box, type and select the name of the conference bridge.
5. Click the Save button. ![]()
✔ You should now see that phone number routing to the conference bridge in your Phone Number Inventory.

Conference Auto Attendant
If you have multiple conference bridges configured, it may be difficult for your internal and external users to join conference calls. One way of allowing callers to join conferences hosted by conference bridges is to use a conference auto attendant.
A conference auto attendant is a type of auto attendant that is configured to have callers either dial into or select the conference bridge they want to route their call to. Using a conference auto attendant can make it much easier for external users to dial into and join a specific conference bridge.
Quick Tip: Using a conference auto attendant can also help you avoid having to route multiple phone numbers to different conference bridges.
Instead, you can route one phone number to the conference auto attendant where callers can be routed to different conference bridges depending on their input.
Set Up a Conference Auto Attendant
Step 1: Add a Conference Auto Attendant
A conference auto attendant will allow callers to enter in the extension number of a conference bridge to join an active conference. This is a good option if an account has many conference bridges for users to join.
To create a conference auto attendant to use to route calls to different conference bridges…
1. Navigate to the Auto Attendants page. ![]()
2. Click the Add Attendant button. ![]()
3. In the Add an Auto Attendant modal, fill in the following information:
• Name - Type a unique name to identify the auto attendant with.
• Extension - Type in an ion number that is not yet in use.
• Time Frame - Use the dropdown to select default (all the time).
4. When you are done, click the Add button. ![]()
Step 2: Configure the Conference Auto Attendant
Now that a conference auto attendant has been added, you can configure it to read off a message and route callers as needed. You can set an auto attendant to allow people to join a conference bridge by having them dial the extension number of the conference bridge or press an option on their dial pad.
To prepare a conference auto attendant for routing callers…
1. Ensure that the Menu Prompt tells callers to how they can reach a conference call by doing one of the following:
• Use a general statement that prompts callers to dial the extension number they know to call into a conference that they wish to join.
• List out the numbers on the dial pad that the caller can press for a specific conference call.
• List out the extension numbers the caller can dial to reach a conference call.
Quick Tip: If there are a lot of options for callers to choose from, it is recommended to add “To hear these options again, press [NUMBER or STAR]” to your menu prompt so that callers know they can press a dial pad menu options to play the greeting again.

2. If you listed options that the caller can press, use the Dial Pad Menu section to add conference bridges to the numbers. 

3. If you are adding an option for callers to press to hear the greeting again, click a number option and select Repeat Prompt.
4. Click the Options  button to further configure the conference auto attendant.
5. Ensure that Enable Dial by Extension is selected to allow callers to dial the conference bridge's extension number.![]()
6. Configure the If no key is pressed and If unassigned key is pressed options if callers should be routed to a specific conference bridge if they don't press a key or they press the wrong key, 
7. Click the Done button. ![]()
8. Click the Save button. ![]()
✔ Now you will have a conference auto attendant that allows callers to dial the extension numbers of conference bridges to join their meetings.
Contact a Conference Auto Attendant
Using the conference auto attendant, users can enter the extension number of the conference bridge they need to join. This can be especially useful if your organization uses multiple conference bridges.
As an Internal User
As an alternative to calling a conference bridge directly, users can opt to call the conference auto attendant instead.
Any user on your account can get in direct contact with the conference auto attendant by either…
• Calling the extension number of the conference auto attendant.
• Have their call transferred to the conference auto attendant's extension number.
As an External Caller
Users calling from a cellphone and people outside of your organization can join a conference using the conference attendant by either…
• Calling a dedicated phone number for the conference auto attendant.
Route a Phone Number to the Conference Auto Attendant
In order for people outside of your organization to be able to use the conference auto attendant to reach a conference bridge, a phone number can be routed to your conference auto attendant.
1. Navigate to the Inventory page.![]()
2. Click the phone number that you would like to designate for your conference.
3. Use the Treatment drop-down to select Auto Attendant.
4. In the Auto Attendant box, type and select the name of the conference auto attendant. 
5. Click the Save button. ![]()
✔ You should now see that phone number routing to the conference auto attendant in your Phone Number Inventory.

• Calling a user in the organization and having their call transferred to the extension number of the conference auto attendant.
Another option is to have conference participants call a phone number on the account and have their call transferred to the desired conference bridge's auto attendant or extension number, just like transferring to another user.
View and Manage Conferences in Stratus
On the Conferences page, you can view the conference bridges that have been created and whether or not they have participants.

As an Office Manager or Site Manager, you can…
- Reference a conference bridge's Name and Extension or Owner.
- Take note of requirements for the conference.
- View and invite Participants.
- Manage Reports
 for a conference bridge.
 -
Edit
 a conference bridge's settings.
 -
Delete
 a conference bridge.
Click the number in the Participants column to view information about the participants that joined the conference.

As the Leader of a conference, you can view and manage the conference's participants.
- View a participant's information, such as their Name, Number, and whether or not they are a Leader.
- Check a participant's Status.
-
Mute
 a participant.
 -
Disconnect
 a participant from the conference.
Invite Participants
Use the search bar to type and select the extension numbers and phone numbers of other participants to invite to the conference.

✔ When the Add Participant  button is clicked, a phone call will go out to the entered destination.
The conference bridge will auto-join them to the conference as a participant when the call is answered.
Conference Reports
Click the Reports icon to view recent conferences hosted by a specific conference bridge.
